Dragonfly Drawing – 12 Steps to Sketching Graceful Guardians
This post may contain affiliate links. We may earn a small commission from purchases made through them, at no additional cost to you.
As the morning sun warms the dew-kissed reeds beside the shimmering pond, the dragonfly perches delicately on a slender stem, its iridescent wings catching the first rays of light. Whether you’re fascinated by the intricacies of insect flight or simply seeking a moment of natural beauty, this guide will lead you through 12 mesmerizing facts about dragonflies, revealing the wonders of these aerial acrobats with vivid detail and insight.
Table of Contents
- 1 Wings of Wonder: Capturing Dragonflies in Drawings
- 1.1 Step 1: Sketch Your Dragonfly Head
- 1.2 Step 2: Draw the Body of Your Dragonfly Sketch
- 1.3 Step 3: Add the Wings to Your Dragonfly Art
- 1.4 Step 4: Outline Your Realistic Dragonfly Drawing
- 1.5 Step 5: Sketch the Eyes
- 1.6 Step 6: Draw the Abdominal Segments
- 1.7 Step 7: Add Details to the Wings on Your Dragonfly Art
- 1.8 Step 8: Apply the Initial Coat of Color
- 1.9 Step 9: Apply the Secondary Color Coat to Your Dragonfly Sketch
- 1.10 Step 10: Shade and Highlight the Body
- 1.11 Step 11: Continue Onto the Dragonfly’s Wings
- 1.12 Step 12: Finalize Your Dragonfly Art
- 2 Frequently Asked Questions
Wings of Wonder: Capturing Dragonflies in Drawings
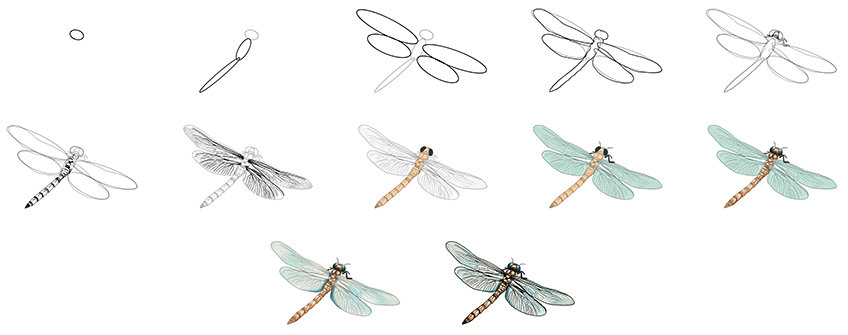
Unveil the artistic intricacies of capturing the ethereal grace and structural elegance of dragonflies with unmatched precision and finesse in this definitive guidebook. This handbook meticulously illustrates each step needed to portray a dragonfly on your canvas with meticulous detail.
With dedicated focus and practice, mastering the art of learning how to draw a dragonfly will become effortless for you!
Step 1: Sketch Your Dragonfly Head
Begin by sketching your realistic dragonfly drawing, by drawing a small oval shape to represent the head.

Step 2: Draw the Body of Your Dragonfly Sketch
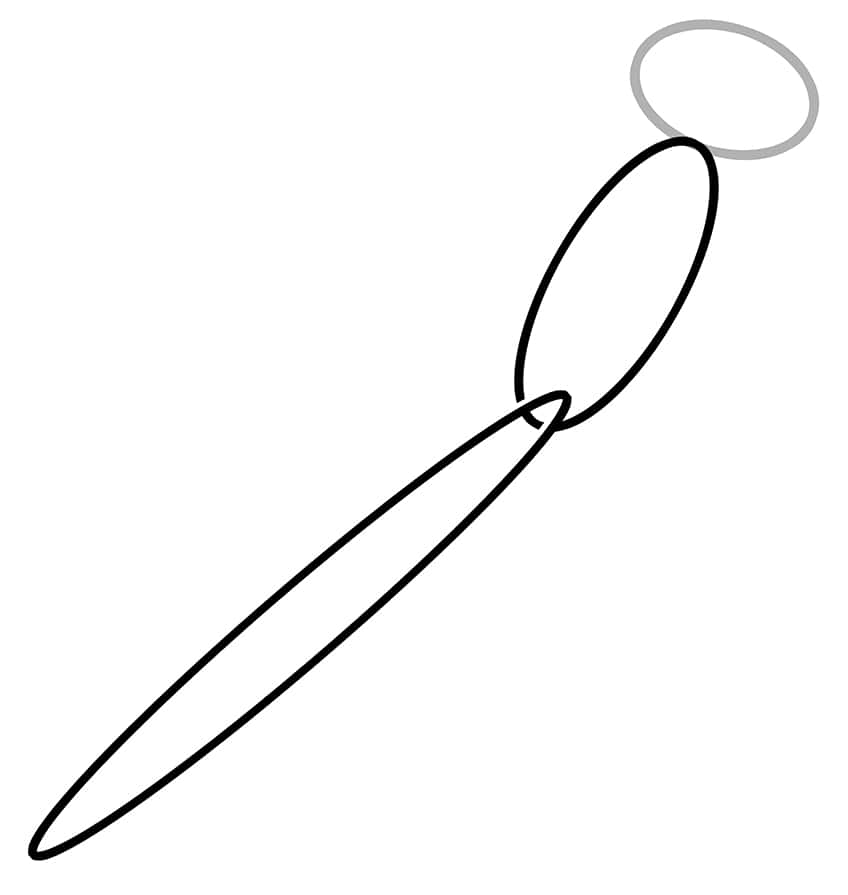
The main body of the dragonfly consists of the middle and back, the middle being the thorax and the back being the abdomen. Draw both in this step represented by a medium oval shape and a narrow long oval shape.
Step 3: Add the Wings to Your Dragonfly Art
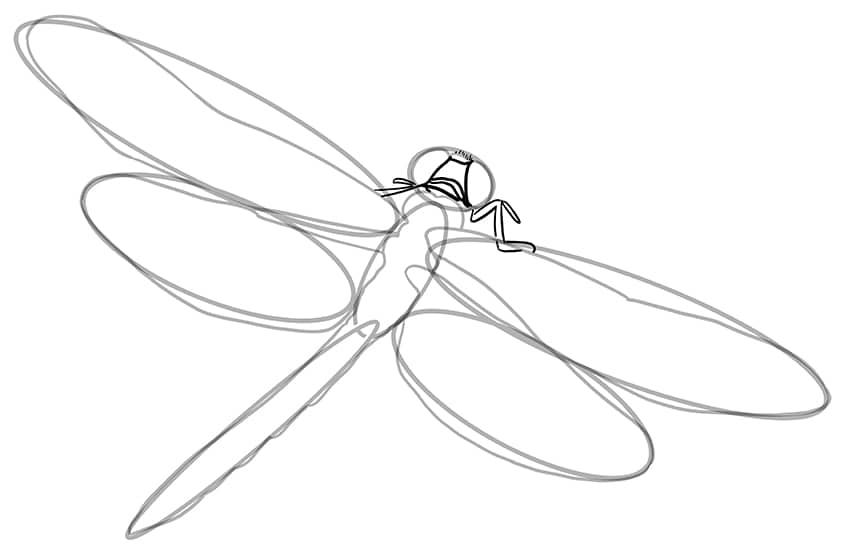
Attached to the sides of the main body or thorax, draw the top and lower wings represented by a large and medium oval shape.

Step 4: Outline Your Realistic Dragonfly Drawing
Begin to outline a more realistic shape of the dragonfly, by starting with the head and working your way through the wings and main body on your dragonfly illustration.

Step 5: Sketch the Eyes
Draw two large eyes within the head and the partially visible legs on your dragonfly illustration.
Step 6: Draw the Abdominal Segments
The main body is separated into segments. Draw each segment as an oval. Once you reach the rear half, draw curving lines to wrap around the main body, creating realistic segments.
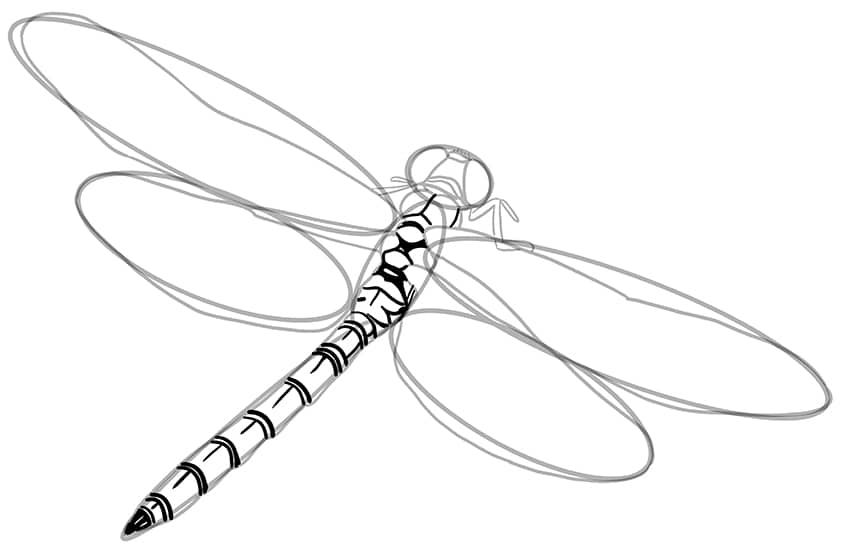
Step 7: Add Details to the Wings on Your Dragonfly Art
Don’t let this step intimidate you; it’s simpler than it looks. Start by drawing fine, connected patterns along the edges of each wing, using a light gray color.
Then, draw long, delicate lines extending from the center of the main body and flowing outward onto each wing.

Step 8: Apply the Initial Coat of Color
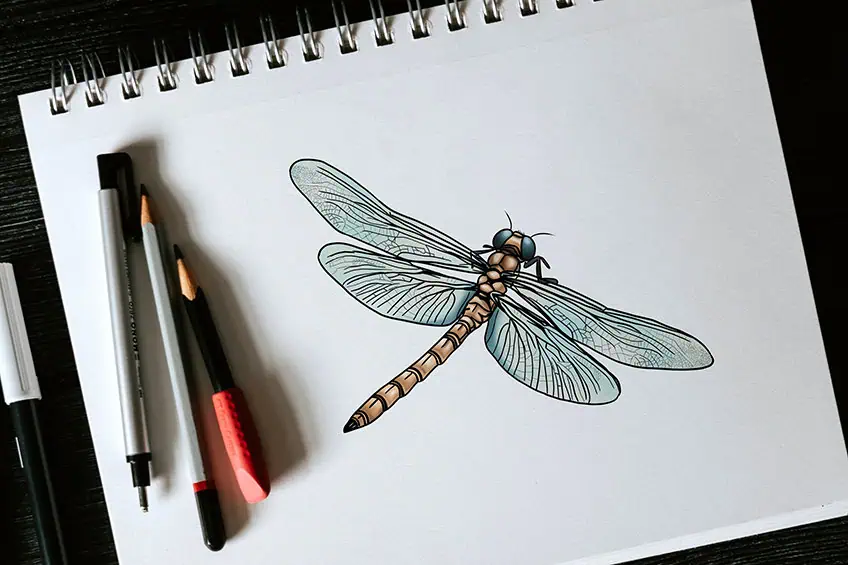
Begin your dragonfly coloring process with a sharp brush and tan paint, and evenly coat the body. Then, use dark green paint to fill in the eyes.
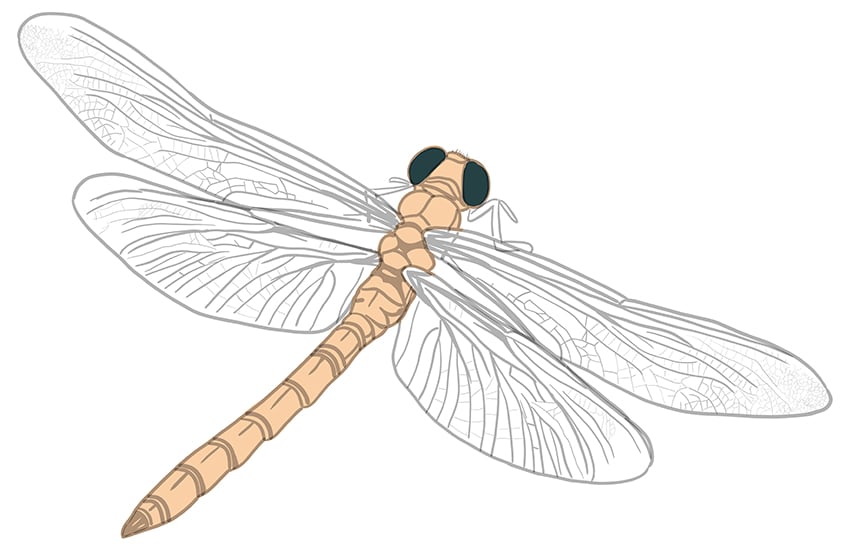
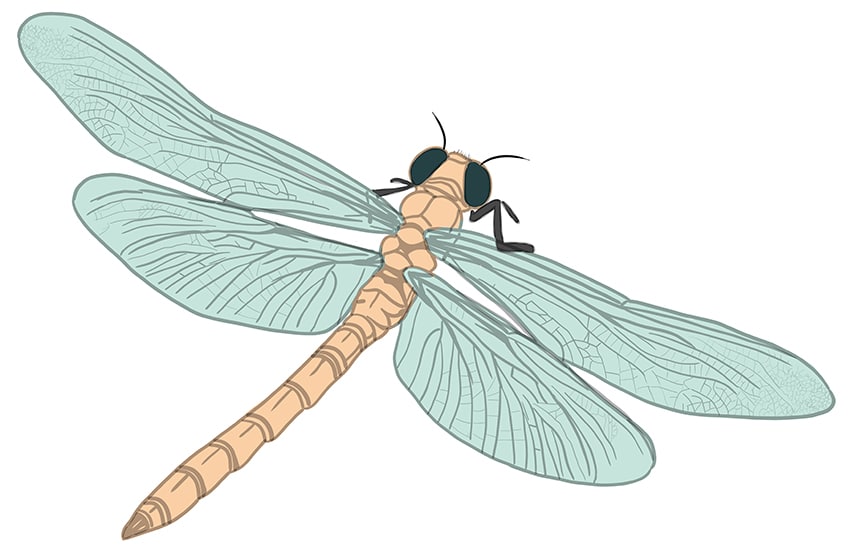
Step 9: Apply the Secondary Color Coat to Your Dragonfly Sketch
Continue your dragonfly coloring process using the same brush and teal paint, and evenly coat the wings on your dragonfly drawing. Switch to dark gray paint for the legs and black paint for the antennas.
Step 10: Shade and Highlight the Body
Employ a gentle brush and black paint to apply shading to the segments on the main body. Repeat using white paint to introduce a soft highlight within each segment. Continue using the same brush and black paint to shade the eyes. Once again, apply white paint to add a shimmer to them.
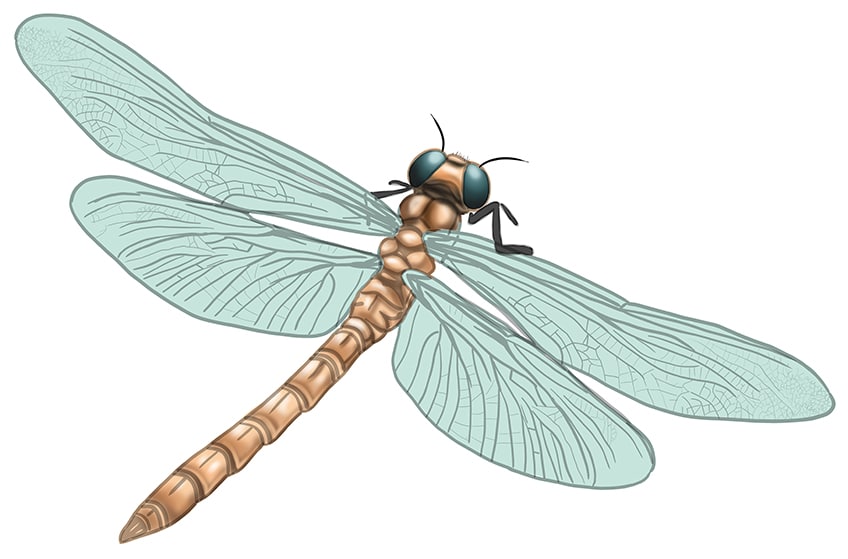
Step 11: Continue Onto the Dragonfly’s Wings
Start by employing a blend of cream and white paint to softly blend colors onto the wings, ensuring the first color coat remains somewhat visible. Next, utilize a blending brush to soften the coats evenly. Then, with a gentle brush and a dark navy blue shade, shade the corner edges of the wings nearest to the main body.
Finally, shade the legs with a gentle brush and black paint.
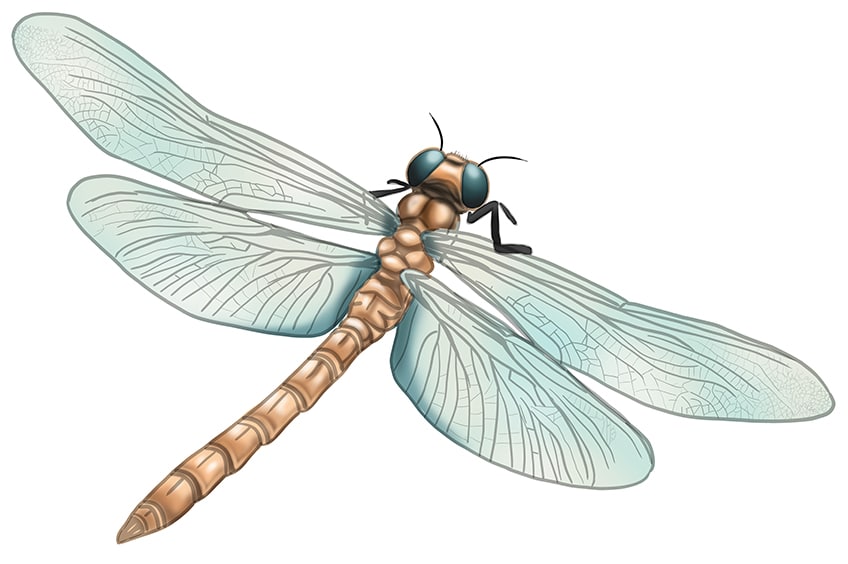
Step 12: Finalize Your Dragonfly Art
In this step, select a thin, sharp brush and black paint, and trace any texture lines and outlines to create a realistic dragonfly drawing. You have just learned how to draw a dragonfly!

Congratulations on completing the intricate journey of learning how to draw a dragonfly in just 12 simple steps! Your dedication and attention to detail have brought this captivating creature to life on the page with remarkable precision. Each stroke of your pencil was a testament to your skill and perseverance, culminating in a stunning portrayal of the dragonfly’s delicate beauty. Well done on mastering this artistic feat – your accomplishment is truly commendable!
Frequently Asked Questions
What Are Some Common Mistakes to Avoid When Drawing a Dragonfly?
In my experience, one common mistake to avoid is neglecting the proportions of the dragonfly’s body parts. It’s crucial to maintain balance and accuracy, ensuring that the body, wings, and eyes are proportionate to each other. Another mistake is overlooking the intricate details of the wings, such as the veining pattern and transparency. Rushing through these details can detract from the overall realism of the drawing. Lastly, it’s essential to avoid stiff and unnatural poses; instead, strive to capture the fluidity and gracefulness of the dragonfly’s movements.
How Can I Incorporate Creative Elements into My Dragonfly Drawing?
Injecting creativity into a dragonfly drawing can elevate it from a simple representation to a captivating piece of art. One way I like to do this is by experimenting with unconventional color schemes, perhaps using iridescent hues or incorporating unexpected pops of color into the wings or body. Additionally, I enjoy embellishing my drawings with fantasy elements like swirling patterns or mystical backgrounds, adding a touch of magic to the scene. Playing with composition, perspective, and lighting can also introduce creative flair and make the drawing more visually engaging.
What Drawing Supplies Are Best Suited for Creating a Dragonfly Drawing?
When it comes to drawing dragonflies, I find that having the right tools can make all the difference. I prefer using fine-tipped pens or pencils for precise linework, allowing me to capture the intricate details of the dragonfly’s anatomy with accuracy. Watercolor pencils or markers are excellent for adding vibrant colors and subtle shading to the wings and body. Additionally, I often incorporate metallic or iridescent paints to enhance the shimmering quality of the wings and create a sense of depth. Investing in quality paper with a smooth surface helps ensure that the colors blend seamlessly and the details remain crisp and clear.
IzzyBll is a digital artist and content creator from Israel and currently residing in South Africa. Originally coming from videography, Izzy then turned to digital graphic art. He specialized in using digital drawing software such as Photoshop and Procreate. Drawing and photo editing has always been a sort of second nature for Izzy. In doing so, he can now look back on 5 years of experience in the industry, completing commissions for various well-known brands such as Audi.
Learn more about IzzyBll and about us.
