Epoxy Clear Coat – Best Top Coat for Floors, Paintings and Countertops
This post may contain affiliate links. We may earn a small commission from purchases made through them, at no additional cost to you.
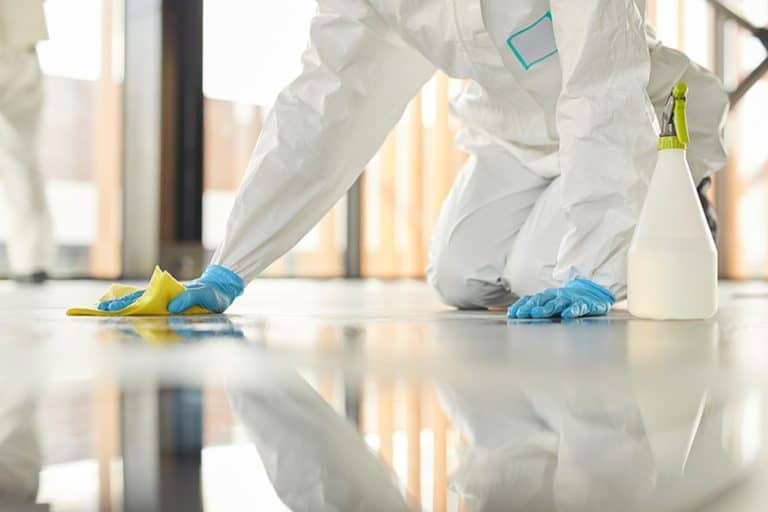
When coating your floors with epoxy, there comes a time during the process where a clear epoxy top coat can be added. Some would choose to leave the floor as it is, but there are so many benefits that it is highly recommended you go ahead with an epoxy top coat. Once you have the floor preparation down, the rest of the job should be simple enough to complete, and an extra epoxy clear coat should be easy to add. You not only improve the durability, but the floor will look even better. A clear epoxy top coat is not only used on floors but can also easily be used for various other applications from wood tables, and countertops to coating pieces of art. Further in this article we will be revealing a few of the best epoxy clear coat products and looking at various applications.
What is an Epoxy Clear Coat?
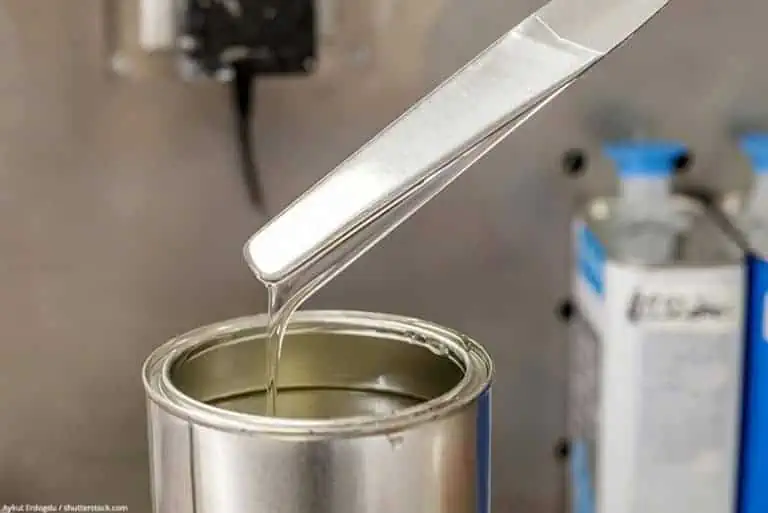
The best epoxy comes in a two-part system, the resin, and hardener which you have to precisely mix and then apply. Once applied to a prepared surface, it will begin to harden or cure. The final coat will provide added protection and a beautiful look to surfaces. When applying a clear coat over epoxy garage floor, it is an added protective coat that provides scratch resistance amongst other benefits. Then you can also add an epoxy top coat over a color coat on countertops. This can help to create a beautiful looking, long-lasting, and high-gloss countertop that protects the surface from the general use you usually get in a kitchen environment.
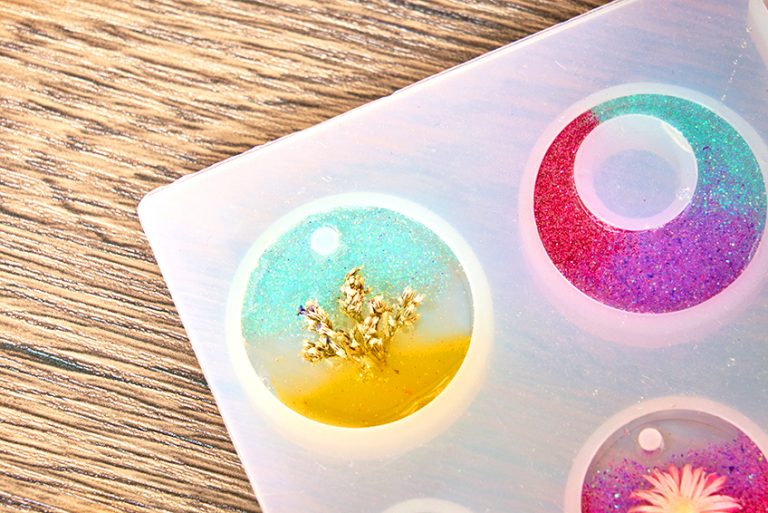
What about beautiful pieces of art? The most popular form today is the acrylic pouring on canvas. By applying an epoxy clear coat, it helps to enhance the color and shine of a piece. The epoxy top coat also gives the art piece a protective layer from moisture and scratches. So, whatever you want to use the epoxy clear coat for, from a clear epoxy floor coating or improving an art piece, it is something that comes highly recommended. Providing a smoother more professional finish to any suitable project.
Can a Second Coat be Added to Epoxy?
The answer is yes, with a few preparation steps you can add another coat to epoxy. In fact, you might have to add a number of coats at times, to achieve the results you are looking for. A second epoxy or epoxy top coat can help to fix scratches or other problems that occurred with the first layer. However, another coat can simply be added to build up layers which will improve durability. For example, a garage floor epoxy clear coat can help to protect from hot tire lift and general wear and tear. Also, it helps to enhance protection from various oil or chemical spills which is always a risk in this type of environment.
Remember to always read the product information, this should always tell you how to mix properly, how thick you should pour, and other pertinent information. For example, when it comes to tabletop epoxy, it needs to be applied in thinner layers, so you will need to add many layers for a thicker coating. Sometimes working with epoxy can be difficult and frustrating, but once you understand the fundamentals you should be able to pour a second layer without problems. The main thing is to understand how to prepare your first coat with sanding and cleaning. This step is important, as the next coat needs something to stick to, and roughening up the surface provides the perfect grip for the epoxy.

Best Epoxy Clear Coat
Next, let us have a look at a few of the best epoxy clear coat products available. Keep in mind that you can also get other products besides epoxy that also provide a high gloss durable finish over an epoxy coating. Therefore, we have also included a best epoxy alternative.
Best Floor Kit: RUST-OLEUM EpoxyShield Premium Floor Coating Kit
The Rust-Oleum EpoxyShied Premium Coating Kit is the perfect low-odor coating for bare concrete and interior coated surfaces. The coating contains 100 percent solids, which means it should give you excellent durability and resistance to chemicals, oil, and water. The EpoxyShield Premium Coating will give you a high gloss finish that will protect your floor for years to come.
Pros
- High-gloss clear finish
- Durable and resistant to water and chemicals
- The kit comes with an anti-slip additive
- Easy to use
Cons
- Expensive
- If spills are not cleaned straight away, it could degrade the coat
This is definitely a product to consider if you are looking for a remarkably durable and clear epoxy floor coating.
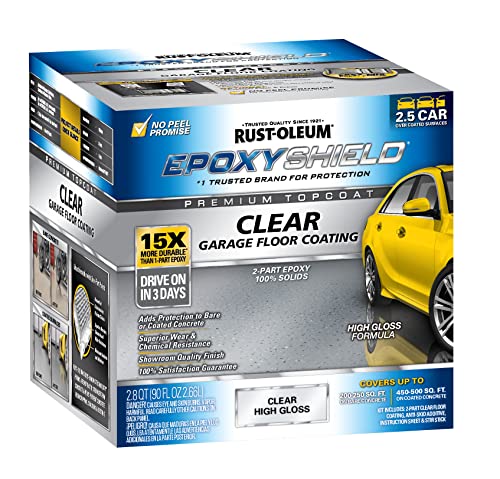
- Low odor, low VOC formula is ideal for use on interior coated or bare concrete surfaces
- Heavy duty coating is walk ready in 24 hours, vehicle ready in 72 hours
- High-gloss protective finish provides a show room quality floor that lasts
Best Top Coat Resin for all Applications: STONE COAT Countertop Epoxy
The Stone Coat Countertop Epoxy comes in a kit that is easy to use, so you can add new life to countertops yourself. The product has zero VOC’s (Volatile Organic Compounds) and will give you a durable, scratch resistance and easy to clean finish.
Pros
- Durable and high-gloss finish
- There are no VOC’s (Volatile Organic Compounds)
- Eco-Safe
- Good heat resistance
- Scratch-resistant and food safe
Cons
- Can be expensive
This specifically formulated epoxy has been created for the do-it-yourself enthusiasts who will save quite a lot when compared to hiring a professional. The epoxy is a great choice for countertops and offers a quality finish.
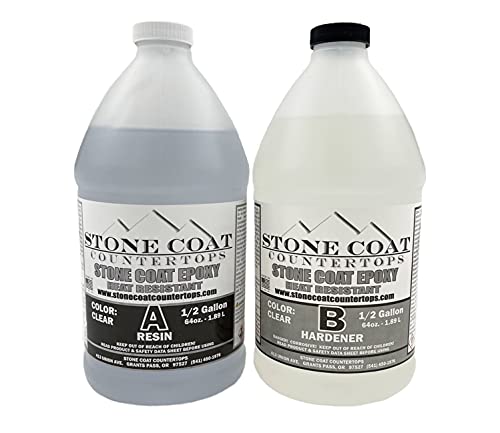
- Cures in 24 hours, self-leveling
- Heat resistant up to 425°F, crystal clear and UV stable
- Scratch-resistant, food-safe, zero VOC's
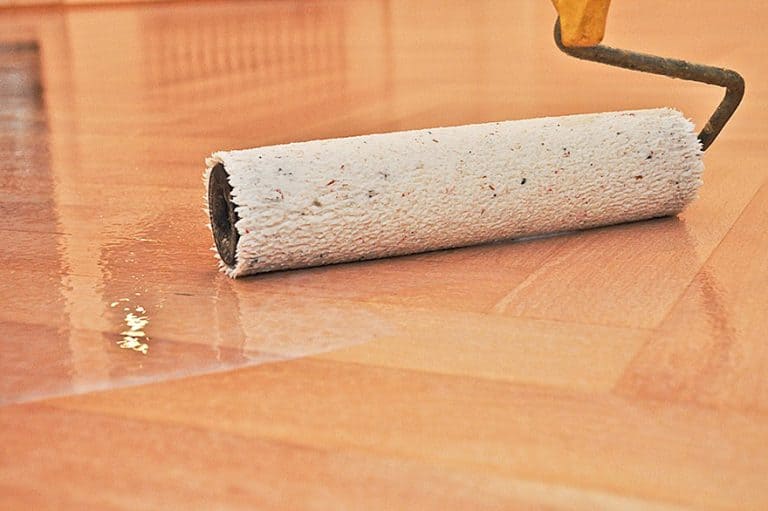
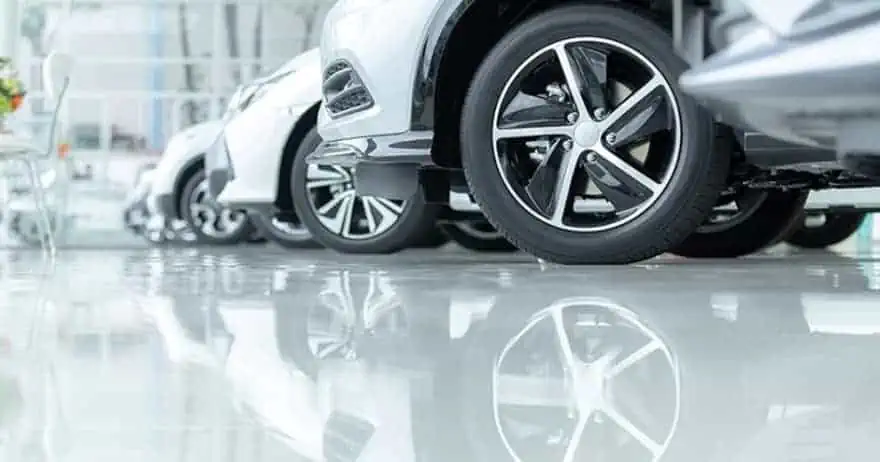
Why Should You Apply a Garage Floor Epoxy Clear Coat
Applying a clear coat over epoxy garage floor offers many benefits, so let us have a look at a few of the reasons you should add a clear epoxy floor coating.
Clear Epoxy Floor Coatings Protect the Color Layer
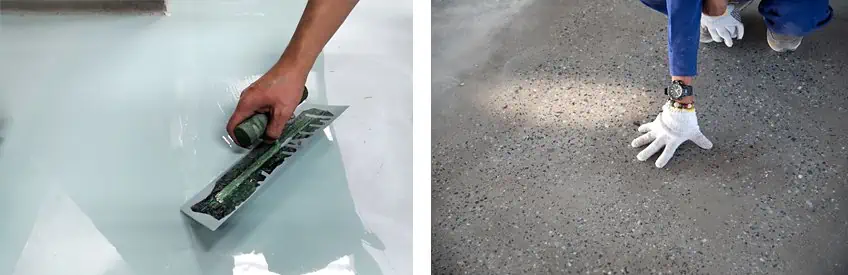
To add more protection to the color coat, adding an epoxy top coat is a good idea. The color coat will be protected from general wear and tear, chemicals, and other spills preserving the brilliant color. However, even this coat can begin to degrade if spills are not cleaned up straight away. Another benefit is to prevent hot tire pick-up from the wheels of your vehicle because it adds a thicker coat to the surface.
In many of the epoxy garage floor coating kits, you get decorative chips or flakes that come with it. Applying a clear coat over an epoxy garage floor can protect these chips from peeling off and also from dirt gathering around any edges that might be exposed. Since most garage floors are exposed to traffic and impacts, it is safe to say that the surface will develop scratches or minor damages. By adding a clear coat over the epoxy garage floor, you can hide these imperfections.
Images: Chinnabanchon9Job, Bannafarsai_Stock / shutterstock.com
An Epoxy Top Coat is Easy to Keep Clean
The smooth finish can easily be cleaned, especially if the flakes are covered. Always clean spills up straight away. Simply use a dust mop or a vacuum cleaner to remove any dust and loose dirt.
Creates Depth and a High-gloss Finish
When applying a garage floor epoxy clear coat, it tends to give you more depth in appearance, and looks thicker than it is. You should also get a nice high-gloss finish that will reflect light giving a smooth and shiny look.
Easily Include Anti-slip Additives
When including the anti-slip additives in a clear epoxy floor coating, this is concealed better. These additives can be added to the color coat without a topcoat, but these might be visible as small bumps.
Easy to Maintain
A garage floor that has an epoxy top coat can last for many years. However, due to the amount of traffic and abuse, the surface will have to be renewed. This is a simple process of roughening the topcoat with sandpaper to remove any scratches or other marks. Clean the epoxy floor and then apply another clear epoxy floor coating for a brand-new look.
In the end, a garage floor that has a clear epoxy top coat just looks better than if it has no added coat. There is no question as to whether you should or should not add an epoxy top coat, the benefits speak for themselves.
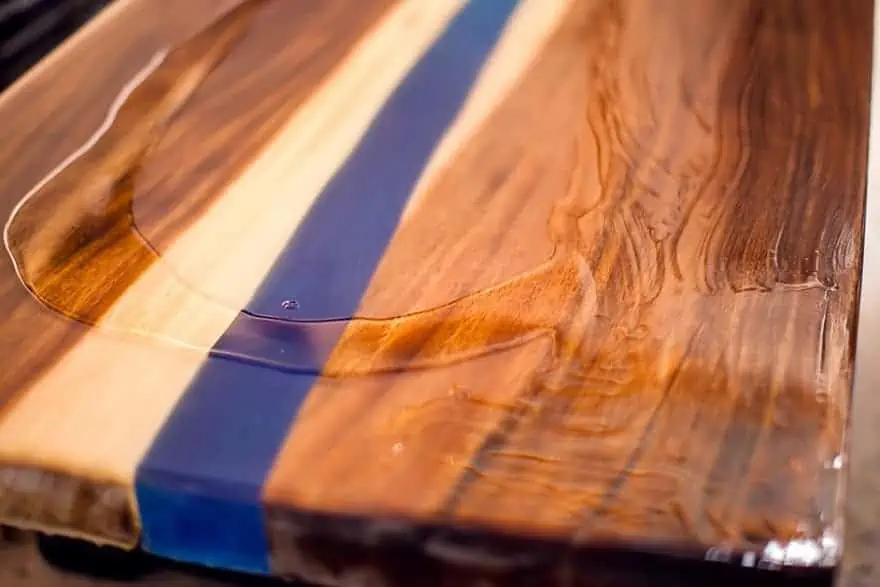
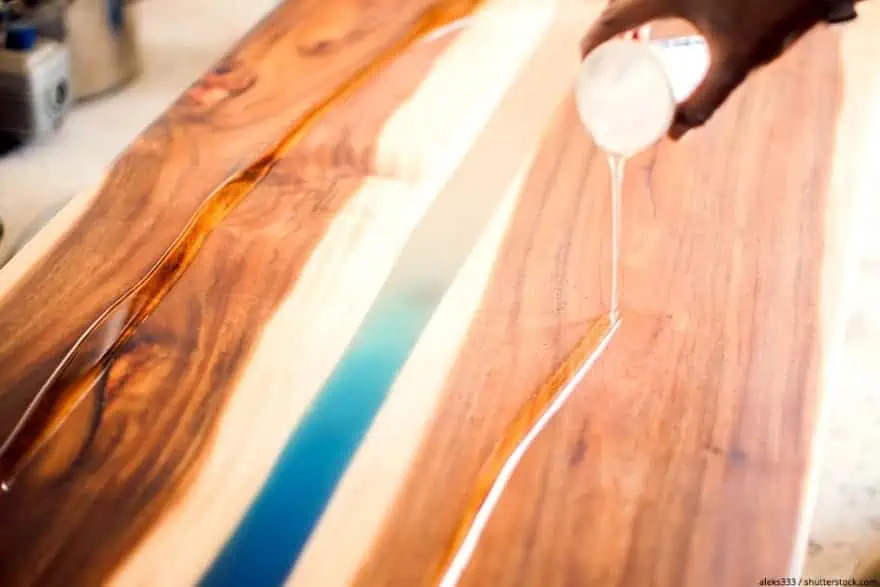
Epoxy Top Coat for Wood
Create a flawless wood finish using an epoxy clear coat and bring out the natural beauty of the wood. You also protect the wood surface from damages. By following a few steps, the process should be fairly simple to follow.
Preparation is Important
Whenever you are using an epoxy resin, preparation is always something you should never ignore. This is where the foundation is laid to produce the best finish. Any wood surface where you want to add a clear coat should be clean, free from any dirt, and completely dry before you begin. Sand the surface going along the grain for best results and wipe or vacuum away any dust. If you find that the wood you are working with is naturally oily, you can simply use some acetone and a kitchen towel to remove any residue. Where you work is also important, you want a dust-free environment, and the temperature should be about 72 to 85 degrees Fahrenheit. Try not to work in an environment the goes below 65 degrees Fahrenheit. A well-ventilated space is another important factor along with wearing gloves and protective gear for safety.
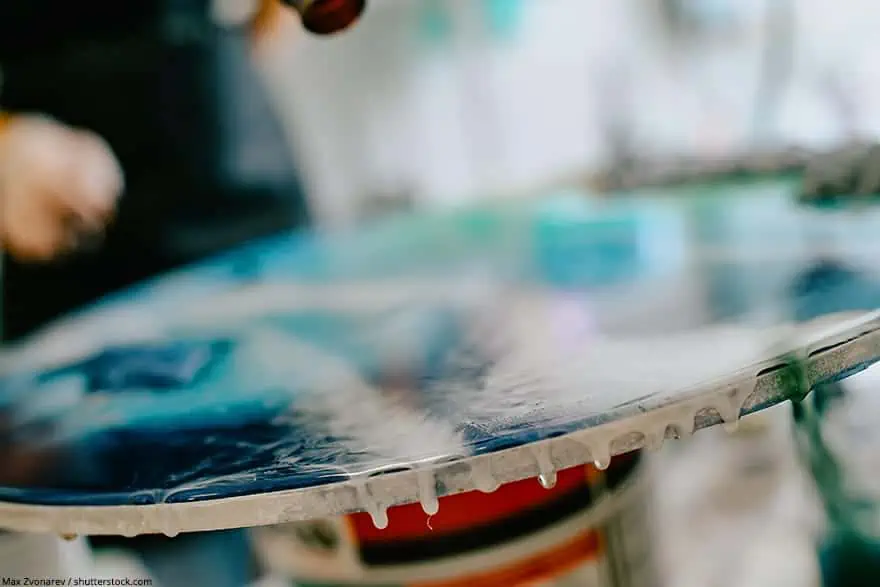
Applying the Epoxy Clear Coat
Once you have made sure all the preparation has been done, you can now move onto applying the epoxy. Remember to always follow the label instructions to get the best outcome for your epoxy project. Mix the two-component epoxy as instructed.
When it comes to applying your epoxy to the wood, it is best to do it in thin layers and apply a few coats using a foam roller or spatula for even coverage. During this process you might see bubbles forming, these can easily be removed using a hot air gun, torch, or even a hairdryer.
In general, you will need two to four coats of epoxy, applying a new coat once the previous one becomes tacky. However, if the first coat appears too rough with wood fibers sticking up, you will need to first let this coat cure before sanding it smooth ready for the second coat. Also, if you have let a coat harden too much, wait until it has cured properly and if there is an amine blush, wash this away. Then sand and prepare the surface for the next application.
Applying an Epoxy Clear Coat to Other Surfaces
Not only wood surfaces look great with a clear epoxy top coat, but kitchen countertops can also get a new look with an epoxy coating. There are plenty of tough clear epoxy coating products available that can help to protect and create beautiful long-lasting finishes.
Coating a Painting with Epoxy Clear Coat
- Give your paintings an amazing new glossy look, while offering your piece more protection from scratches and water damage. As with all epoxy projects, you need to first prepare your work area, get everything you need together, and make sure the space is well-ventilated. The best working temperature should be mild, ranging between 72 degrees up to 78 degrees Fahrenheit.
- Cover your workspace you do not want the resin to get on with a protective cover like plastic. Place your painting on a well-balanced elevated surface to ensure a more even coverage and so that the resin can drip off. If you have an art piece that is on porous material, this should be sealed first by applying a thin layer of resin. Let this dry thoroughly and then begin pouring over the rest of the resin.
- You can create a thicker layer of resin by damming the edges. This just means you have applied painter’s tape around the edges, which stands up about half-an-inch all the way around. This can be removed 24 hours after pouring.
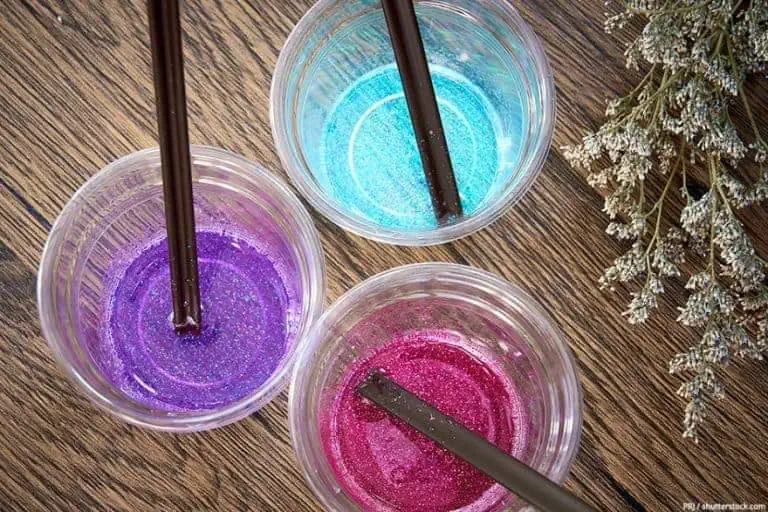
- Follow the instructions on the resin product label for best results, mixing equal parts of the resin and hardener. The resin should be at room temperature when using, if it is too cold the resin can be thick and difficult to spread evenly. Bubbles and clarity may also be an issue.
- Once your resin has been mixed properly, spread over your painting surface, using a spatula, brush, or even a popsicle stick. We have even seen some people use a playing card to distribute the resin evenly. Remember to work with protective gear when using resin.
- You may begin to see bubbles forming, you can help remove them by using a blow torch or hairdryer. Keep moving the torch around, do not hold it in one place for too long, and hold about eight inches from the surface. Also, you can look out for any dust or maybe hairs that might have floated onto the surface, you can remove these at this stage. Bubbles that stubbornly remain can be removed using a toothpick.
- Make a cover for your painting while the resin is hardening, this will help prevent any dust or dirt from landing on the surface. Leave for about 24 hours to 72 hours to cure thoroughly, maybe longer if it is a bigger project.
- You can also spray on a UV-resistant acrylic product if you are going to place your item outside. However, over time the resin will eventually yellow if exposed to UV light. When everything is done, make sure to dispose of any unmixed or excess resin properly.
- A piece of art is something personal you want to keep for a long time. Even though the resin is more expensive than other finishes like varnish, it might be worth the money to have your piece looking its best by adding an epoxy clear coat.
Frequently asked Questions
Are You Able to Apply a Clear Coat Over Epoxy?
Yes, the clear epoxy top coat is added as another protective layer which offers more protection from things like scratches.
Is it Possible to Apply Epoxy Top Coat over Polyurethane?
Preferably not, especially if it is over water-based polyurethane. The epoxy can soften the polyurethane and it generally does not adhere well and can cause fisheyes.
Why do You Need a Clear Coat Over an Epoxy Garage Floor?
An epoxy top coat improves the durability of the garage surface and helps to prevent things like hot tire pick-up and protects the floor from impacts.
Why do Many Artists Apply an Epoxy Clear Coat Over Their Paintings?
The epoxy top coat helps to enhance the colors and gives the surface a beautiful glossy appearance. The epoxy clear coat also provides the art piece with more protection from scratches.
Will an Epoxy Clear Coat Improve the Look of my Kitchen Countertop?
Yes, a clear epoxy top coat will give your old countertops new life and a beautiful glossy finish. This might also be cheaper than replacing your old countertops with marble or other materials.

In 2005, Charlene completed her wellness degrees in therapeutic aromatherapy and reflexology at the International School of Reflexology and Meridian Therapy. She worked for a company offering corporate wellness programs for several years before opening her own therapy practice. In 2015, she was asked by a digital marketer friend to join her company as a content creator, and it was here that she discovered her enthusiasm for writing. Since entering the world of content creation, she has gained a lot of experience over the years writing about various topics such as beauty, health, wellness, travel, crafting, and much more. Due to various circumstances, she had to give up her therapy practice and now works as a freelance writer. Since she is a very creative person and as a balance to writing likes to be active in various areas of art and crafts, the activity at acrylgiessen.com is perfect for her to contribute their knowledge and experience in various creative topics.
Learn more about Charlene Lewis and about us.