How to make Silicone Molds for Resin – Step by Step Tutorial
This post may contain affiliate links. We may earn a small commission from purchases made through them, at no additional cost to you.
In order to make beautiful resin castings or jewelry with epoxy resin, it is essential to use a good negative mold. These are available in numerous designs to buy. If, however, you want to dare special, individual forms or simply want to build something yourself, then you can make a silicone mold without much effort. In this article, we will show you how to make custom silicone molds for resin yourself.
Table of Contents
- 1 Working with Epoxy Resin
- 2 What is the Best Epoxy Resin for Silicone Molds?
- 3 Why are Silicone Molds the best Choice for Resin Casting?
- 4 Most important Factor for Resin Molds: Degree of Hardness
- 5 How to make Silicone Molds with Template
- 6 How to make Silicone Molds without Template
- 7 How to make Resin Molds – Some Considerations before you start
- 8 Supplies you need for the Production of Silicone Molds for Resin
- 9 How to make Silicone Molds for Resin – Step by Step Tutorial
- 10 Making two-piece Resine Silicone Molds
- 11 Silicone Molds with Undercuts
- 12 Silicone Molds for Resin – Valuable Tips and Tricks
- 13 How to Clean your Molds – Tutorial
- 14 How to prevent Problems with Silicone Molds
- 15 Inspirations for DIY Silicone Molds
Working with Epoxy Resin
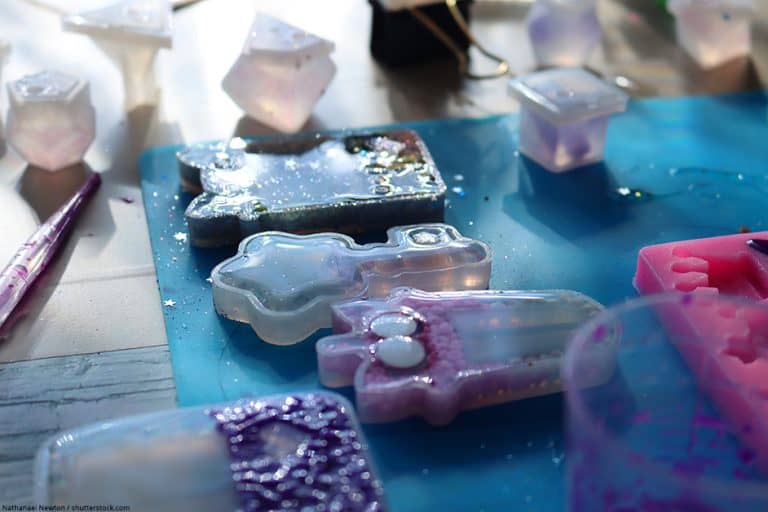
For working with epoxy resin, the resin and a corresponding hardener are the basic requirements. Depending on which project you want to devote yourself to, other materials such as different color pigments will be added. Often polished silicone molds are also needed. There are practically no limits to creativity when it comes to shaping: Cubes, balls, pyramids, stars, hearts, flowers, coasters and all kinds of figures. Anything is possible and can be filled with epoxy resin to create beautiful works of art or gifts.
In the form of your choice you give the finished epoxy resin mixture. Either we use the mixture crystal clear, or colored with liquid colors or pigments. You can then add various elements such as glitter, stones, shells, flowers, etc. if you wish. After hardening, carefully remove your finished work from the mold.
What is the Best Epoxy Resin for Silicone Molds?
When working with epoxy resin, the resin and a corresponding hardener are the basic requirements. Depending on which project you want to devote yourself to, other materials such as different color pigments can be added. Polished silicone molds are also often needed to provide a glossier finish to your finish product.
There are practically no limits to creativity when it comes to shaping: Cubes, balls, pyramids, stars, hearts, flowers, coasters, and all kinds of figures. Anything is possible and can be filled with epoxy resin to create beautiful works of art or gifts.
INCREDIBLE SOLUTIONS Pourable Plastic Clear Casting Resin
You will require a lower-viscosity casting resin for your molds, as this resin has a thin consistency that allows it to fill all kinds of shapes with great effect. This resin has been formulated specifically for the purpose of pouring into a cast, and can be poured in layers of up to 2 inches thick.
This resin will cure crystal-clear unless a color is added. This particular resin is especially compatible with pigmented mica powders. You can mix your resin liquid and hardener according to a 2:1 ratio.
- Custom formula causes minimal bubbles and avoids craters
- Epoxy when used and cured correctly it is safe with a low odor
- Mixes well with mica pigment powders and cures crystal clear
Where most resins offer only a short period of time with which it can be worked, you will have a significantly longer working time before this resin begins to harden. This is due to its low exothermic rate, which means that it produces less heat as it cures. However, the thick-pour quality of this resin means that it can take between 36 and 48 hours to cure.
Epoxy resin tends to become yellow when exposed to sunlight as a result of the sun’s harmful UV rays. This resin has been made with additional UV inhibitors to resist the effects of UV light and prevent yellowing. This product is also water-resistant, almost odorless, and produces no VOCs.
Pros
- Blemish- and water-resistant
- UV-resistant
- Low odor and zero VOCs
- Longer working time
- Very little shrinkage
Cons
- Slow to cure
Why are Silicone Molds the best Choice for Resin Casting?
Due to the fact that it acts as a release agent, silicone is ideally suited as a material for casting molds. The finished resin objects can be easily removed from the mold after curing due to the flexibility of the silicone.
Another advantage is that silicone is considered non-toxic. The fact that it is used as a common material in the production of baking molds or even pacifiers proves that this material is completely harmless. In addition, almost no allergies to silicone are known to date.
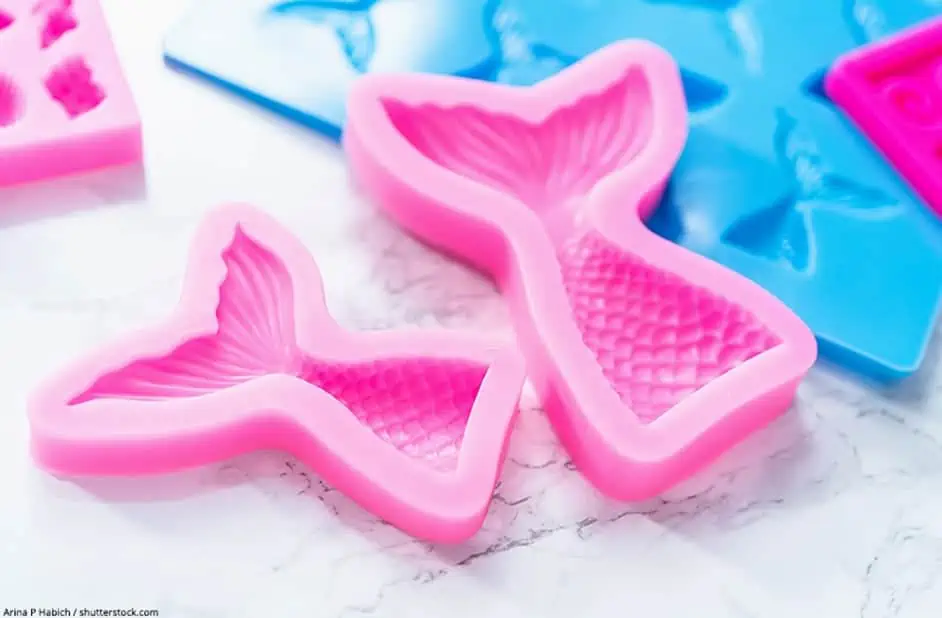
There is already a very large selection of ready-to-use silicone molds on the market. Especially beginners of this technique can fall back on baking molds made of silicone or polished silicone molds made especially for working with resin.
If you are interested in ready-made silicone molds for epoxy resin casting, here are our recommendations:
- High-quality 10pcs Coasters Resin Molds Set
- Includes 4 pcs round coaster molds and 4 pcs square silicone molds
- Made of high-quality silicone, very flexible and durable
- Package totally have 18 items
- It includes 1 sphere, 1 cube, 1 diamond, 1 triangular pyramid, 2 measurement cups, 2 different crystal stone molds, 10 wood sticks
- Very flexible, easy to clean and it re-usable, not easily damaged
- High quality silicone jewelry mold starter set
- Molds for bracelets, necklace and earring pendants, and rings
- Suitable for casting, and UV resins, but not for coating resin
However, a disadvantage of many of these silicone molds (especially baking molds) is that the load on the material is extremely high when working with epoxy resin. The first signs of wear, e.g. a dull surface, are quickly visible. As a result, it becomes increasingly difficult to remove the resin from the mold. In addition, as already mentioned, many molds are available. Nevertheless, these are of course predetermined and may limit your own creativity. The solution: You can easily make your own silicone mold!
Most important Factor for Resin Molds: Degree of Hardness
The basic material for the production of silicone molds is silicone rubber. You can get it at your local dealer. Silicone rubber is a soft mass that hardens very quickly and is then extremely elastic. Nevertheless, silicone is not infinitely flexible: If the material is overstretched, it can easily break or crack. The degree of hardness determines the brittleness of the material.
Silicone rubber is available in various degrees of hardness. The degree of hardness of the silicone is indicated in Shore. The rule of thumb here is: the lower the Shore value, the higher the elasticity.
- Shore 0 to 20: Soft material with a very high flexibility. However, this material is also relatively unstable.
- Shore 20 to 40: Quite dimensionally stable material with medium elasticity.
- Shore 40 to 80: The material is quite hard and hardly elastic. It is very dimensionally stable, but also slightly brittle.
The degree of hardness you should choose for your project depends on what you want to use the silicone for. You may also find it easier to work with one degree of hardness than with another. You can only try it out.
Basically, soft silicone has the advantage that you can easily remove your finished work from the mold after it has hardened. However, the form is also very unstable at a low degree of hardness and deforms relatively quickly. In this respect, silicone molds with a higher Shore value are of course more difficult to handle, as the casting is not so easy to remove. In addition, care must be taken that they do not break or tear during release. If treated carefully, however, they can be used very often because of their high dimensional stability. Because they practically do not deform at all.
In addition to the degree of hardness, the viscosity of the silicone also plays a role in the selection. Depending on the project, you can choose between thick or thin silicone rubber.
If you want to make chocolate or baking molds with silicone, you must make sure that the material used is food safe and heat resistant. A heat resistance up to 200 ° C should be given.
If you want to work with epoxy resin, concrete or other chemical casting materials, you should first make sure that the silicone you use is resistant to chemicals.
If you are not sure whether your silicone meets your requirements, read the manufacturer’s data sheet or contact your dealer for advice.
If you want to make your own silicone molds, you can choose between two options: A negative mold with original mold or a negative mold without original mold. We would like to explain the differences between these two variants in more detail below.
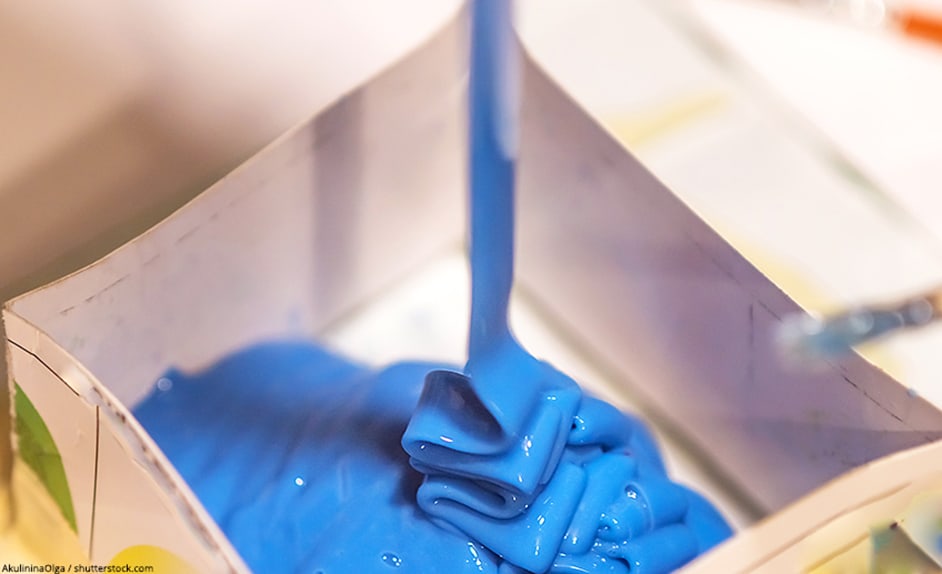
How to make Silicone Molds with Template
The negative mold with original mold is perfectly suited for the production of a duplicate. For such a project you need a frame. This ensures that the silicone does not spread uncontrollably after pouring in. If you want to build the frame yourself, orient yourself to the dimensions of the object you want to reproduce. Since silicone is quite expensive, this procedure makes sense in order not to consume unnecessarily much of the material. Your self-made frame has to be absolutely tight. This is the only way to ensure that the silicone does not flow out into possible cracks or underneath edges during pouring. Instead of using a frame, you can also use empty plastic packaging to pour in the resin.
Now you can place the blank in the frame and prepare the silicone. As always, you should follow the manufacturer’s instructions carefully. Then spread the mixture evenly in the frame and let it harden. The mold can then simply be removed from the frame.
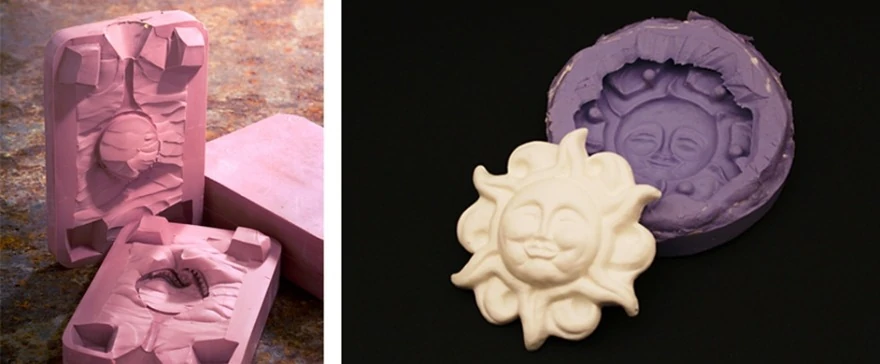
How to make Silicone Molds without Template
To make the silicone formable for this type of processing, pour the mixture into a bowl containing a mixture of water and detergent. Then enclose the prepared blank with the now flexible silicone. Make sure to use sufficient mass. If you are too sparing with the silicone at this point, your mold will later become brittle and unstable.
If you want to make a silicone mold in this way, don’t forget that the mold must have an opening at the end through which the object can be removed. Alternatively, the mold can be cut open at one point after hardening.
 Bilder: Van Rossen / JLORTIZ / shutterstock.com
How to make Resin Molds – Some Considerations before you start
Before you start casting the mold, you should think about your project. For example, the choice of the right silicone mass depends on the nature of the blank. The following considerations should be made in advance:
- What is the surface of the blank like? Is it very smooth or does it have grooves, edges or ornaments? This is important in order to decide on the optimum hardness of the silicone. If the surface of the blank is irregular, you should use a soft Silicone so that the resin casting can be removed from the mold later. With a simpler blank, a silicone with a higher degree of hardness also works.
- How big and heavy is the blank? With which material should the mold later be poured? These considerations are also important when choosing the right degree of hardness. If you have prematurely decided on a soft material, problems with the stability during the subsequent pouring of the mold are quite possible.
In order to be able to make silicone molds yourself, it does not necessarily have to be the expensive special silicone. It is also possible to use bathroom silicone, which is much cheaper to buy. Especially for beginners it offers itself to reach to this economical alternative. So you don’t get annoyed about unsuccessful, expensive attempts. When using bathroom silicone, however, you should be aware that you can only use it to make simple silicone molds. Filigree, detailed illustrations will not work.
Supplies you need for the Production of Silicone Molds for Resin
If you want to make a silicone mold yourself, the type of your project determines the exact material requirements. The following list is based on a negative mold with an original mold:
Best Silicone Mold making Kits Recommendations
Your creativity is your only limitation when it comes to creating your own silicone molds. If you want to make a silicone mold yourself, the nature of your project will determine the exact material requirements. The following list is based on creating a negative mold with an original mold or template:
Best Value for Money: LET’S RESIN Silicone Putty
LET’S RESIN Silicone Putty Mold Making Kit offers a convenient and effective solution for creating custom molds with ease. With its straightforward 1:1 mixing ratio, this kit is user-friendly, making it ideal for both beginners and experienced crafters. The non-toxic formulation ensures safety during use, allowing you to create molds for a variety of applications such as resin casting, soap making, and more. The putty’s quick curing time allows you to start your projects promptly, reducing waiting periods and enhancing productivity.
- Features a simple 1:1 mixing ratio, making it user-friendly and ideal for beginners as well as experienced crafters
- This silicone mold-making kit produces durable, flexible molds that can be reused multiple times
- Made from non-toxic materials, the silicone putty is safe to use
The strong and flexible silicone produced by LET’S RESIN Silicone Putty ensures that your molds are durable and reusable, providing long-lasting performance for multiple projects. The flexibility of the silicone allows for easy demolding, preserving the intricate details of your creations without damage. Whether you’re replicating a favorite object or designing unique pieces, this silicone mold making kit delivers reliable results with minimal effort. Its versatility and high-quality output make it an essential tool for any DIY enthusiast or professional crafter looking to expand their creative possibilities.
Pros
- User-Friendly Mixing Ratio
- Durable and Flexible Molds
- Non-Toxic and Safe
Cons
- Pricey
- Limited Working Time
- Potential for Air Bubbles
Other Materials you need for making your own Resin Mold
- Professional digital scale with LCD display and TARE function
- High precision accurate to 1g (5 kg maximum weight)
- Ideal for weighing casting resin and laminating resin
- Hot glue gun with warm-up time from 3 to 5 minutes
- Perfectly bonds metal, cardboard, plastic, wood, electronics, etc.
- 30 glue sticks included
- MDF is made from wood fibers and is a strong and easy to use and to cut
- These MDF boards are very well cut with no sharp edges, ready to use and glue
- Each board measures 11 x 14 inches
- Reusable and Non-Drying
- The set includes 24 bars
- Versatile and Convenient
- mixing cup
- wooden mixing sticks
- Silicone Spray
- talcum powder
- Carpet knife
- Cotton swab or toothpick
- the item to be reproduced
It is extremely important that very little or no silicone runs out of the frame during the pouring process. Therefore, with the help of the toothpick or cotton swab, all joints are closed with the modelling compound and the frame is sealed as well as possible.
How to make Silicone Molds for Resin – Step by Step Tutorial
At first glance, it probably sounds very difficult to make silicone molds. With our step-by-step-tutorial it will be no problem even for you as a beginner to make a successful negative mold.
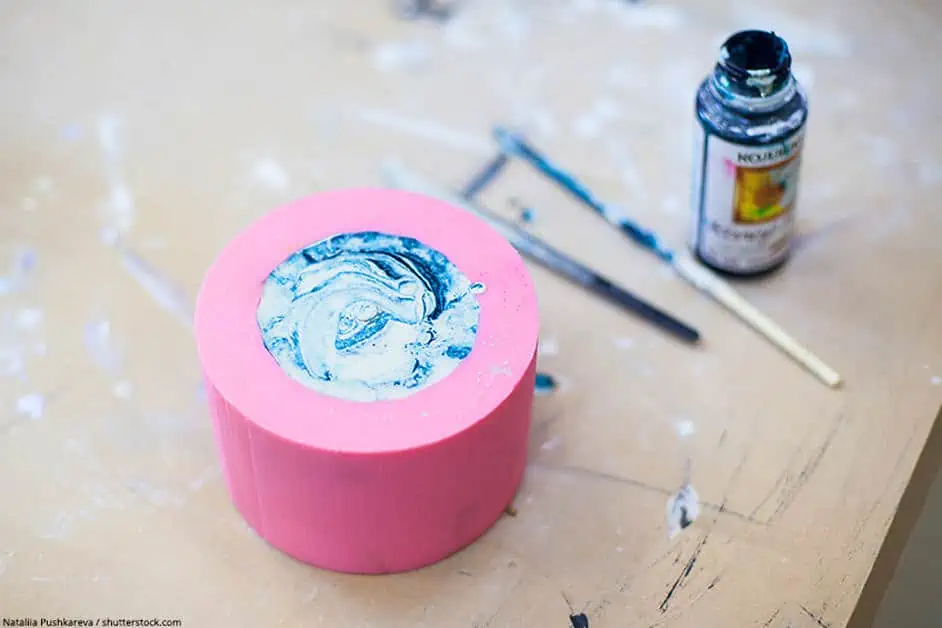
Construction of the Frame
- The frame into which the silicone is to be cast must be sealed as well as possible so that no material leaks out later due to possible cracks. In addition, the frame must completely enclose the blank.
- The base plate of the prototype should be smooth. All smooth materials except glass are suitable for this purpose. This would not repel the silicone and thus the later release without damaging the silicone would be practically impossible. The best way is to use a smooth MDF board. Smoothly planed wood is also very suitable for the four side walls that enclose the base plate. Now glue the sides to the base plate using a hot glue gun. These side walls should protrude your blank by about ten millimetres. The joints of the mold should be thoroughly sealed with modelling compound. Cotton swabs or toothpicks are suitable for smoothing the compound.
- When the frame is finished, place the blank in it. The side to be pictured must point upwards. The object can be attached to the base plate with some double-sided adhesive tape or a drop of hot glue. Fix the blank well enough so that it cannot slip when you fill in the silicone mass.
Mixing the Silicone
- After you have weighed the required amount of silicone you mix the two components in a ratio of 1:1. For mixing you use a mixing cup and a wooden spatula. Be careful not to waste too much silicone. For this you can either calculate the volume or the approximate need with the help of a measuring stick.
- It’s a good idea to mix several small portions instead of one large portion of silicone. These can be mixed more easily without clumping. Since silicone is very tough, it is almost impossible to stir a very large amount of it. So it is better to split the silicone by using several small cups.
- To loosen the bubbles in the mass you can knock the cups several times with the bottom on the tabletop after mixing. Before pouring the silicone into the frame you should wait a few minutes. This is the only way that any air can really escape from the mass.
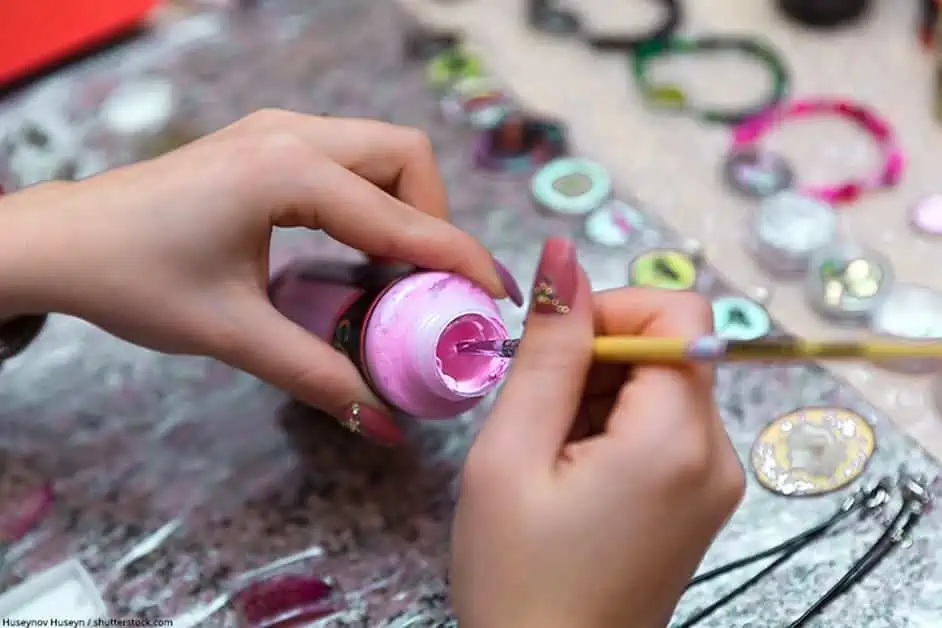
Silicone Pouring
- If you have chosen wood as the material for building the frame, it must be thoroughly sprayed with release agent before pouring in the silicone. Alternatively, you can also coat the frame with oil. But beware: Not all oils are compatible with silicone and may attack the surface of the material.
- Therefore, you should observe the manufacturer’s instructions in advance.
- Now the silicone mass can be poured over the blank into the frame.
- Pouring the silicone into a large object with a smooth surface is quite easy. Here the liquid silicone is poured slowly from relatively large height over the blank. Make sure that it is completely enclosed with the mass.
- In the case of a blank with many edges, corners, angles or cracks, these must be poured out first. This works best with a very thin silicone jet. Then you can frame the rest of the silicone. This procedure guarantees that all details are visible in the later illustration.
- The frame is then filled with the remaining mass until it protrudes about five millimetres above the object.
- Finally, the air bubbles should be removed from the molded silicone. To do this, carefully tap all four sides of the frame so that the air can escape. Then you can let your mold harden.
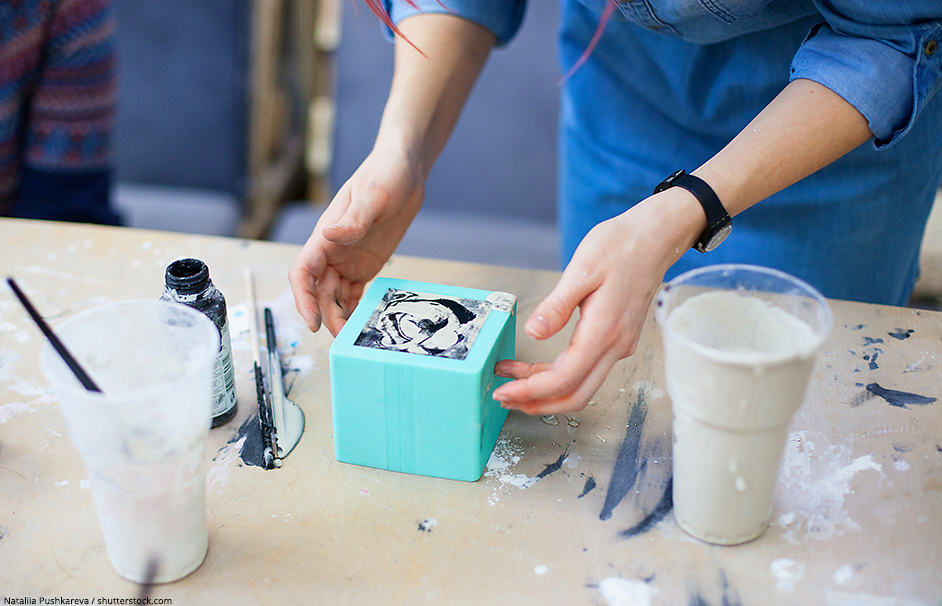
Removing the finished Silicone Casting Mold
- The curing time of the silicone mold depends on the silicone used and its size. It can vary between one and 24 hours. If you want to check if the silicone is completely cured, you can gently press it into the mold with a finger. If you notice that the mass has hardened, the silicone mold is now released from the frame. If it has been thoroughly treated with mold release agent or oil, this is usually no problem. For the final straightening of the edge, it is best to use scissors, a carpet knife or a scalpel.
- In order to keep the silicone supple and to maintain it, you can rub it with talcum powder after releasing it from the frame and after each use.
Making two-piece Resine Silicone Molds
For resin casting, double-layer molds are of course super suitable. When working with epoxy resin, impressive, three-dimensional objects can be created, into which various materials such as stones, flowers or other objects can be cast.
But also for model builders, two-part forms are of course very interesting because they can produce different objects. With two-part silicone molds, parts of different sizes and different materials can be combined without problems. With materials such as concrete or plaster, house facades, gates or bridge pillars can be created, which can be beautifully painted and decorated after hardening.
In addition to the materials already listed above for a simple mold, you will also need some modeling clay for two-part molds. With this, you fill-up the frame halfway. The surface must then be smoothed and the corners well lined.
Now press half of the blank into the clay and fill the silicone into the frame. After hardening, the dough and the silicone mold are removed. The finished silicone mold is placed directly back into the frame. The blank is then placed in the previously made recess. In order to be able to separate the mold halves well from each other later on, you must now spread out the mold with Vaseline before pouring liquid silicone into the frame again. This silicone compound must also harden well.
Silicone Molds with Undercuts
Silicone molds with so-called undercuts can be a particular challenge. Blanks with undercuts have clearly visible, protruding corners and edges that can get in the way when they are removed from the mold. If these undercuts are relatively small and you are using soft silicone (Shore 0 to 20), these edges should not cause any major problems. A little more tricky will be the case with larger undercuts. In this case it is advisable to make a two piece or even multi piece mold. You should decide in any case for the flexible soft silicone rubber and pay meticulous attention when removing the object that it is not overstretched.
If it is not possible to remove the blank in the normal way, you can cut the silicone mold at one edge and then remove the blank. The resulting cut can then be closed by attaching some very tight rubbers to the mold. This makes it very easy to remove the cast part from the negative mold later.
Silicone Molds for Resin – Valuable Tips and Tricks
- If it is too expensive for you to build a wooden frame in advance, then there is a very simple alternative. Take a base plate made of smooth planed wood and then place a frame made of Lego bricks which you glue to the plate. With this you are absolutely flexible in size and shape. When sealing and later pouring in the silicone you proceed in the same way as with a wooden frame.
- The optimal room temperature for drying silicone is between 18° and 22° C. If the temperature is higher, the material may clump because it dries too quickly. If the room temperature is lower than 18° C, the drying process is unnecessarily prolonged.
- Another little trick if you are unsure how much silicone you actually need: Build the wooden frame as described and fix your blank to the base plate. Now fill the mold with rice until it is about one centimetre higher than the object. Since the weight of the rice corresponds approximately to the required amount of silicone, you only have to weigh it now.
- An important tip at the end: In order not to lose the joy of your project at the beginning, first plan a relatively simple form and take your time for the implementation. Gradually you can increase the level of difficulty.
How to Clean your Molds – Tutorial
With our tips you will get the silicone mold back in perfect condition.
- Simply put the non-solid epoxy resin in the freezer. The cold makes the liquid resin crystallize and the biggest damage is repaired. This trick also works with UV resin, but here you should try it with a longer curing time first. Please put your silicone molds only packed and labeled into the freezer. Preferably into an empty compartment. Contact with food must be avoided in any case.
- Most of the resin should now be easy to remove, leaving only remnants. These are best removed with a lot of dishwashing liquid, which you rub into the mold with gloves and rinse with water. Place the mold on a lint-free cloth to dry.
- Meanwhile the mold looks better and could theoretically be used again. But the residues would stick to the new resin. For all perfectionists who want to invest another 5 – 10min of work, they now resort to adhesive tape. Simply use the adhesive side to get the remaining resin, pigments and glitter residues out of the mold and it should look like new and is ready for your next resin casting
How to prevent Problems with Silicone Molds
- No open fire at the Mold. Burning away bubbles is a popular method to get rid of the annoying air bubbles in the resin. But be careful: Avoid any contact with the silicone. Silicone molds can be heated up to 180° Celsius for a short time. A lighter reaches temperatures between 800° and 1300° Celsius – so way too much.
- Mix the resin according to the packaging instructions. Even minimal deviations can cause the resin to become unnecessarily warm and thus cause your mold to age more quickly.
- Only use colors that are suitable for resin. Acrylic paints can cause the resin to boil and damage your mold.
- Never clean your silicone molds with sponges or other acidic items.
- You can use release agents. Release agents will degrade the finish of your resin work, but will help your silicone mold last longer. Our suggestion: Use release agents only for complex shapes that are difficult to mold or if you already notice that the quality of your silicone mold is deteriorating.
Inspirations for DIY Silicone Molds
Even if you don’t have too much experience in making silicone molds yet, you can still dare to make small pieces of jewellery. There are no limits to your creativity. Pendants in various shapes made of epoxy resin and embedded materials are real eye-catchers.
If your child is fascinated by your favourite piece of jewellery, you can create a beautiful duplicate with sparkling extras such as glitter particles.
If you are already a little more experienced in casting molds, take up the challenge of a self-cast chess game made of epoxy resin. A unique gift idea for chess lovers, where the high effort pays off in the end.
The sky is the limit – you can even build out a guitar with your own silicone mold.
Common silicone molds are easily available on the market. If, however, you want to let off steam and create a truly unique piece, you can’t avoid making a DIY silicone mold. Just give it a try – with our tutorial nothing can go wrong 🙂
In 2005, Charlene completed her wellness degrees in therapeutic aromatherapy and reflexology at the International School of Reflexology and Meridian Therapy. She worked for a company offering corporate wellness programs for several years before opening her own therapy practice. In 2015, she was asked by a digital marketer friend to join her company as a content creator, and it was here that she discovered her enthusiasm for writing. Since entering the world of content creation, she has gained a lot of experience over the years writing about various topics such as beauty, health, wellness, travel, crafting, and much more. Due to various circumstances, she had to give up her therapy practice and now works as a freelance writer. Since she is a very creative person and as a balance to writing likes to be active in various areas of art and crafts, the activity at acrylgiessen.com is perfect for her to contribute their knowledge and experience in various creative topics.
Learn more about Charlene Lewis and about us.


