Resin Crafting Projects – Our Best Resin Craft Ideas
This post may contain affiliate links. We may earn a small commission from purchases made through them, at no additional cost to you.
Resin has taken off by storm over the last two years and should we really be surprised? As intimidating as it might seem to those new to the craft, resin crafting is one of the easiest and reasonably priced crafts to get into. There are countless cool and wonderful creations you can make by getting stuck into the rein scene, and all of it can be done from the comfort of your own home. The best part is you don’t have to follow any rules, simply let your imagination run wild! Let’s have a look at what resin crafting is and some of the weird and wonderful things you can make from this seemingly miracle material.
What Is Resin Crafting?
There are a lot of ways one could look at resin crafting, but at its core, what is it? Put simply, resin crafting is the practice of creating or replicating forms using various molds. These molds are filled with a substance called epoxy resin which is poured into molds in a liquid form. This liquid then dries and hardens to form a near-perfect replication of the negative from the mold hold.
The idea is if you can find a mold for something you can replicate it with resin. Why would you want to do this? Maybe you have an ornament that you love dearly, maybe you simply want more of a particular object, or you simply want to express your creativity and make something special and unique. Regardless of your reason for starting, epoxy resin crafts have something for everyone, and there are different types of epoxy resin types for different applications. Why are there different types of resin available?
Well, some resins are transparent, some are colorful, some are multi-colored, and some are plastic for added rigidity, meaning that there are various types of resin for different applications. How many applications are there for resin? Considering that epoxy resin is used in virtually every facet of society as we know it, from crafting to automotive engineering, to Jewry creation, and even tool insulation, the variety of resins available is soundly justified.
When Was Resin First Created?
If you think that resin is a new thing that was discovered a few years ago you wouldn’t be completely wrong, but technically speaking the first synthetic resin was created all the way back in 1909. This first iteration or resin was known as Bakelite which could be used for hundreds of different applications as it was malleable and extremely versatile. Before this, there were a number of naturally occurring resins available, but they could be challenging to farm and even harder to work with, it is for this very reason that when Bakelite was introduced that it sparked the “plastic” age in the early 20th century.
You might remember the boom of plastic Tupperware in the 1970s, which saw many housewives and television commercials promoting the sale of this new revolutionary cheap and durable range of containers that could be used to store virtually anything you could think of. These days we know that plastics of this nature aren’t very good for the environment and there are strict regulations regarding which plastics can be used for mass production, but back then the research and development of resin-related products filled the eyes of corporations with Dollar signs.
Plastic resins are essentially a by-product of the oil refinement process known as cracking, this breaks the substance down into either propylene resin or ethylene resin which can then be repurposed, molded, dyed, and sold to the public. Epoxy resin is similarly made, except it is found when epichlorohydrin and bisphenol-A react with one another, the latter can be replaced with other chemicals to produce different types of resin by altering the chemical composition of the end plastic. It might sound complicated, but at its core, there are lots of ways to manipulate resin to achieve your end result. In fact, some are so strong that they can be used to replace metals, so the possibilities are endless!
This being said we should probably digress back to the topic of epoxy resin crafts. As we mentioned previously, resin can be used to make lots of things, but you don’t have to limit yourself to the molds available in stores or online. If you wanted to, you could make a mold of anything you come across and replicate, which basically makes you your own manufacturer. Lots of people take advantage of this by purchasing resin mold-making kits and replicating forms they like, modifying them, and selling them as either a hobby or a small business. These resin mold kits are easy to come by and shockingly inexpensive considering what one can do with them given enough time and imagination.
You could replicate children’s toys, electronic components, automotive components, jewelry, food molds, and even shoes! You should be careful not to use anyone’s designs or intellectual property without their permission if you intend to take this route though.
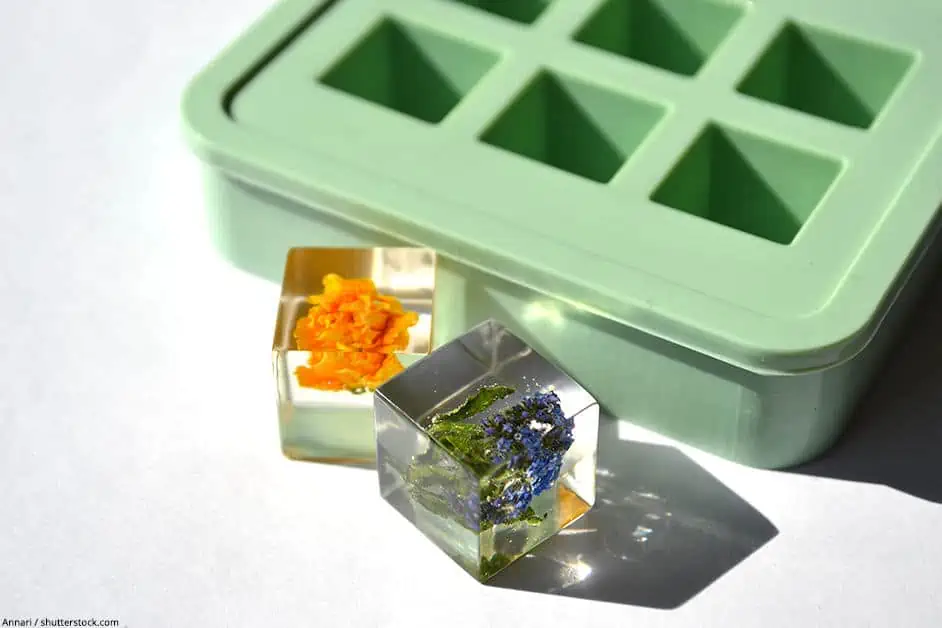
What Can Be Added to Resin?
There are lots of ways to modify resins to suit your own personal taste. Here are a few cool things you can add to your epoxy resin crafts to reflect your own personal aesthetic. These are easy-to-use and inexpensive additions that don’t even scratch the surface of the possibilities!
- Glitter
- Small objects
- Photographs
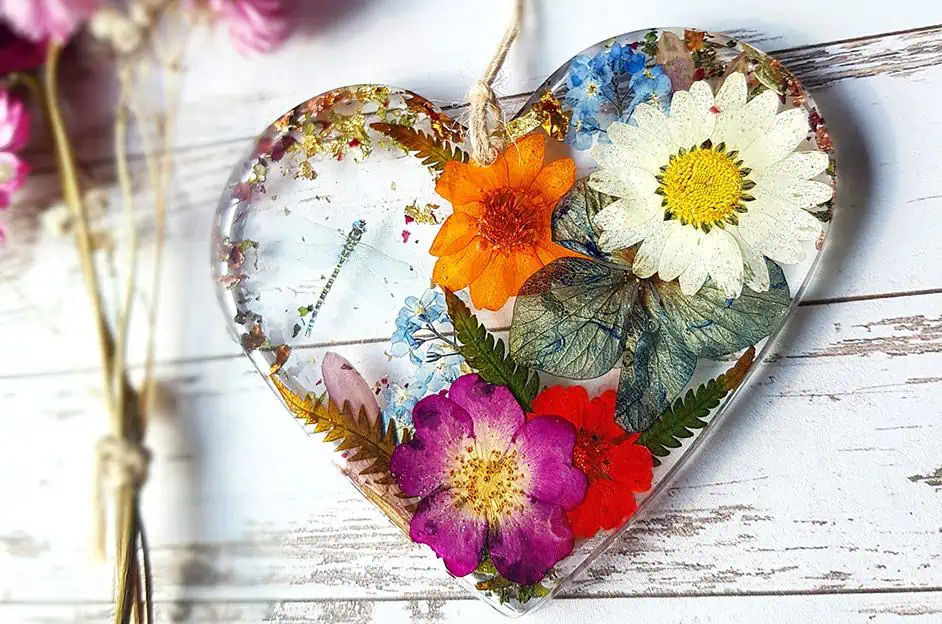
- Flowers
- Food coloring
- Dyes
- Clothing beads
- Sequins
- Wood shavings
What Materials Can Resin Be Used On?
When people refer to resin, they usually talk about the castings you can make from the molds they’re sold with, but if you use your imagination, you can use resin on virtually any surface you come across. Here are a few surfaces you can use resin on in your daily life. Keeping in mind that some surfaces may require some preparation so always read up on the materials you’re working with.
| Materials Resin Can Be Used On ✔ | Materials Resin Cannot Be Used On ✘ |
| Metal Surface | Wax |
| Wood Surfaces | Polyurethane (PU) Surfaces |
| Plastic Surfaces | Grease or Oil |
| Mortar Surfaces | Silicone |
| Canvas Backings | Polyethylene |
| Paper Surfaces | Polypropylene |
| Ceramic Surfaces | Painters Tape |
| Glass Surfaces | Parchment |
What Kind of Molds Can Be Used for Resin Casting?
Molds come in various shapes and sizes, which means that there are lots of neat things you can make from them. However, molds can also be made of various materials for different applications, namely for use with different types of resin and other casting materials. Here are a few different types of molds you might find in your resin casting journey.
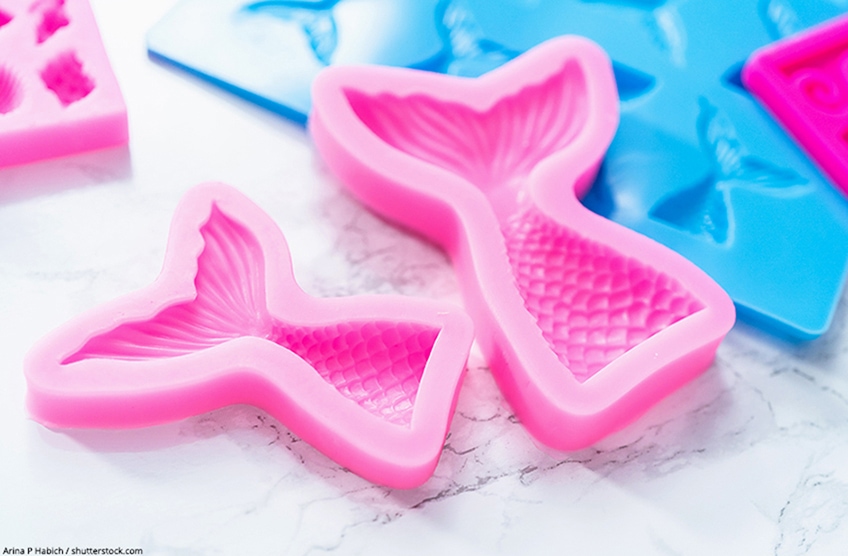
Store-Bought Plastic/Silicone Molds
These are the more commonly sold types of mold. Why? {Plastic molds are easy to manufacture and cheap to produce in mass volume However, not all of them are made of recyclable materials and therefore they aren’t always good for the environment. These molds are typically cheap and are used to create a variety of molds that you would usually find in a starter kit for beginners or children’s toys. They are usually pretty smooth as they don’t have much surface friction which causes the resin to stick to surfaces, and you have the advantage of being able to clean them out easily for repeated use.
DIY Silicone and Latex Molds
Just because there are molds that are sold with resin and hardener doesn’t mean that you are limited to what manufacturers sell you. Although most people prefer the simple fun of making interesting forms, you do have the option of making your molds using either rubber or latex mold-making kits. Essentially, there are compounds one can mix to form a type of putty, which can be used to replicate a form by creating a negative imprint. Before the advent of 3D printing and plastic molds, this was the go-to method for replicating things in resin form.
These mold making materials simply need to be prepared and formed around the object you would like to replicate, once covered, you simply allow the silicone or latex to set for the manufacturers recommended time period, remove it from the object, and you are ready to start making your resin castings.

Which Resin Crafting Projects Are Right for You?
If we were to list all of the things you could make out of resin potentially it would be an exhaustingly long list. Instead, here are few resin crafting projects you could make with relative ease in two or three hours on a rainy day, or in your spare time on your own or with friends or family.
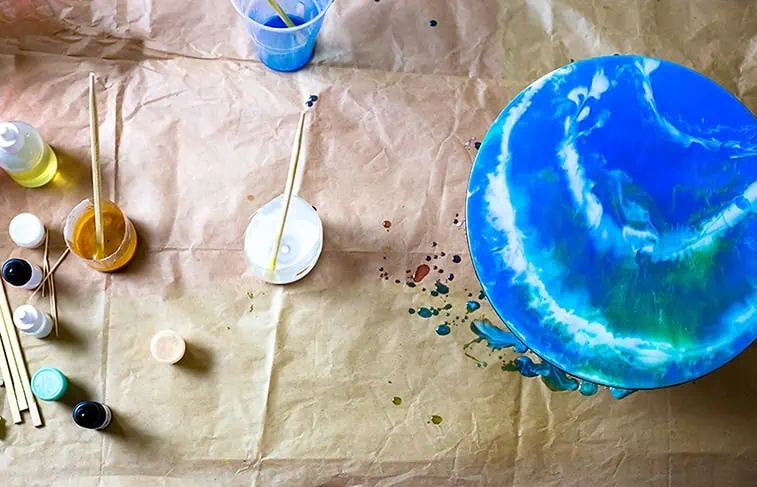
Resin Tabletop
This one is a great first project especially if you are into home DIY improvement. Resin tabletops can be simple aesthetic upgrades to your home, or you could take them to the extreme and make something nobody’s ever seen before. Either way, you’ll end up having a ton of fun in the process! To get started you will need to get a few things, namely a tabletop, a base coat, the resin colors you would like to see in your workpiece, a paintbrush, a heat gun/blowtorch, a short PVC pipe, and a few cups to mix them in.
Start by mixing and applying the base coat of resin to your tabletop, this can either be a color that strongly contrasts with the resin colors you have selected, or it can be one that blends well. Once your base coat has been applied to the surface using your paintbrush to spread it evenly across the surface until flush, then allow the resin to dry. You can use your blow torch/heat gun to remove bubbles and speed up the drying process at this point. Once dry, mix the resin colors you have selected individually in their cups. Once mixed, place the PVC pipe on the surface of the table and pour the colors into the cylinder without mixing them.
Once they have been poured in, simply move the cylinder around in the pattern of your choosing and watch your tabletop come together. Once the resin has dried, apply a final clear coat to your work of art and marvel at its beauty.
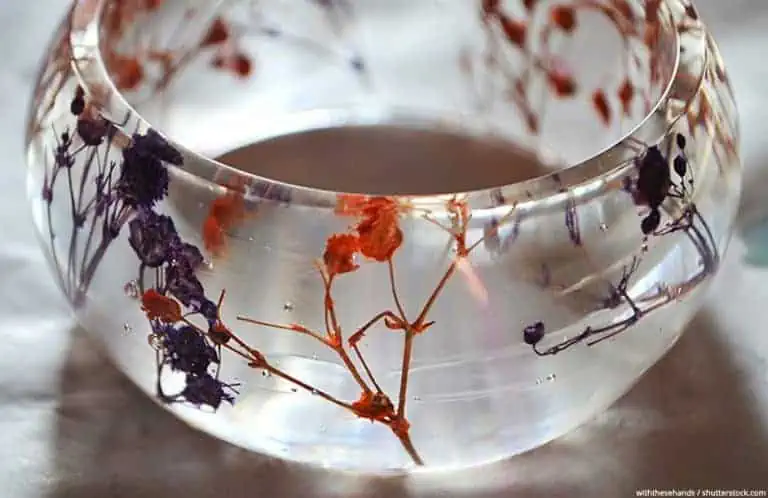
Resin Jewelry
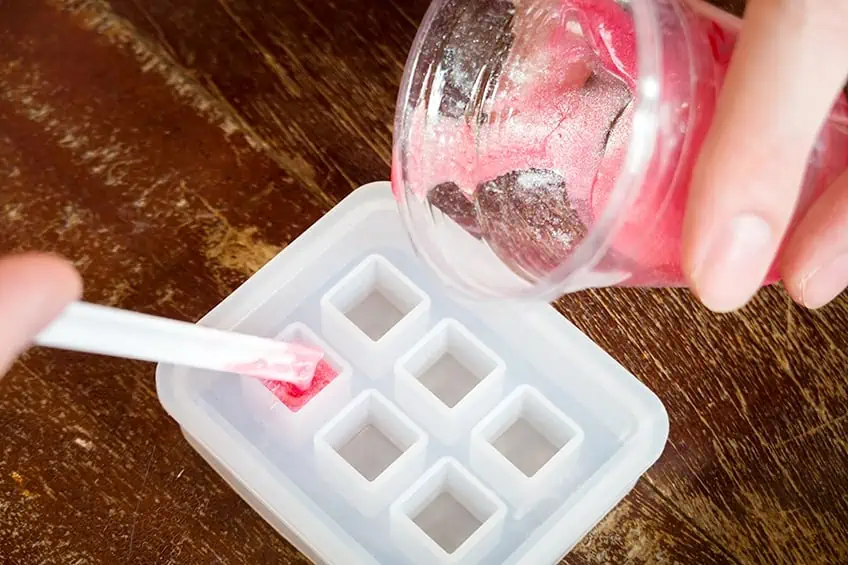
This is one of the best places to start your resin casting journey if you are a beginner. There are so many creative directions you will be able to take when it comes to jewelry casting, and the best part is that you have the option of wearing them later! Jewelry castings are easy to make and their molds are by far the easiest to come by. In fact, if you were to go out and buy a jewelry resin mold you would likely find that they are sold in packs of multiple molds. This is due to the fact that these molds are small and made in bulk, manufacturers will often offer you a variety of molds for your enjoyment, some packs offering dozens of molds for you to work with, combine, customize and share.
Common accessories that you should be able to make with relative ease are hair clips, rings, earrings, bracelets, piercing accessories, necklaces, and even chokers! As far as beginner resin crafts go, this is the easiest, as all that you have to do is mix your resin and hardener together and then pour it into the mold of your choice.
Attaching a pin or chain plug while the resin cures are optional, as is adding little trinkets to make your casting more interesting, like grains of rice, individual letters, glitter, or color swirls. You can also add these upgrades to your resin while you are mixing the resin and the hardener together if that’s the effect you’re after. Technically speaking, anything is an accessory if you’re able to wear it, making the possibilities of what you can turn into jewelry endless with epoxy resin crafts.
Resin Coasters and Place Mats
Is there anything better than a hobby that has practical applications in your everyday life? Making things that you can use is one of the unique characteristics renin crafting offers, namely things that you can use throughout your home. This being said, popular beginner resin crafts are not limited to jewelry, In fact, one of the more popular beginner resin crafts are placemat and coaster castings. Why, may you ask? Considering the fact that they are easy to make and customize, these castings make amazing gifts for your friends and family for birthdays or during the holiday season!
The possibilities are incredible, you could fill some coaters or placemats with family photos, you could make one for each family member using their favorite color, or you could add something special to a set of coasters as a constant reminder of your friends and family. The great thing about these molds is that they are reusable, durable, and easy to use. If you would like to replicate a coaster or placemat form, all you have to do is mix on your resin and your hardener and pour it into the mold and allow it to set. Remember that resin can be cut and sanded too, so you have the ability to customer your creations well beyond simply what’s inside them.
Coaster and placemat molds are usually sold in sets, meaning that you have the added advantage of being able to make more than one individual unit at a time, much like with jewelry molds. This type of mold is perfect for those who would like to add a personal touch to their homes or to gifts they intend to give to others.
Resin Light Bulbs
When we consider epoxy for crafts, we often don’t look at a practical application as important as light production. It might sound a bit silly, but resin can be used to create light bulbs that aren’t only effective in an aesthetic sense, but they are also effective in the way they illuminate your surroundings. How does one achieve this considering resin isn’t glass and doesn’t refract light? Well, It’s easy.
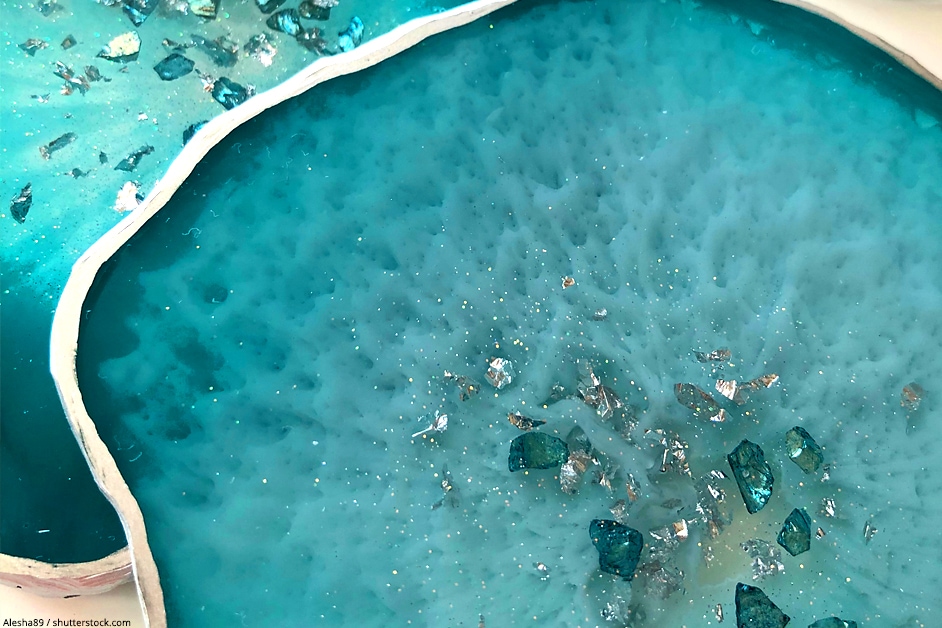
Crystal resin actually does a really good job of both absorbing and reflecting light in the right shape/form, and it just so happens that if you cast crystal resin into the form of a lightbulb, with the right chemical composition, it makes an effective lightbulb when and LED (light-emitting diode) is added under the lightbulb cap! Using epoxy for crafts is often an aesthetic exercise, and this does fulfill a rustic, calming niche that is extremely popular at the moment. It doesn’t take a rocket scientist to start off with casting like this either. Just like with the castings we mentioned previously, simply combine the resin and the hardener and pour it into the mold. Once cured, simply add the LED to the top of the light bulb casting, remove it from the mold, add the lightbulb cap, and you’re ready to go!
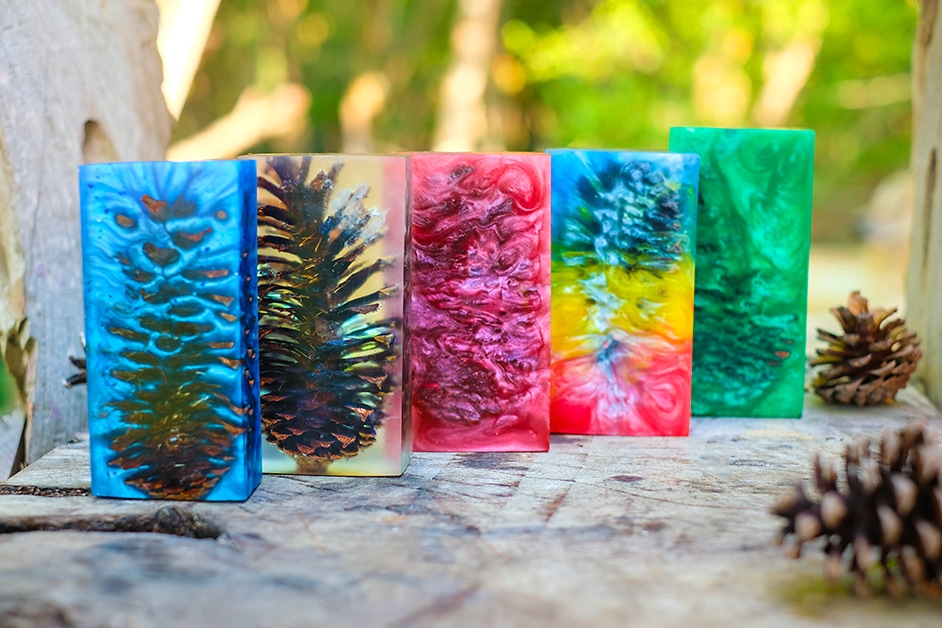
Combining Alcohol Ink and Resin
There are hundreds if not thousands of resin crafting ideas out there, but the further down the rabbit hole you go the more complicated some of these resin crafting ideas can get. If you are looking for a trick that is both simple and effective, then adding alcohol ink to your resin casting might be the thing for you. What is the difference between regular ink and alcohol ink? Well, think of resin dye and typical ink as having more of a muted effect on a casting than their alcohol counterpart. Alcohol ink is often used with crystal resin because it suits the overall glassy aesthetic of the resin type. Also, it stands apart from other coloring agents because it allows the resin to retain its transparency.
That’s really the party piece of alcohol ink – it allows the resin to remain transparent even though dye has been added. This means that you can use clear resin (which is a bit cheaper than color resin) and simply add some of this ink to get the same effect!
Loads of people prefer using this technique in their DIY resin projects because it is cost-effective and can be used to create some interesting effects, one which few people know how to achieve. This effect can be compared to having stained glass without the hassle of having to work with such a brittle material, and you have the advantage of being able to drop objects made of resin without it shattering into a million pieces. Imagine things like “stained glass” coasters, bowls, drinking cups, earrings, charms, and even placemats!

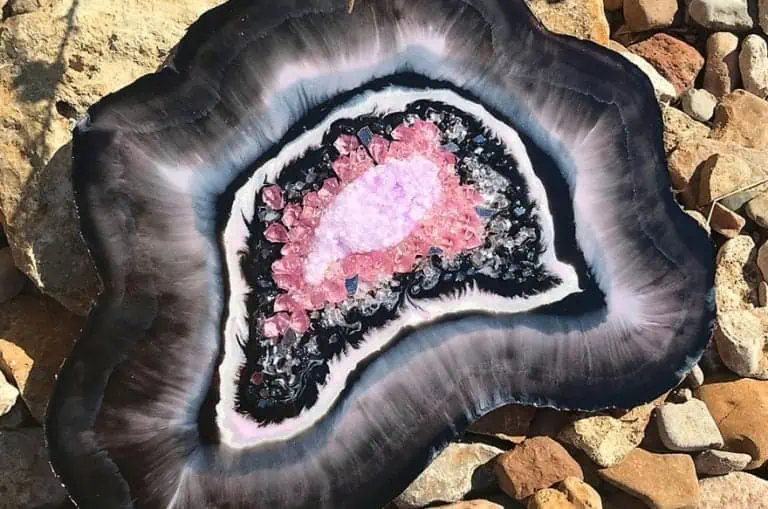
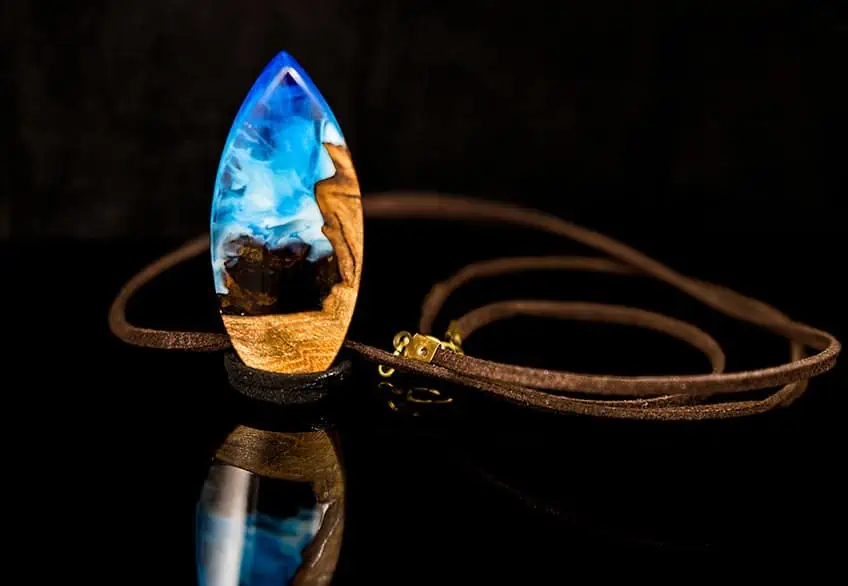
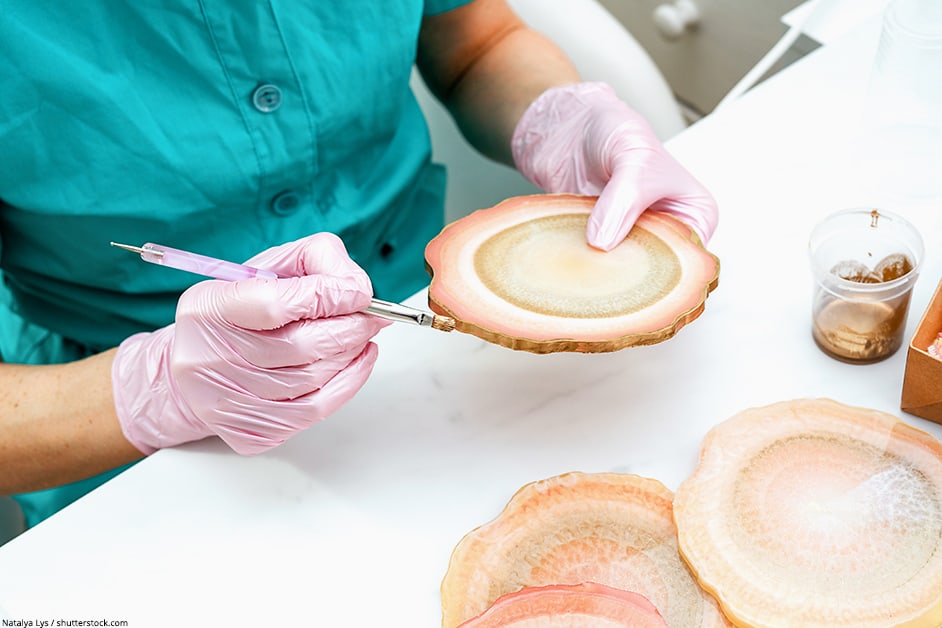
Resin Paintings
We should probably start off by saying that this isn’t exactly what most people would refer to as an “entry-level” DIY resin project. Resin paintings are new, and if you are really good at it you could sell them for a pretty penny if you wanted to. Outside of the commercial market, they can be a bit intense to make. It goes without saying that painting takes a lot of skill (as any fine art does) but painting with a substance with the consistency of resin can be a headache if you lack the temperament for it. We aren’t doing a good job of selling this to you, are we?
Don’t be discouraged, resin painting can be a lot of fun and can be a great form of self-expression, not to mention a good illustrator of the creator’s mood. Getting a canvas or other medium and going down on it with resin can be therapeutic and the best part is that designs are often unexpectedly good, although if you are trying to make something specific you might need one or two tries to get the feel of things. Getting resin in the quantities needed to make conventionally sized resin paintings can be costly, but this doesn’t mean you can’t make a small work just for you. Getting a huge amount of resin and hardener in the colors of your choice and spending a relaxing afternoon lost in your own thoughts is kind of its own reward.
You have the option of adding a glossy clear coat to the paint once you’re done to ensure it’s preserved forever. If you would like to ensure that your workpiece is bubble-free, a good trick is using a heat gun or blowtorch on the surface of the workpiece.
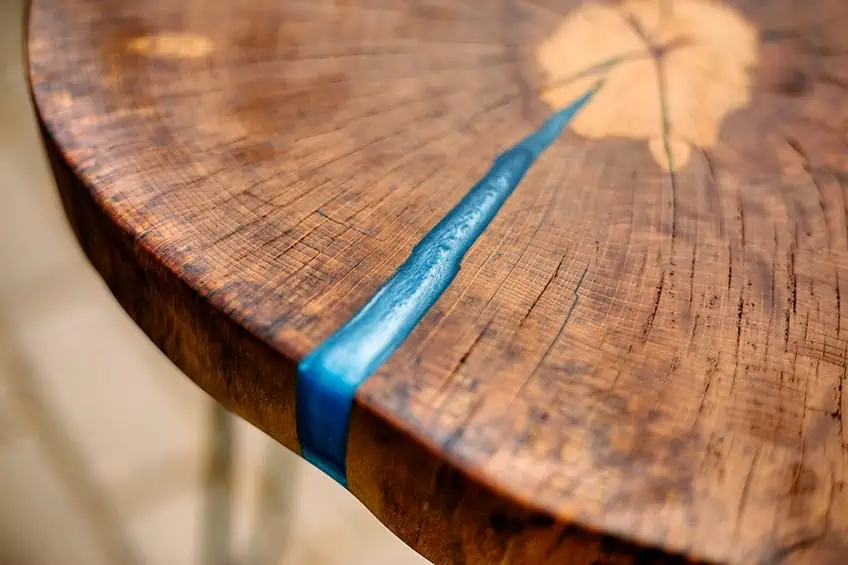
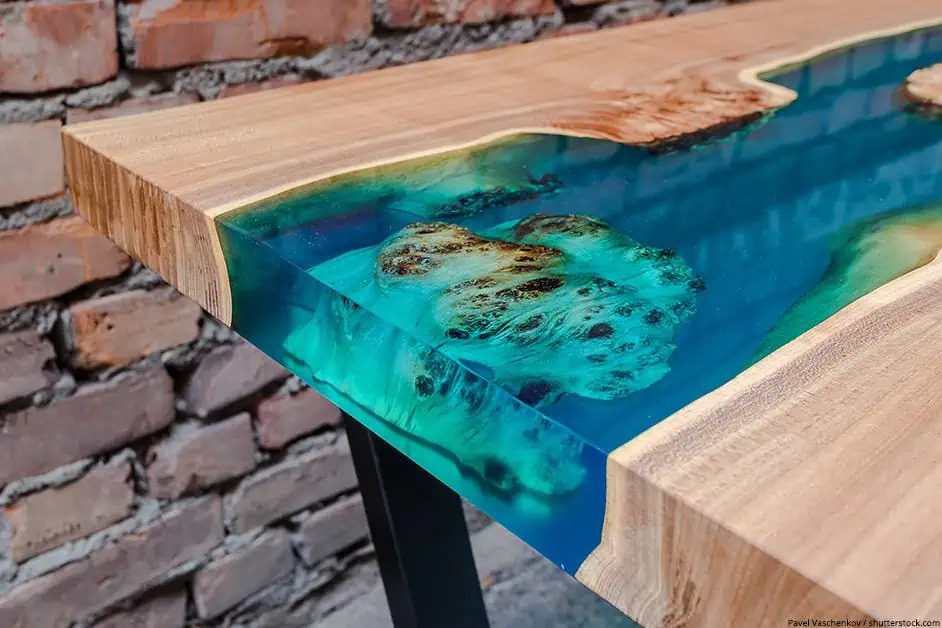
Filling Voids in Wood with Resin
This is a favorite among most resin enthusiasts, but it can be a massive undertaking if you aren’t sure what you are doing. The chances are if you have a Pinterest account you have seen resin being used in this manner. Before the advent of resin for consumers like us, wooden tables that had large chunks missing or were simply damaged through the passage of time were sent to the garbage heap.
These days, you might have seen one or two people purposefully removing chunks of their larger tables so they can be filled with colorful resin. Is this good? Does it matter?? We don’t think so if anything because the result is simply stunning to look at, and even makes the table a bit stronger to a degree. In order to pull this off, it might take a bit longer than a weekend. It might seem simple – just pour the resin into the cracks, right? Well, you will need to ensure that what surface you do have is level, then sand it down to make it flush, and then start pouring. You should also ensure that you select the color combination you want and ensure that you have enough resin to create the illusion of flow.
This exercise takes quite a bit of resin, so we recommend starting off on a smaller workpiece and working your way up to this level of the void filling. Filling spaces with resin is a fun way to breathe life back into old furnishings and can be fun for the whole family, especially on bigger projects.

We should mention that because of the sheer amount of resin and hardener being used for bigger workpieces, you should absolutely do it in an environment with good airflow (preferably outdoors on a nice day). If you are a bit stuck on which project would be good for your first try, here is a table ranking them in difficulty for beginners:
| Resin Crafting Activity | Degree of difficulty |
| Resin Jewelry | Easy |
| Resin Light Bulb | Easy |
| Resin Coasters and Place Mats | Easy |
| Using Resin and Alcohol Ink | Medium |
| Resin Tabletop | Medium |
| Resin Paintings | Hard |
| Resin Void Filling | Hard |
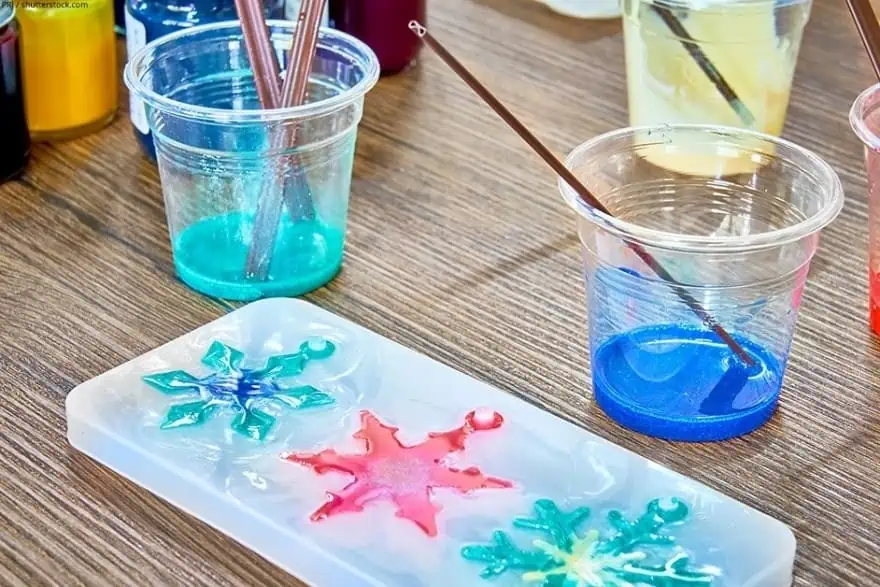
How to Create Resin Castings?
Knowing what you can make with rein is great, but even the simpler castings can be a bit intimidating if you have never worked with resin before. Here are a few steps you can follow to ensure that you have the best experience when creating your resin workpieces. Remember that resin is dangerous once cured, but you should work in a well-ventilated environment while you are mixing and pouring both your resin and hardener.
Prepare Your Workspace
Whether you are working on creating big or small casings, working with resin can be a messy exercise. Preparing your workspace is important because the resin can be quite challenging to get off surfaces once it dries and cures. You should start by laying down a tarp to ensure that none of the resin gets onto the surrounding surfaces.
Next, get some paper towels, gloves, and a fabric face mask to protect your hands and mouth. Next, depending on the size of your workpiece and the number of colors you will be working with, prepare your mixing containers and mixing sticks for each individual color. Finally, prepare your molds by applying anti-adhesive coatings like the ones sold in-store or, if you prefer, coat your molds in a light layer of baby powder.
Mix Your Resin and Hardener
Now to get your hands dirty! This can be a bit nerve-wracking for beginners, especially considering that to get the best out of your resin casting, you need to mix your resin and hardener together at an exact 1:1 ratio. We recommend that you start off with small epoxy resin projects, this will allow you to get the feel for mixing the resin together with the hardener and working within the pot life of the mixture.
Mixing a small amount of resin and hardener first will allow you to get a feel for the consistency and dry time of the solution, this way you will have a decent idea of the time limit you are working within to pour the resin before it cures completely.
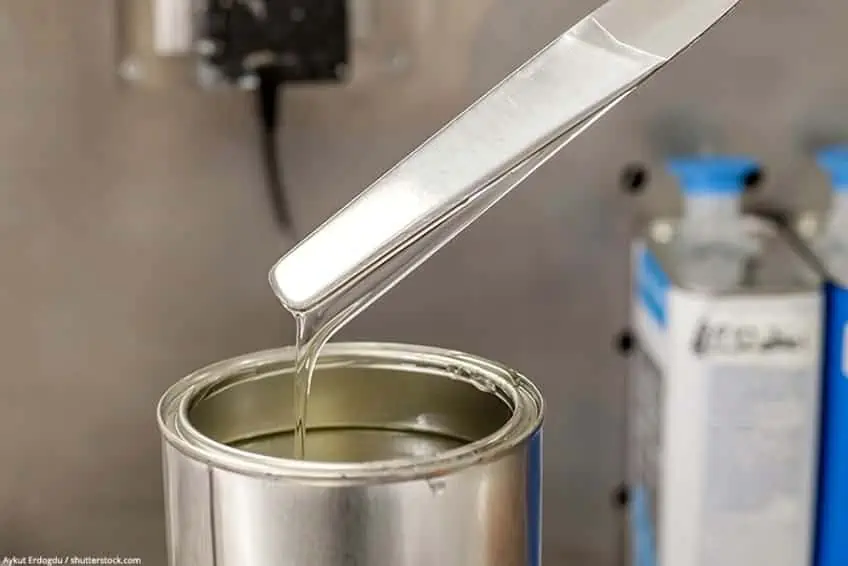
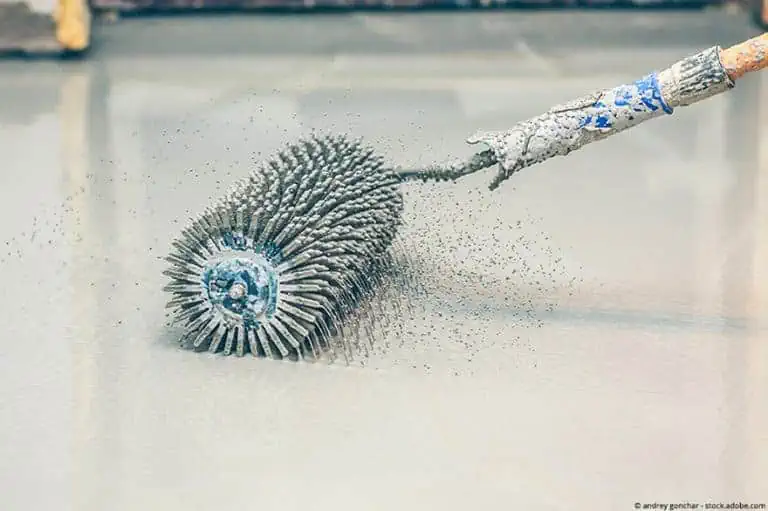
When pouring your resin and hardener together you should do your best to ensure that you pour slowly, not only does this reduce the chance of spilling, but it also minimizes the amount of air that becomes trapped due to the change in the liquid’s surface tension. It is possible to remove these air bubbles from the resin with the aid of something like a heat gun or a blowtorch at a later stage, but it’s good to practice this technique if you’re new to resin casting.
Therefore, small resin casting projects are better for beginners, it allows them to cultivate their own workflow and pace, as well as getting them used to working with resin which is a bit unconventional compared to other crafting mediums.
Prepare Your Mold
Mold preparation can save you a lot of time in the long run. Why? Half the battle most beginners face when working with resin casting for the first time is getting their castings out of the mold. Various molds and resins have different best practices for ensuring a smooth demolding process, which is essential for ensuring that your mold and casting aren’t damaged during removal. One of the common methods of ensuring your resin castings don’t stick to their molds is to use an anti-adhesive spray. These are readily available at most retailers and online, but if you’re in a pinch, you can use other friction-reducing substances like baby powder on the inside of the mold to make the demolding process slightly easier.
Manufacturers might include mold-specific anti-adhesive sprays that are specially designed to work their molds; it is not advised to use other anti-adhesive compounds in this case as it might conflict with the chemical composition of the molds you intend to use.
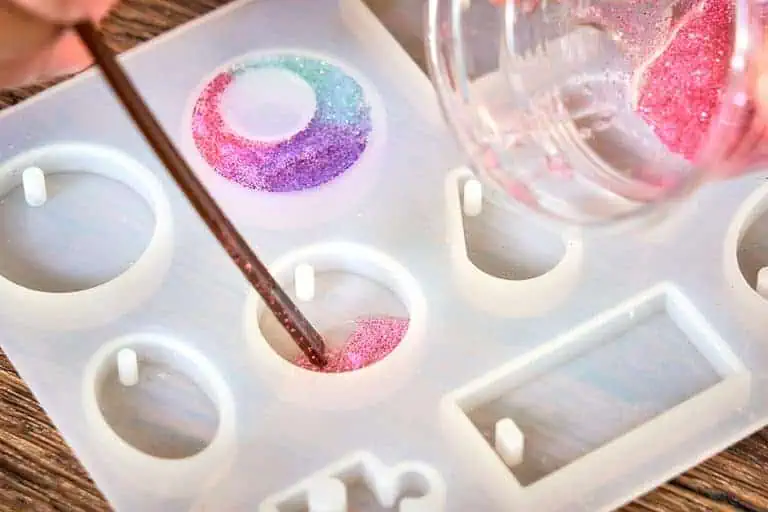
Fill Your Mold
This is a fairly straightforward process, although there are a few tips and tricks you can follow to ensure that you get the most out of your resin molds and achieve flawless castings. When pouring your resin and hardener into your mold, don’t simply pour it in all at once. Remember that the difference in surface tension between the mold and the resin can cause air bubbles to form, resulting in imperfections in your castings.
Instead, when working with epoxy for crafts, pour a small amount of resin into the mold to form a thin layer on the mold’s interior. After this layer has been poured, allow it to settle for a few seconds and then begin slowly pouring the rest of the rein into the mold.
Once all the resin has been poured into the mold ensure that it is sealed tightly before waiting for the resin to cure (if you have a two-part mold). If you have a two-part mold, check the integrity of the mating point between the two halves of the mold regularly and ensure that it is nice and tight.
Remove Your Casting
Epoxy for crafts is typically designed to work seamlessly with the molds they are sold with, however, you might want to use a different type/brand of epoxy with your existing molds in the future, which could result in some difficulty during the demolding process. As we mentioned previously, a good way to ensure your castings don’t stick to the mold interior during the demolding process is to use anti-adhesive substances on the mold interior before the resin is poured inside.
However, you also run the risk of damaging your castings if you’re too aggressive when removing casting from the mold, which could inadvertently damage both the casting and the mold. When removing the casting from the mold, you should be aiming to pop the casting out of the mold, not peeling the casting out of the said mold. If your molds are oddly shaped and challenging to work with you could try heating smaller sections of the mold, this will cause it to expand freeing up your casting trapped on the inside.
Now you know how resin came about, what it is made of, what it can be used for, which forms it can be used to make, which ones are easiest, and how to cast resin on your own, it’s time for you to go out and put your newfound knowledge to the test. Remember to always work in a well-ventilated area, always wear the appropriate personal protective gear, and ensure that you cover your workspace adequately.
Take a look at our resin crafts webstory here!
Frequently Asked Questions
What Are Good Beginner Resin Art Ideas?
If you are looking for resin art ideas for beginners there are a few good places you can start. Most beginners start their resin crafting journeys with small casting projects like jewelry, this is because the castings are easy to pour and remove from the molds once cured. Increase the complexity of your resin castings as your skill and comfort level improve over time and remember that practice makes perfect.
When Should I Demold My Resin?
When it comes to unmolding your reason castings, you should take care not to unmold them before they are fully cured. Always follow the manufacturer’s directions when determining resin cure times, most resins are ready for removal within a half hour. If you wish to be extra cautious, you should consider allowing the resin to cure for a full hour before removal (if the matter is not time-sensitive).

How Do You Keep Resin From Sticking to the Mold?
There are lots of ways you can go about stopping your resin castings from sticking to your mold. Crafting stores often sell anti-adhesive sprays which you can coat the inside of your mold with, alternatively, you could use baby powder, wax, silicone, painter’s tape, or wax paper.

In 2005, Charlene completed her wellness degrees in therapeutic aromatherapy and reflexology at the International School of Reflexology and Meridian Therapy. She worked for a company offering corporate wellness programs for several years before opening her own therapy practice. In 2015, she was asked by a digital marketer friend to join her company as a content creator, and it was here that she discovered her enthusiasm for writing. Since entering the world of content creation, she has gained a lot of experience over the years writing about various topics such as beauty, health, wellness, travel, crafting, and much more. Due to various circumstances, she had to give up her therapy practice and now works as a freelance writer. Since she is a very creative person and as a balance to writing likes to be active in various areas of art and crafts, the activity at acrylgiessen.com is perfect for her to contribute their knowledge and experience in various creative topics.
Learn more about Charlene Lewis and about us.