Resin Coasters Tutorial – How to make Resin Coasters
This post may contain affiliate links. We may earn a small commission from purchases made through them, at no additional cost to you.
Resin crafts have recently come into the spotlight as it is something everybody can do. What could be more decorative and useful than a beautiful coaster? Add a decorative flair to your home and protect your wooden furniture at the same time. Personalize DIY resin coasters as a gift, or simply create something for fun. Making resin coasters is great for beginners and is sure to dazzle everyone who sees them.
What is a Resin Coaster?
Simply, you are using a resin which is then poured into a mold to make a coaster. The coaster helps to protect your tables when placing glasses or cups onto them.
What Materials do you need to Resin Coasters?
Best Resin for Coasters – PRO MARINE SUPPLIES Art Resin
If you are looking for a durable resin that will keep your coaster (or any other DIY project) clear and glossy, then this choice by Pro Marine Supplies is ideal. This art resin is specially formulated to provide an attractive and protective coat for various surfaces. It is completely non-toxic, doesn’t produce dangerous fumes, and can be safely used in all environments.

- Specifically designed for art projects, excellent color stability
- Very easy to use with 1 : 1 mixing ratio, 100% solids, hard-shell finish
- High gloss and crystal clear, your all-seal solution, excellent air release
The resin kit has a self-leveling formula. This helps to provide a top-quality protective coat that is also UV resistant. Once cured, you get an incredibly glossy, shiny surface which is perfect for creating coasters. This shine is also durable, and thanks to the added UV protection it shouldn’t yellow.
The kit is easy to use and can be mixed in a 1:1 ratio. There is a half-gallon of resin and a half-gallon of hardener – allowing you to end up with a full gallon of high-performance resin. It is heat resistant to a pretty good level, making it a good choice for coasters.
Pros
- Heat resistant and UV protected
- Very glossy and clear
- Covers a large surface area
- Can be used for various arts and crafts purposes
- Easy to add color
Cons
- Can be difficult to remove air bubbles
Best Heat-Resistant Resin for Coasters – STONE COAT Countertop Epoxy
When making coasters with resin, they will need to be able to withstand a certain degree of heat. This epoxy resin by Stone Coat offers a good level of heat-resistance to ensure more effective and durable coasters. This epoxy resin is incredibly strong and has actually been specifically designed for use on counters and tabletops.
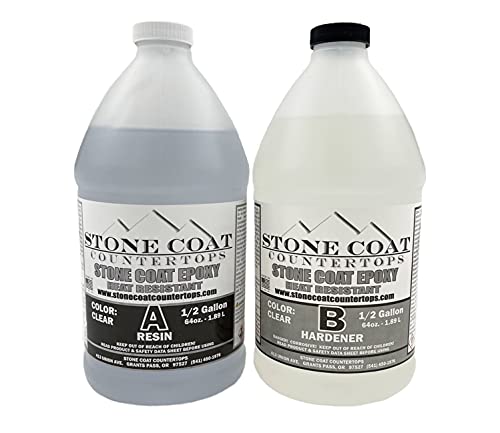
- Cures in 24 hours, self-leveling
- Heat resistant up to 425°F, crystal clear and UV stable
- Scratch-resistant, food-safe, zero VOC's
The resin is food safe, eco-safe, and has zero VOC. It is also scratch-resistant and designed to withstand heavy use. The formulation also includes excellent UV resistance in order to maintain the shine and gloss of the coaster. The mixing ratio is 1:1 which makes work easy, and curing should take 24 hours.
As coasters are meant to take a fair amount of heat, scratching, and heavy use, this durable epoxy resin is an ideal choice of material for the purpose.
Pros
- Scratch-resistant and durable
- Heat resistant
- Food safe and non-toxic
- Offers a beautiful clear finish
- Easy to work with
Cons
- A more expensive resin
Silicone Molds for Resin Coasters

- Includes 18 silicone molds in round, square, and octagon shapes, offering diverse options for creating unique and stylish coasters
- Made from durable and flexible silicone, these molds ensure easy demolding and are designed for long-lasting use
- Perfect for epoxy resin projects allowing for endless creativity and customization
When attempting this project, you will need a few materials. You can also purchase a resin kit, which should have most of what you need. Otherwise, here are the materials you will need for your resin coasters:
- Depending on your project, you might want to embed items like buttons, shells, or any appropriate object. You can also add things like glitter or sand.
- Color pigments
- A mold release product or substitute
- Disposable Mixing Cups: 2 smaller 30 ml cup and a larger 300 ml cup
- Stirring Sticks and popsicle stick
- Pair of nitrile gloves and safety glasses
- Resin Drying or Curing mat
- Handheld or artist torch
- Toothpicks
- Cloth for cleaning up messes
- An empty box or something to cover the coasters while they cure
- Again, depending on what you want, a sheet of cork or clear self-stick rubber pads for the back of your coasters.
Have you decided on your resin coaster shape and design? There are quite a few different shapes, providing you with a chance for more creative ideas.
Types of Resin Coaster Molds
- Your typical round or square molds
- Rectangular mold
- Oval resin coaster molds
- Large and smaller hexagonal shape molds
- Octagon or 8-sided shape mold
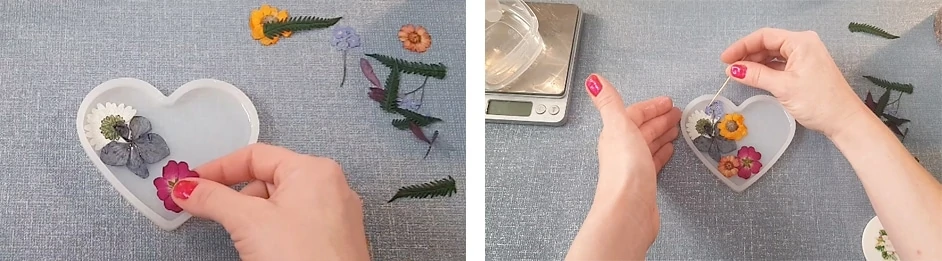
- Heart-shaped
- Flower-shaped molds
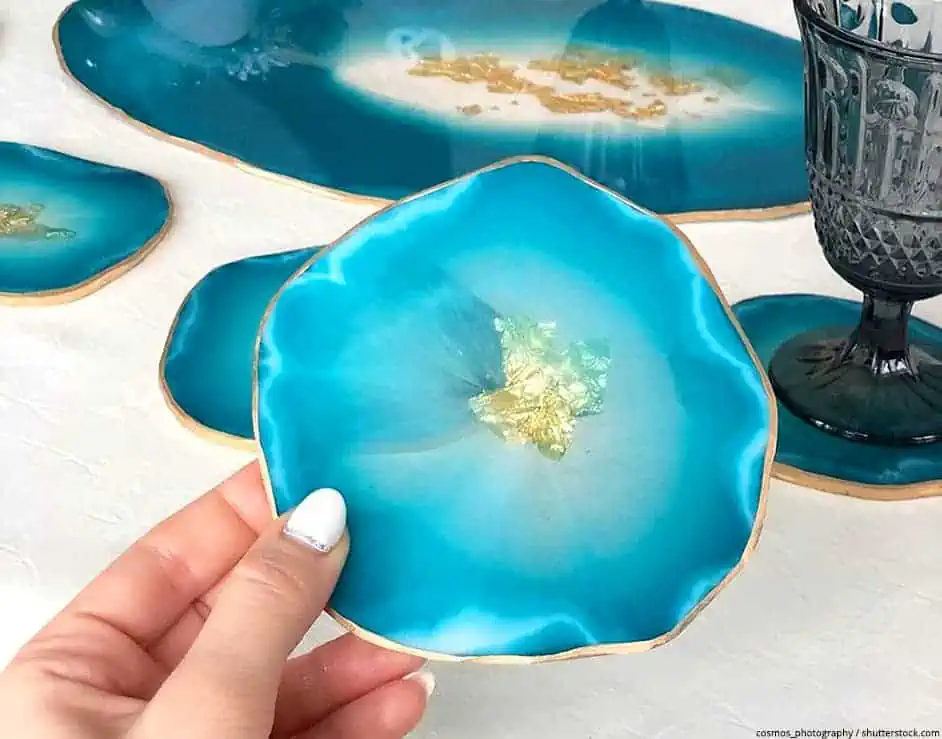
- Irregularly shaped geode molds
- Some have a rim and others are not rimmed.
- 2-piece resin coaster molds that provide a river or ocean effect coaster
- Puzzle type molds, larger 4-sectioned molds that create separate pieces but come together to form a shape – circle, square, or geode shape.
- Some molds have a glossy or matt interior surface, which provides a matt or gloss finish to your resin after it has cured.
You can use a resin coaster mold or item around the house such as a smooth, shallow round container. When finished, you will most likely have to cut the mold to get the cured resin out. Using a proper silicone resin mold is easier to work with and will provide a much better result. The mold can also be used over and over again.
A silicone resin coaster mold does eventually become worn and the resin will begin to stick to it and the silicone will start to break or tear.
How to make Resin Coasters
Whatever shape or design you choose, choosing to work with resin is a fun way to create something unique. Ready to get creative?
Preparation
How to make coasters, preparation is always key to a successful project. Make sure you have read the instructions and have all of your materials ready. Always remember to work in a well-ventilated space and to wear the required protective gear, gloves, and a respirator. Also, cover your work area with a drop cloth or mat to avoid any mess.
When working with resin, it is always best to work in an environment with a warm temperature. 72°F to 74°F (22°C to 23°C) is the ideal temperature to work in. Prepare your mold by spraying it with a mold release product, use your gloved finger or brush to cover the whole surface of the mold.
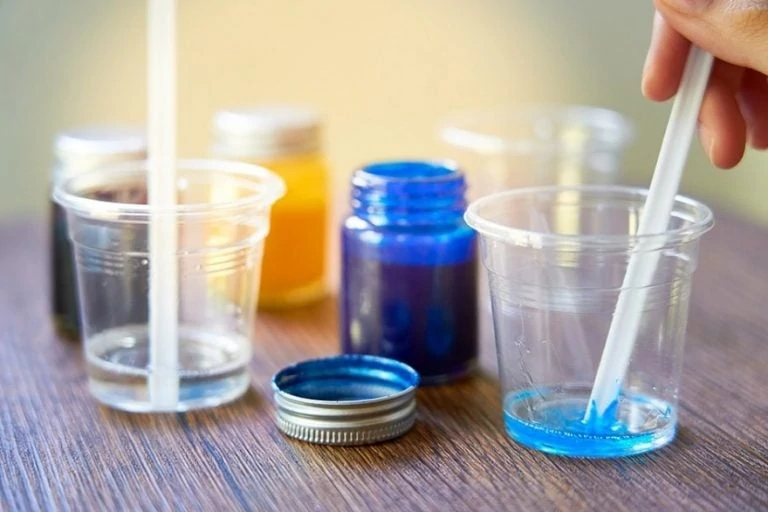
Mixing and coloring Resin
Before mixing. you can take the resin before opening it and place it into a bowl of warm water for about 10 minutes. This helps lessen the number of bubbles in the mixture. Take note, that doing this will also increase the curing time and decrease the amount of time you have to work with it.
Always read the instructions before mixing your resin. The size of the mold as well as if you embed an item, will determine the amount of resin you will need. The rule is to mix equal amounts or a 1:1 ratio of resin and hardener. For example, if you need 100 ml of a mixture, you will need to measure off 50 ml resin and 50 ml hardener.
Use two smaller disposable measuring cups and pour both into a larger cup. Take your mixing stick and stir thoroughly, making sure to scrape the bottom and sides of the cup, which helps reduce the number of bubbles. Stir for about 3-minutes until the mixture appears clear.
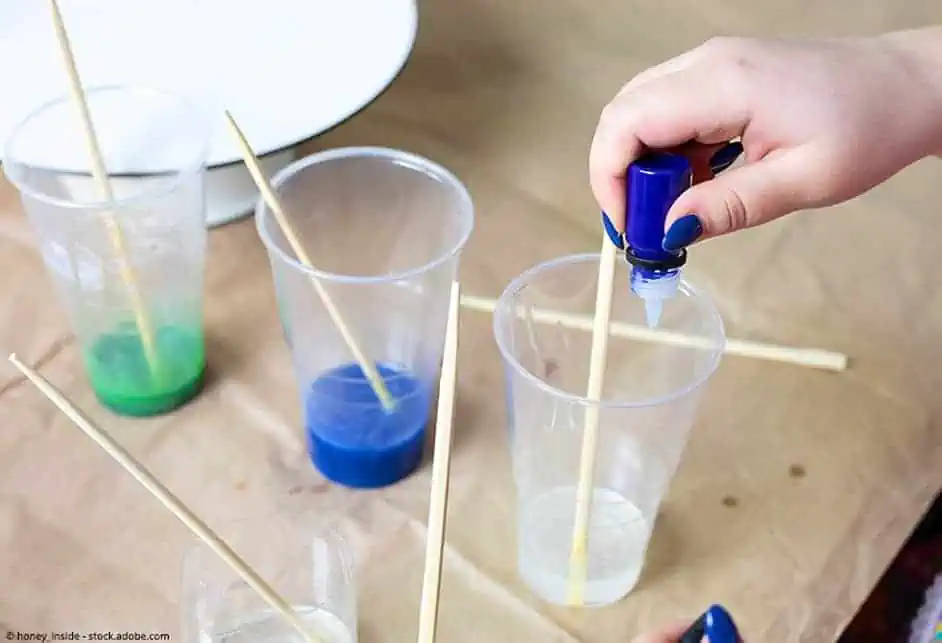
When adding color to your resin, it is recommended you use a color brand that is designed to go with a specific resin. By using another brand of color for your resin may result in different curing times and the color might come out differently than you expect.
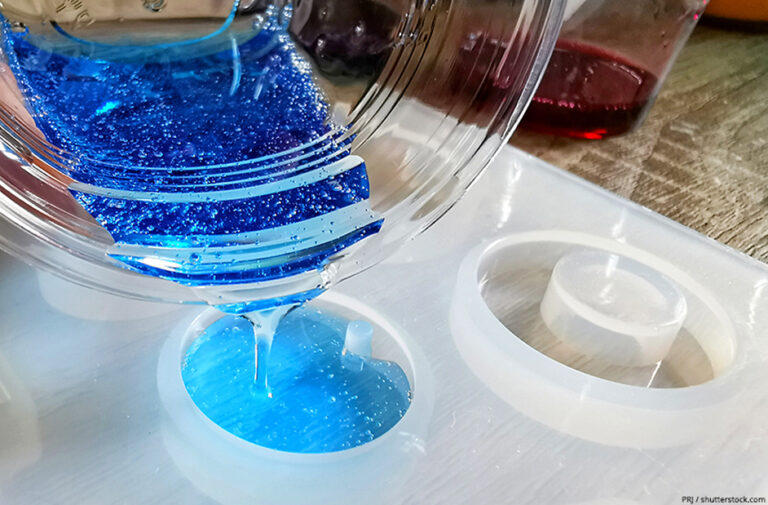
Once you have mixed the resin and hardener you can add your color. Depending on what affects you want, you will need to mix thoroughly to get a solid looking color. There are different types of colorants you can use:
- Alcohol Ink
- Color Pigments
- Special resin dyes
Note: Whatever color you use, make sure to not exceed 6% of the total volume of your resin mixture.
Embed Items
First, choose what you would like to embed into your resin. Flat items like bottle caps or coins are popular choices. Next, when using a silicone mold, you will have to decide which side of the coaster you want to be on the top.
The easiest option is to make the top of the coaster the side which is facing you. You can easily see what you are doing, as you embed the items facing up. Otherwise, if you choose the top of the coaster side, which is closest to the table, you will have to embed your items upside down. This will be the case with a rimmed mold or items that tend to float.
We will be using the first example as we follow the procedure. First, pour a little bit of resin into your mold, this helps to keep your item in place. Next, add a small amount of resin into a separate cup, drop the item you want to embed into the resin, and make sure to coat the entire piece. This helps to prevent any bubbles from surfacing when embedding your object.
Once your object has been coated place it into the thin layer of resin in your mold. Follow the same procedure for other objects you want to embed. Where to place the embed or inclusion items is for you to decide. Add another layer of resin.
Note: Be careful not to move objects around too much, as this will cause bubbles to form. You can also push down any objects with a stick if they decide to float after more resin has been added.
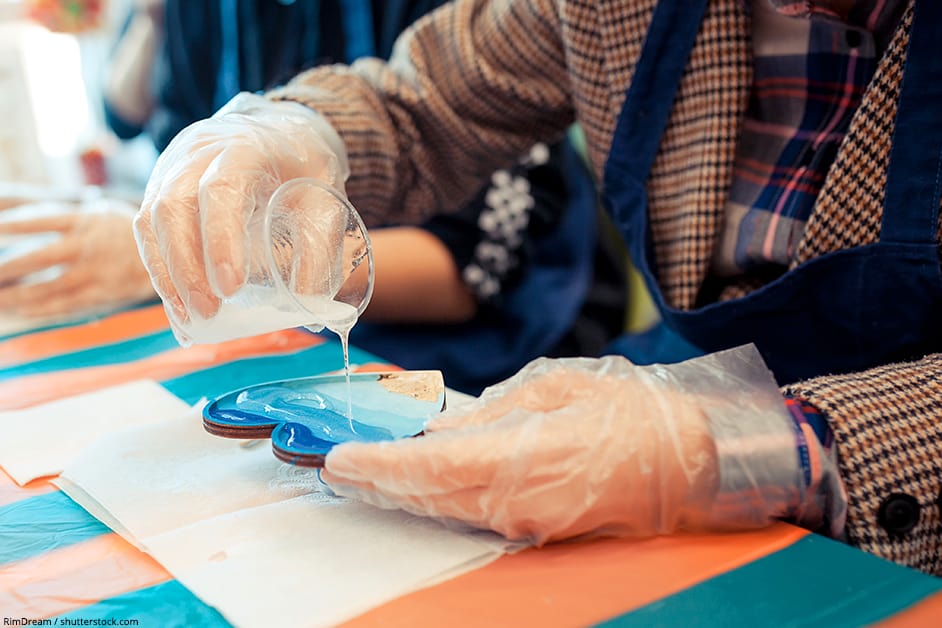
Pour the Epoxy
Once you have mixed and added color, you can pour your resin into your coaster mold. For a coaster, you will be looking at about 1/3 of an inch to fill it up. When embedding items, you will first add a thin layer, covering about 1/8 of an inch. You then add your object.
Once your items have been placed into the resin, you will need more resin to cover everything and fill the mold. Pour until you reach about 1/8 of an inch from the lip, so you do not land up with resin overflowing the mold.
The first involves a single pouring of resin. But you can also do it in two layers. Your first pour would be a small amount of resin for a thin layer, as explained above. You should be able to cover a total of 4 coasters with about 60 ml of resin. You then add your embed objects. Remove any bubbles and allow to cure for about 4 hours. Finally, add your topcoat or layer of resin. A single round coaster should take, in total, about 88 ml to 100 ml of resin.
Get Air Bubbles out of your Resin
You can remove air bubbles with an artist torch or even a toothpick. Once you have added your resin into the mold, you can use the torch to remove any bubbles. Make sure you do not hold the torch in one place for too long, keep moving it around.
Coasters with embedded objects:
- Coat the items with resin before embedding
- Remember and check for bubbles once all items have been placed in the resin
- You can leave the resin for a short time, no longer than 10 to 15 minutes. This brings the bubbles to the surface. Do not leave for longer, as the resin will begin to harden.
Cover and Cure
When you have done pouring your resin, you can leave it to cure. The resin can be handled at about 24 hours, but to cure completely, leave for at least 48 hours, and in some cases, even 72 hours. While it is curing, it is advisable to cover your work so that dust or other floating particles cannot get onto the surface.

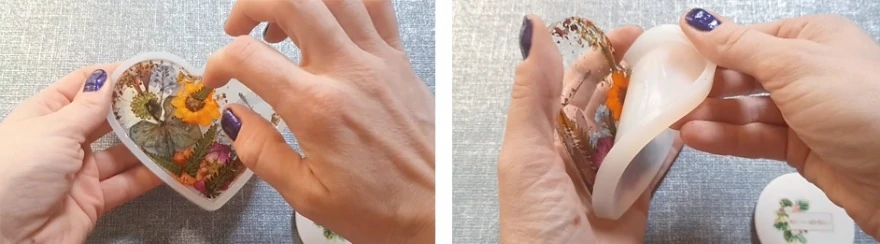
Unmolding
If you notice that the resin is still bendable, do not try to remove it from the mold. By handling it at this stage as it could distort it and leave you with a coaster that is not flat. The silicone molds do not usually pose any problems and the cured resin should pop out perfectly.
Using a mold release product also helps with demolding and extends the life of your mold. Your silicone mold will age over time, becoming brittle and it may eventually rip apart if you do not use the mold release.
Mold Release alternatives:
- Non-stick cooking spray works great as a mold release agent. The spray is non-toxic and will not damage the mold or resin. The fine spray should also not affect the finer details of a mold.
- Mineral or vegetable oil, again mostly recommended for simple molds. Applying too thick a layer could affect the finer details of a mold.
- Petroleum Jelly can also be used for more basic molds that do not have finer details.
- Talcum Powder for more basic molds without too much detail.
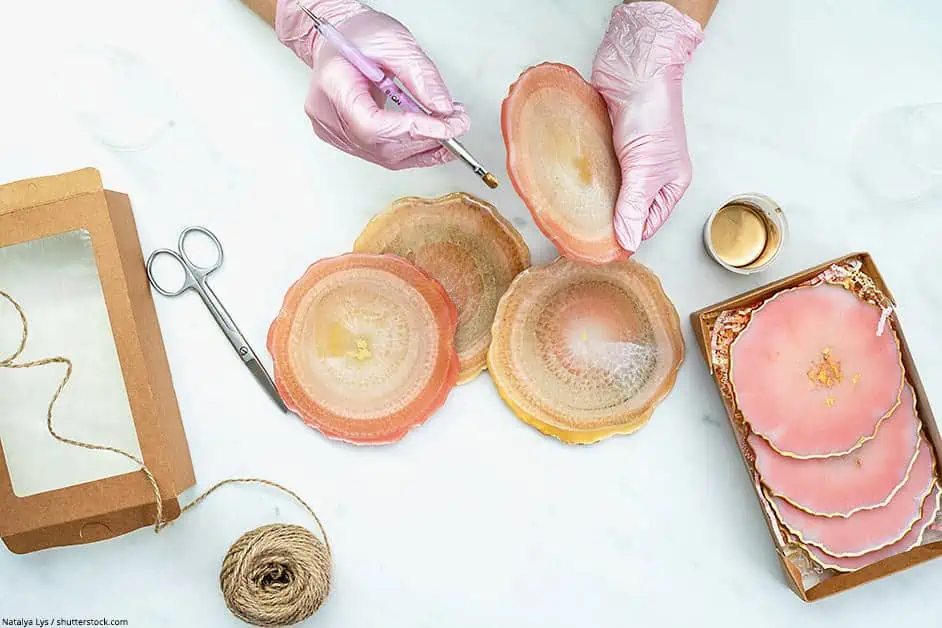
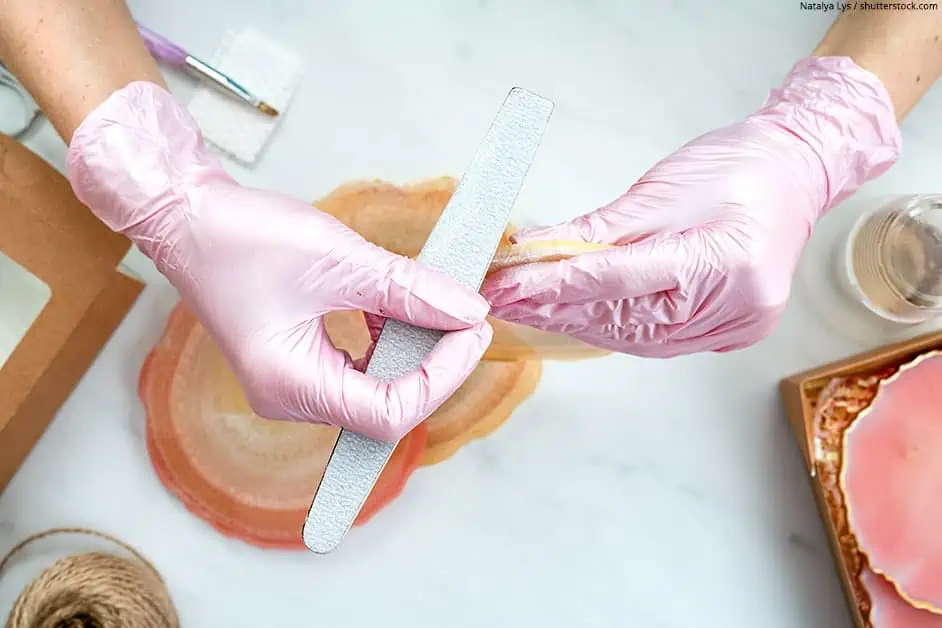
Polishing your Epoxy Coaster
When using a silicone mold, the resin piece in most cases will have a glossy surface after casting. You can easily use fine-grain sandpaper and wet sand the item. You might even be able to leave out the sanding part and only use a resin polish. The polish is easy to apply and provides a lovely gloss finish.
In cases where the casting came out dull or may have light scratches, you will need to wet sand the item. Since a coaster is a relatively small object, this can easily be done by hand. You will need some sandpaper, from coarse 120-grit to fine 3000-grit sandpaper. Since you will be doing this by hand, a sandpaper holder will come in handy. For larger projects, you may want to consider an electric sander and polisher.
You will need some water in a squirt container or spray bottle. Water is needed for this process because heat is emitted while sanding and mainly because it carries away any dust or dirt particles. Some people moisten the sandpaper while others add water to the item being sanded. You work your way from coarse sandpaper to finer in circular movements, each time using water and afterwards wiping the surface clean.
Once you have finished sanding, the surface should be level and all traces of water should have been removed. You can then begin with polishing your resin casting. To get the best and clearest surface, you should consider:
- what type of polish is best
- type of cloth used
You can learn everything about Polishing Epoxy Resin in our in-depth guide. Once done and you are satisfied with the results, you can then finish off by adding bumpers or a cork base to your coaster.
Usage of Resin Coasters for hot Beverages
How to make coasters for hot beverages? When using the normal epoxy resin, it can only withstand up to 150 °/300° F (65.5°C/148°C) for a short time, before it begins to warp or distort. So, when it comes to a resin coaster, hot coffee cups are not a good idea. You will have to purchase a Heat Resistant Resin.
- Cures in 24 hours, self-leveling
- Heat resistant up to 425°F, crystal clear and UV stable
- Scratch-resistant, food-safe, zero VOC's
Depending on what make and manufacturer, you can get heat resistant resin that can withstand up to 600°F (315°C). One of the more popular heat resistant resins on the market, which can be used with silicone molds is the Resin8 heat-resistant epoxy resin. This resin is safe for home use and can withstand higher temperatures.
Inspirations for different Types of Coasters
There are many ideas for resin coasters, as you can embed all kinds of things in resin from plastic to metal, clay, and glitter. You can also combine various elements to create something more unique.
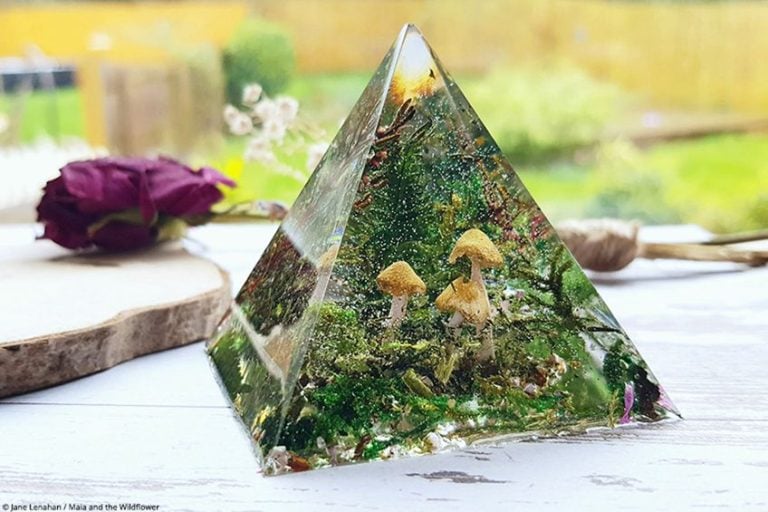
When it comes to items like real leaves or flowers that contain moisture, it is best to avoid these. The moisture can react with the resin and this can then turn brown. As an alternative, you can use dried flowers.
Ideas for your DIY resin coasters:
- Shells
- Coins
- Bottle caps
- Photos
- Clockwork pieces
- Paper
- Buttons and Beads
- Mosaic tile pieces
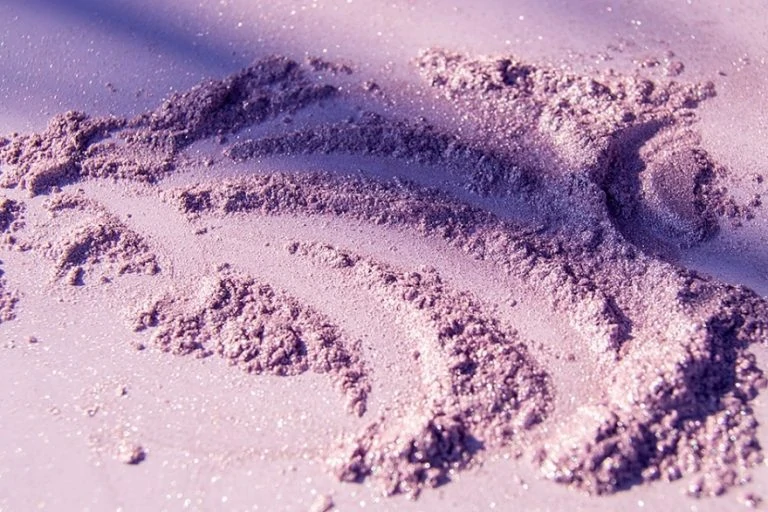
- Stones and sand
More Inspirational DIY Resin Coasters
There are numerous colors, glitters, and paints you can use to create with as well as a variety of mold shapes available for resin coasters. These inspirational DIY resin coasters will impress your guests.
Ocean Beach: Want to create some epoxy coasters for your beach house? These are simple to make and come out looking like you have captured some of the ocean and beach. Using resin dyes and pigment, you can create the blue ocean and waves as part of the coaster. The other part is simply some beach sand mixed into the resin.
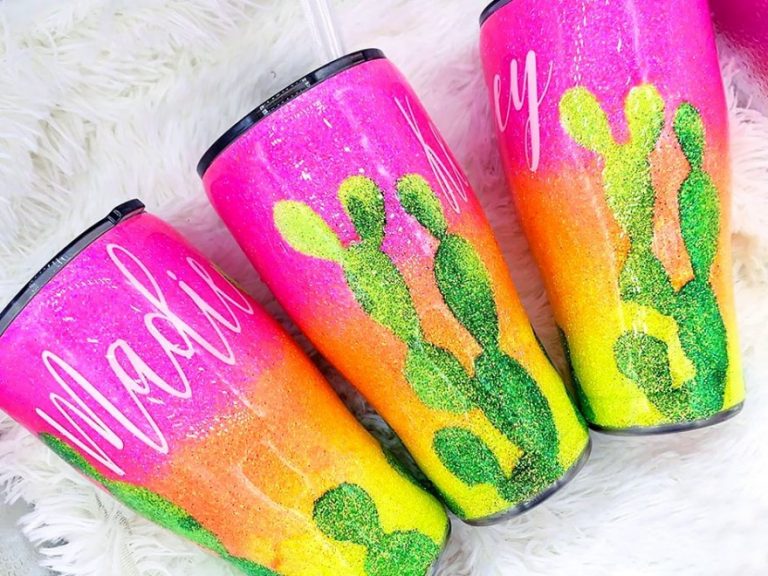
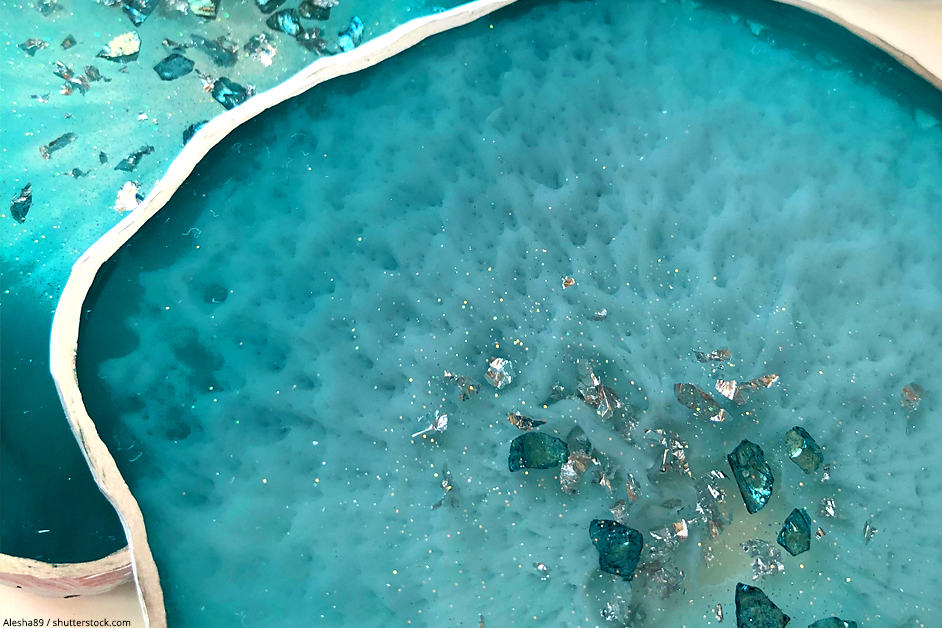
Galaxy Epoxy Coasters: Using resin, colors, and glitter you can create these amazingly beautiful glittery galaxy coasters.
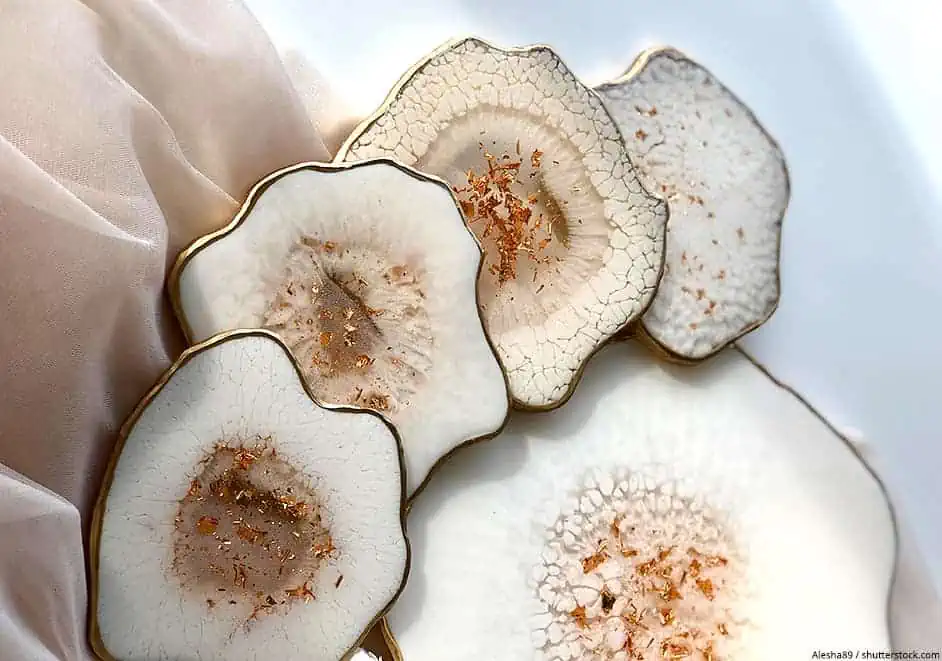
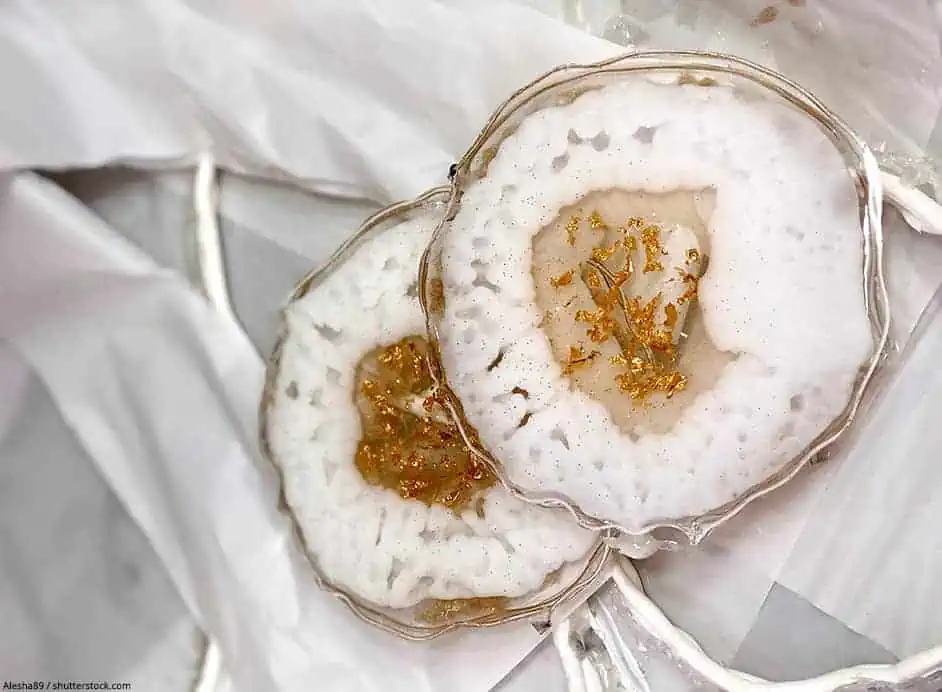
Geode Coasters: This type of coaster seems to be popular. The coaster resembles a geode crystal and you can create a variety of colors and effects, especially with some glitter. There are specifically shaped geode molds available for this. You can even create a puzzle geode, where there are four separate pieces to the mold which come together to form a single circle.
Foil and Resin Epoxy Coasters: You can use different resin pigment colors and a piece of foil added into the mix creates a more textured appearance.
Natural Piece Coasters: take a natural round or square piece of wood, rock, or metal. These are not embedded into the resin but are given a resin layer to protect and preserve the piece.
Resin Petri Dish Coasters or Alcohol Ink Coasters: The alcohol inks react perfectly with resin, it creates amazing patterns and blossoming colors. The white alcohol ink is particularly important as it is heavier and can, therefore, create deeper layers when used with other color inks within the resin.
Wooden Coaster basis: you can purchase ready-made non-drip wooden coasters that have a rim around the edge. The resin can be poured onto the coaster without dripping over the sides. You can easily create different colors and effects.
River Epoxy Coasters: This is similar to the river tables, just on a much smaller scale. You can use live edge wood for this if you want, but there are also special coaster molds available that will create the same effect.
As you can see, when it comes to resin coaster ideas, you are only limited to your imagination.
Take a look at our resin coasters tutorial webstory here!
Frequently Asked Questions
What is a Resin Coaster?
Simply, you are using a resin which is then poured into a mold to make a coaster. The coaster helps to protect your tables when placing glasses or cups onto them.
What Materials do you need to Resin Coasters?
When attempting this project, you will need a few materials. You can also purchase a resin kit, which should have most of what you need. Otherwise, here are the materials you will need for your resin coasters.
How to make Resin Coasters?
How to make coasters, preparation is always key to a successful project. Make sure you have read the instructions and have all of your materials ready.

In 2005, Charlene completed her wellness degrees in therapeutic aromatherapy and reflexology at the International School of Reflexology and Meridian Therapy. She worked for a company offering corporate wellness programs for several years before opening her own therapy practice. In 2015, she was asked by a digital marketer friend to join her company as a content creator, and it was here that she discovered her enthusiasm for writing. Since entering the world of content creation, she has gained a lot of experience over the years writing about various topics such as beauty, health, wellness, travel, crafting, and much more. Due to various circumstances, she had to give up her therapy practice and now works as a freelance writer. Since she is a very creative person and as a balance to writing likes to be active in various areas of art and crafts, the activity at acrylgiessen.com is perfect for her to contribute their knowledge and experience in various creative topics.
Learn more about Charlene Lewis and about us.