Resin Geode Art DIY (Free Form Style)
This post may contain affiliate links. We may earn a small commission from purchases made through them, at no additional cost to you.
With this tutorial we want to show you how you can create impressive, sparkling Free Form Resin Geodes yourself. We will show you step by step how you can easily cast these luxury unique resin geodes with the help of silicone and which supplies you need for it. Here you will get all the information and we will show you what you should pay attention to so that your resin geode wall art will succeed.
What is a Geode?
Natural Geodes
The term “geode” (Greek: γεώδης, geōdēs for earthy) comes from geology or mineralogy and describes a round hollow space in rock, which is occupied by geological processes with minerals and crystals. Geodes are mostly formed in volcanic lava rocks which, after cooling, contain gas bubbles. When hot water with dissolved quartz penetrates these cavities, the crystals can grow and depending on the added trace elements, take on the different colors of the smoky quartz or the amethyst.
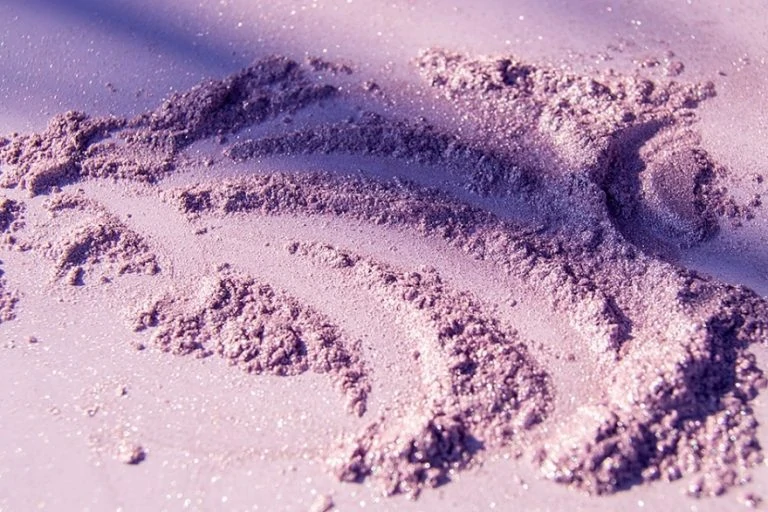
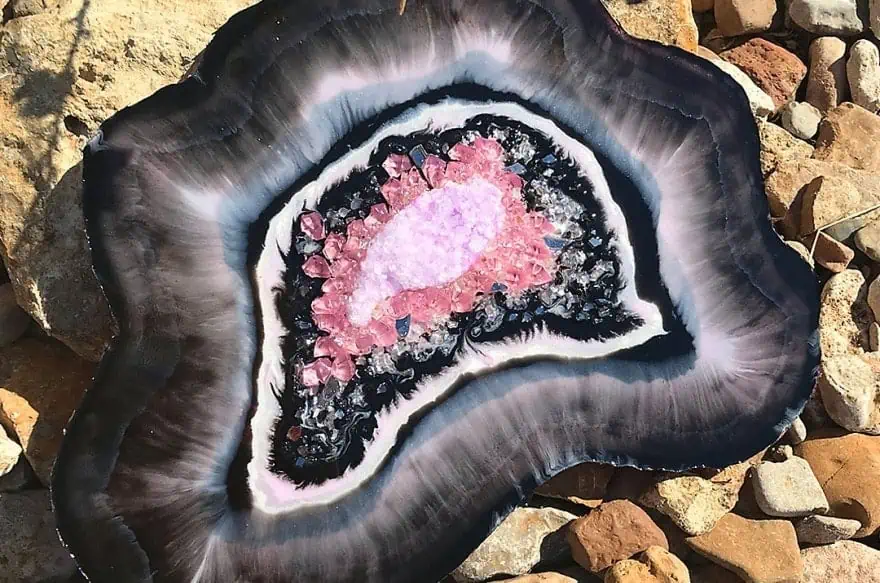
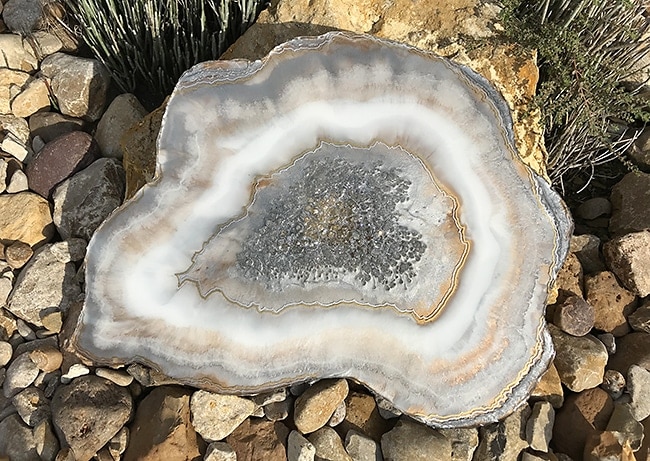
Geodes can also contain other types of minerals, e.g. amethyst, quartz, agate and jade. Finding geodes is not easy, most of the time they are spherical or almond-shaped stones and can hardly be distinguished from the surrounding rocks. They only reveal their sparkling inner life after impacting or in cross-section.
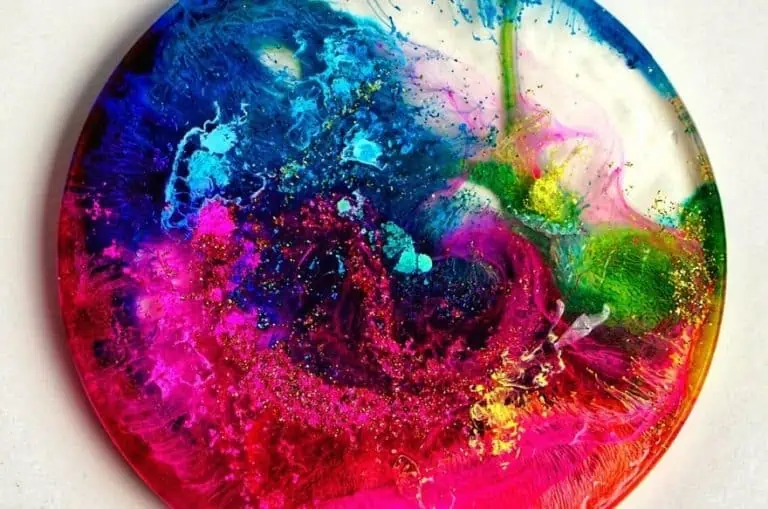
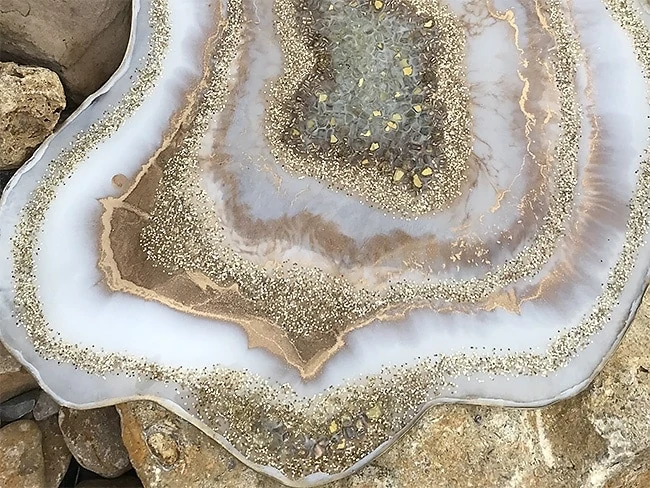
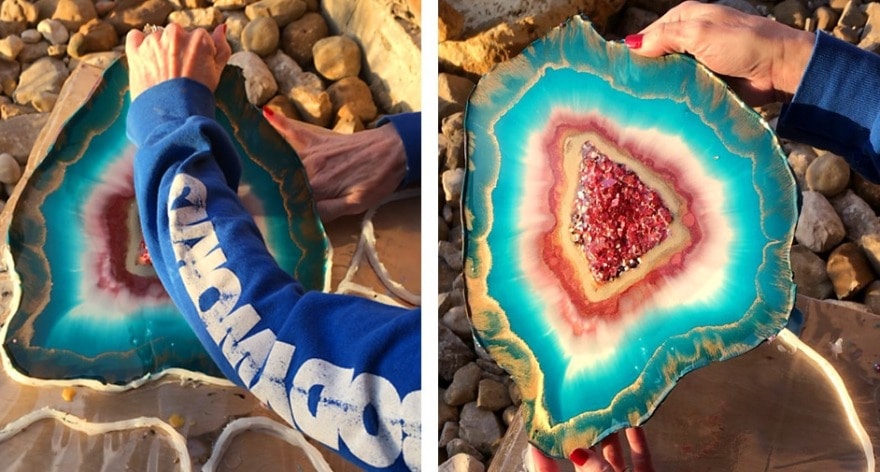
Resin Geode Wall Art
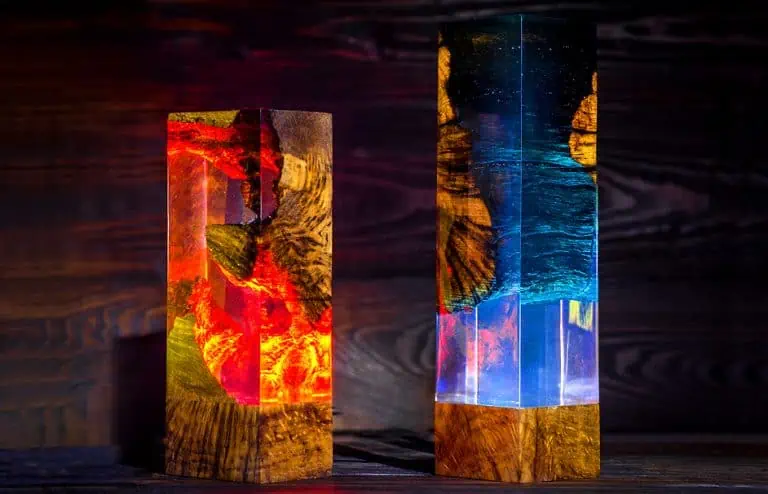
Inspired by the natural geodes, you can now create beautiful geodes with resin, deco stones, glitter and of course real crystals and minerals. There are no limits to your imagination and the “geode imitations” made of resin look with a little practice deceptively similar to the real minerals from nature. Of course, you can also cast resin geode wall art on a suitable painting ground or, as in our case, as a free form. Such free-form geodes can also be processed wonderfully e.g. to tables etc. or you can use them as fancy coasters.

Supplies you need for your Resin Geode Art
Most important: Suitable Epoxy Resin and Pigments

- High-quality crystal clear Table Top Epoxy
- 100% Solid Material with no VOC and solvent additives
- When mixed using a 1:1 ratio
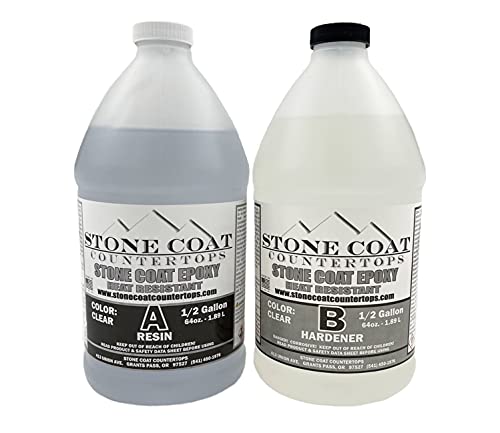
- Cures in 24 hours, self-leveling
- Heat resistant up to 425°F, crystal clear and UV stable
- Scratch-resistant, food-safe, zero VOC's
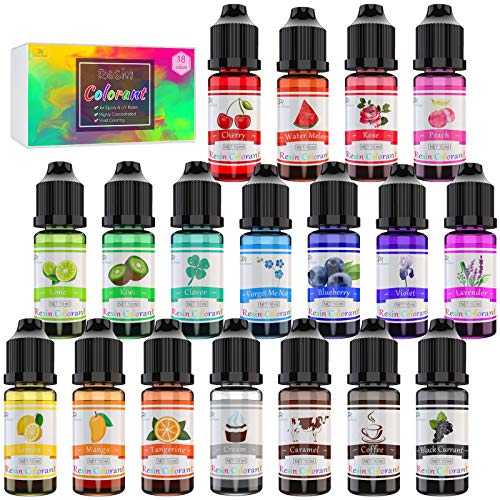
- 18 colors ar carefully-selected for resin art projects, no preparation is required
- High concentration, just a drop and you will be amazed by the strong dyeing effect
- Non-toxic, no harsh chemicals, cruelty-free
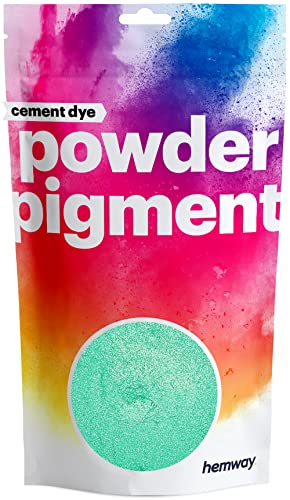
- Hemway has one of the largest ranges of pigment powder dyes
- You can simply mix this slowly into resin until the desired ratio is reached
- Colorfast and lightfast, so your works will still shine brilliantly even after a long time
Make it look realistic with Stones, Crystals and Glitter

- The glitter additive from V1rtus is very well suited for use with resin and is available in many different colors
- This glitter powder is colorfast and does not fade

- Colored Mica Flake collection, 12 pcs
- Perfect for resin casting, hot melt craft, mosaic work, paper arts, assemblage accents, etc.
- Package contains 12 x 3g jars of mica colors and one little dipper for scooping
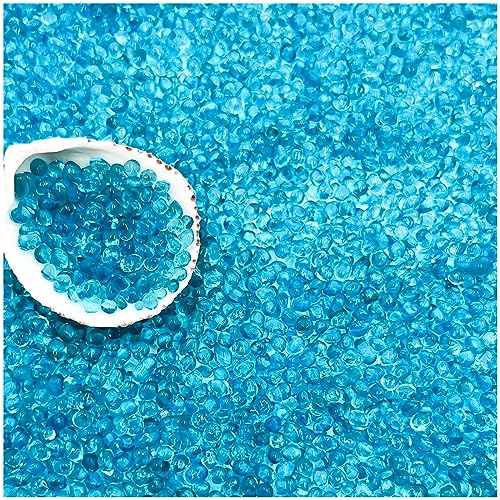
- Add decorative stones to add shimmering or realistic accents to your resin paintings
- Weight: 2 pounds, about 1000 gram., stone size: 1 – 3 mm
- Material: glass sand, Volume: 0.22 gallons, colorfast, non-toxic
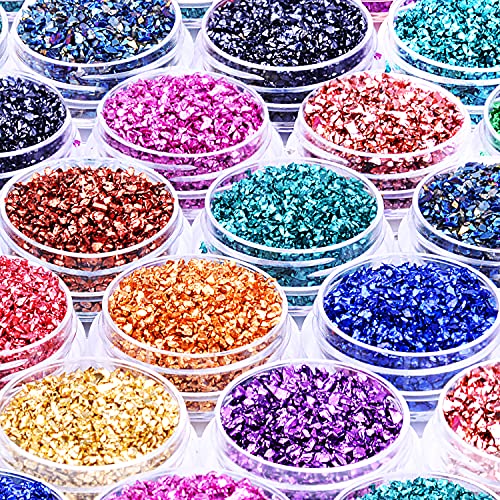
- Includes 12 boxes crushed glass in various colors
- Fade, melt, break or deform, rust, and corrosion-resistant
- Suitable for nail art, cast resin, artwork, vase fillings, and more
Tools and other Materials
- Reference Photos of Natural Geodes
- Vinyl Shower Curtain
- Packaging Tape
- Hard Board
- Marker for draw the form
- Silicone sealant caulk
- Caulking gun
- Dish Soap
- Marker for Accents
- Plastic Mixing Cups & Stir Sticks
- Heat Gun
- Butane Torch
- Level
- Gloves
- Respirator
- Eye Protection
Dedicated Course on how to learn Resin Geode Art

![]()
Course: How To Make Free-form Resin Geodes and Agate Slices![]()
- Two ways to make a mold for your resin
- How to work with resin safely and the basic supplies and tools you will need
- How to build up layers of resin to give your piece depth
- Three different finishes for the edges
- How to add extra fine lines and definition
- Three ways your final artwork can be displayed
A course for resin beginners looking to create amazing geode-inspired free-form resin artworks.
Get the Resin Geode Course
How to make a Resin Geode
Surface Assembly
Before you can start casting your geodes in Free Form Style, you must first prepare a suitable substrate. We recommend a transparent vinyl shower curtain, which we apply to a hardboard surface.
- Take your clear vinyl shower curtain and cut a section slightly larger than your hardboard surface. Secure it to your hardboard with packaging tape (this will be removed on one edge at a later point). Remember, the vinyl may have creases and wrinkles but that’s okay.
- Now draw your desired geode shape with a marker using the reference photo.
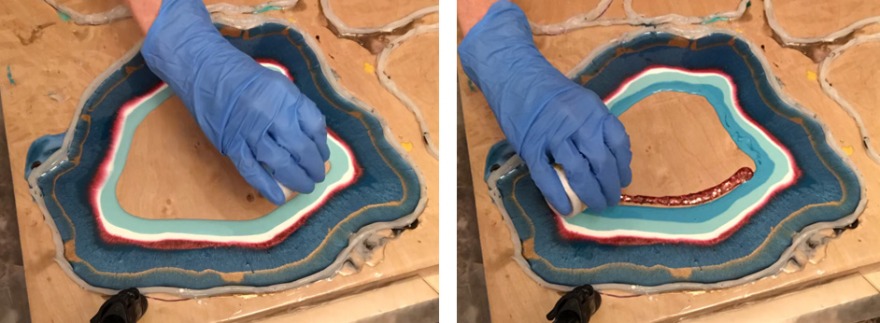
- Following your drawn form, place a line of silicone sealant around your geode with the help of a caulking gun. Wait about 5 minutes and add another layer of silicone on top of the first one. If you want your geode to have a cavity in the center, you can apply a boundary with silicone in the middle (same shape as the geode, only in small size). In our example the geode is closed in the center.
- Wait another 5 minutes and moisten a gloved finger with dish soap. Now, smooth out the inside surface of the silicone with with your soapy finger. This is therefore necessary so that your geode later has as even an edge as possible without sharp edges.
- Two layers should be enough depending upon your project. If you’re preparing your mold for a large piece like resin geode tables, you may need several layers. So that the geode has the necessary thickness or stability. Your mold will be ready for use in approximately 45 minutes.

- Steel half-barrel frame caulking gun for 1/10-gallon cartridges
- Thrust ratio of 10:1 for use with low viscosity materials
- Rod retracts after each pull of the trigger to help prevent dripping
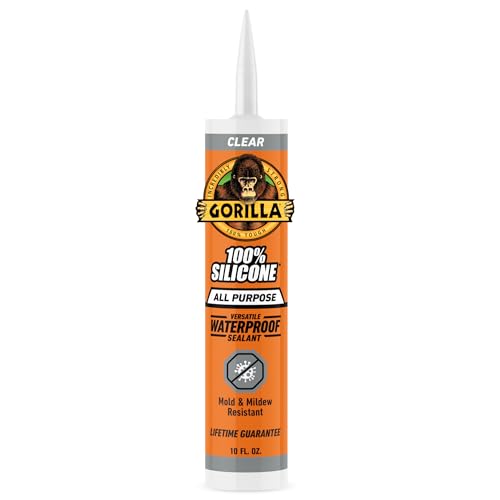
- 100% silicone sealan, dries translucent clear
- Optimal for sealing gaps or cracks between two surfaces
- Indoor/outdoor; 100% waterproof, won't yellow, shrink or crack

Resin Preparation
Prepare your resin according to the packaging directions. We prefer Stone Coat Countertops Resin, 1 part epoxy to 1 part hardener. Now, separate your resin into individual paper cups according to the number of colors you have chosen for your geode and mix in the colored pigments. We prefer using various brands of pigment pastes and pigment powders. Also, added glitter or mica flakes to your resin is another way to add some interest and texture to your geode.
Pouring Your Free Form Geode
One of the most important tips we can give you is to make sure your surface is level. So, using your leveling tool, check every angle including diagonally. You can shimmy the board with your stir sticks if you need to. Now you’re ready for the fun part.
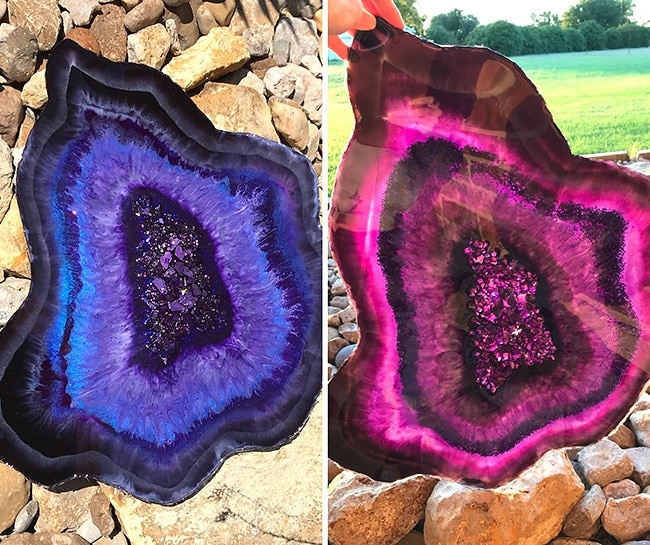
- Working from the outside in, start layering each color of resin until you’ve reached the center alternating colors and opacities.
- All the while heating the resin with heat gun or butane torch to encourage the release of any bubbles. Be careful not to heat your resin too much as this will cause the plastic to warp and mess up your work.
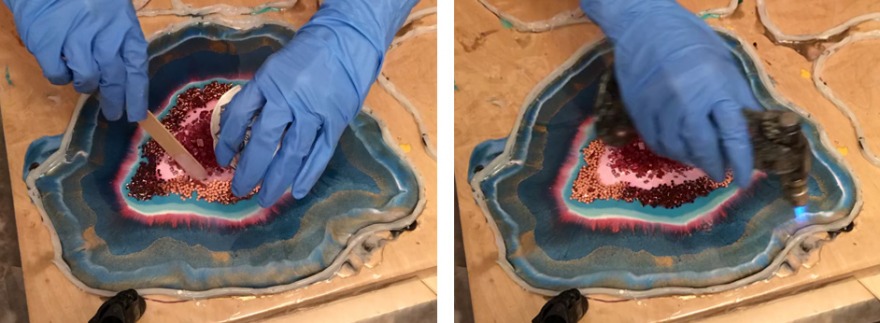
- Layer one is only the preliminary version so don’t worry if it isn’t perfect, you won’t see any imperfections after layer two.
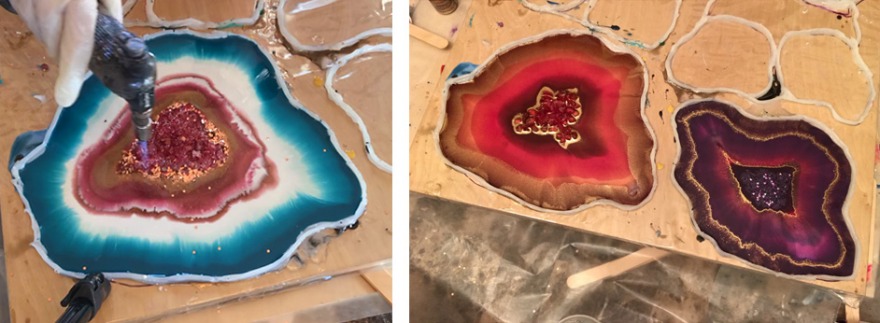
- Now that your center point is established you can add mirror glass pebbles, mica flakes, deco stones, or crystals.
- Layer one is complete and needs to cure prior to layer two. (depending on brand and type of resin, it takes between 4 and 24 hours to cure). The idea of layer two is to fix anything you dislike.
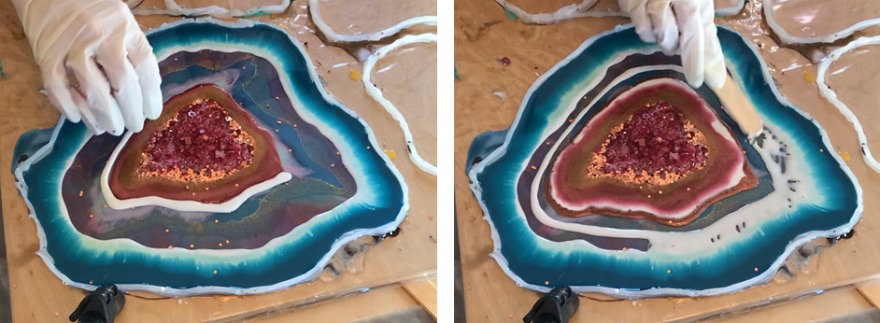
- So, only apply transparent tints to the areas you already love. If you are satisfied with layer one, then simply add a clear layer. However, we recommend that you also use colored resin for the second layer, as this will further enhance the color intensity and depth of your geodes.
- Depending on your taste, you can now also add further 3D elements such as mirror glass pebbles, decorative stones or crystals.
- For an easy way to store your art in a dust-free zone, turn a storage container upside down and place it over your art. WaLaa – you are now a geode artist!
Unmolding
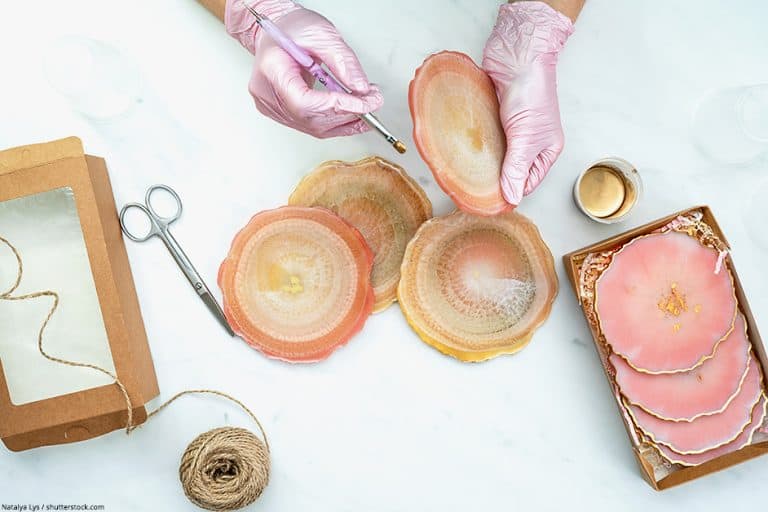
To allow your geode to set up completely, we recommend waiting for 24 hours. Once your resin is set, remove one of the edges of tape so you are able to place a hand behind the vinyl. Now, gently pry away the silicone from your geode careful not to pull the silicone from the vinyl. Press against the silicone border if you need to while following along the edges of the geode on all sides until it’s free. The edges of your geode may be sharp so be careful not to cut yourself. Sharp edges can be sanded off with sandpaper, if necessary, as soon as the geode has been fully stocked. Optionally you can add accents to your finished geode with a special marker pen.
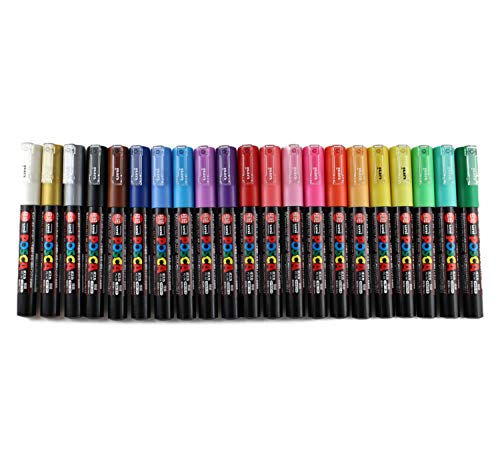
- POSCA is a paint marker popular with artists and creative hobbyists.
- You can use it on almost any surface
- 21 bright colours with gold and silver, optimal for adding details to your resin artwor
The mold can be reused over and over as long as the silicone still adheres to the vinyl. If a section has become loosened, simply cut this portion out and reapply the silicone caulking to this area.
Always take a look at your health: Wear a respirator and Nitrile Gloves when working with Epoxy resin!
Video Tutorial Resin Geode Art (Free Form Style)
To make the whole thing a little more vivid, we have also created a video tutorial for you:
We wish you lots of fun and good luck with your first Free Form Geode! Most importantly, have FUN! Happy Geoding!
A detailed list of supplies, a tutorial for your first steps in resin art technique and a tutorial for resin paintings with textures can be found in separate articles. If you like to work with wood, you’ll find a tutorial about Epoxy resin for wood and about creating an epoxy resin river table.

FlatLand Artistry is the mother-daughter duo of Christi and Madison. Their passion for resin geode art comes from their love of nature and the outdoors. Christi once owned her own faux painting business during its craze and incorporates that knowledge into her art today. Madison is a certified welder and is in the process of designing steel sculpture stands for the display of their geode art. Madison is currently expecting her first child and will soon be moving to Texarkana with her new baby, husband, and 3 step-children. Christi is happily married and has two other children and a stepson. Artists who have had a huge hand in inspiring FlatLand are Mitch Gobel, Crystal Ma, Liza Vaughn, and Karen Cain. FlatLand Artistry is currently open for commissions and their art is for sale.
Learn more about FlatLand Artistry.