How to Draw Hair – Easy Method for Depicting Hair Tutorial
This post may contain affiliate links. We may earn a small commission from purchases made through them, at no additional cost to you.
Learning how to draw hair or drawing hairstyles is simpler than one may imagine. The core principles of hair drawing is fairly straightforward. Do not approach the task with the idea that you should draw each strand individually. Instead, if you draw hear as one overall shape, then it only takes a few pen or pencil strokes to create a head of hair. Both a pencil and a pen can be used in this lesson on hairstyle drawing. When creating a hair drawing, it’s crucial to keep in mind that creating the illusion of hair involves understanding it as a collection of larger volumes, more than little lines. We want to keep this concept in mind as we work through this lesson on how to draw realistic hair from beginning to end.
Our Guide on How to Draw Realistic Hair
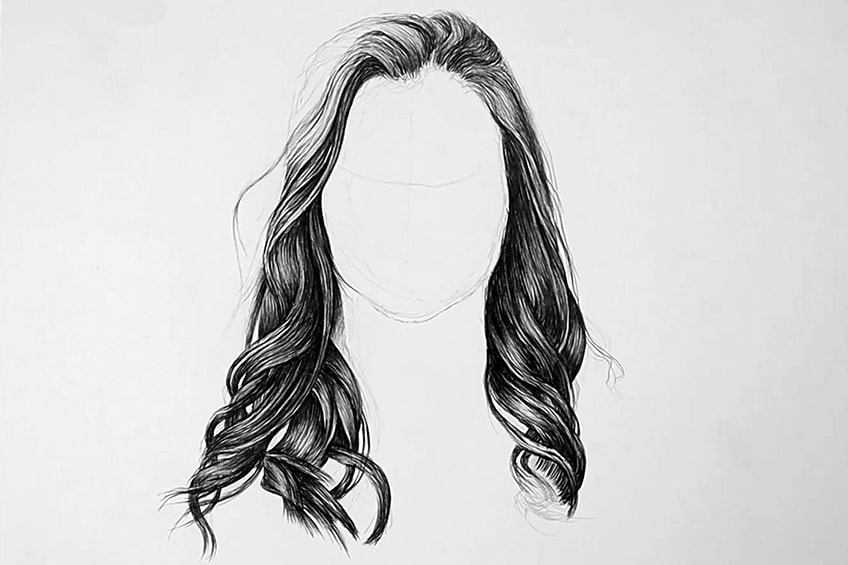
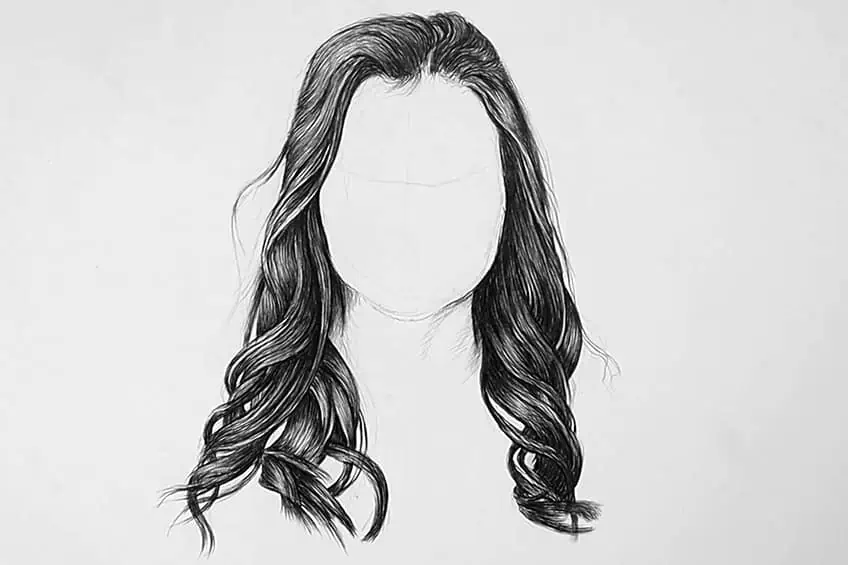
We will create a drawing of a beautiful head of flowing hair in this lesson. If you want to hone your ability to tone hair, then keep in mind that this will one one of many different hairstyles that you can recreate in your drawings. In this tutorial, we’ll sketch a woman with long wavy hair. For our model we will use a reference image that can be printed or accessed immediately from a smart device. Drawing a variety of hair styles and textures is a very useful activity for improving your general portraiture sketching skills. In addition we will be honing our pen shading abilities, as we work through the various steps required to take our drawing from a loose set of lines to the illusion of a full voluminous head of hair.
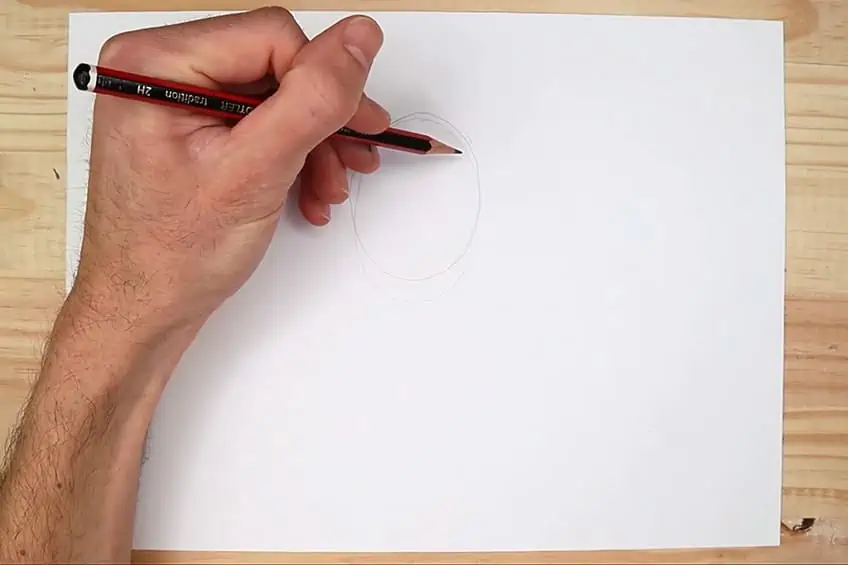
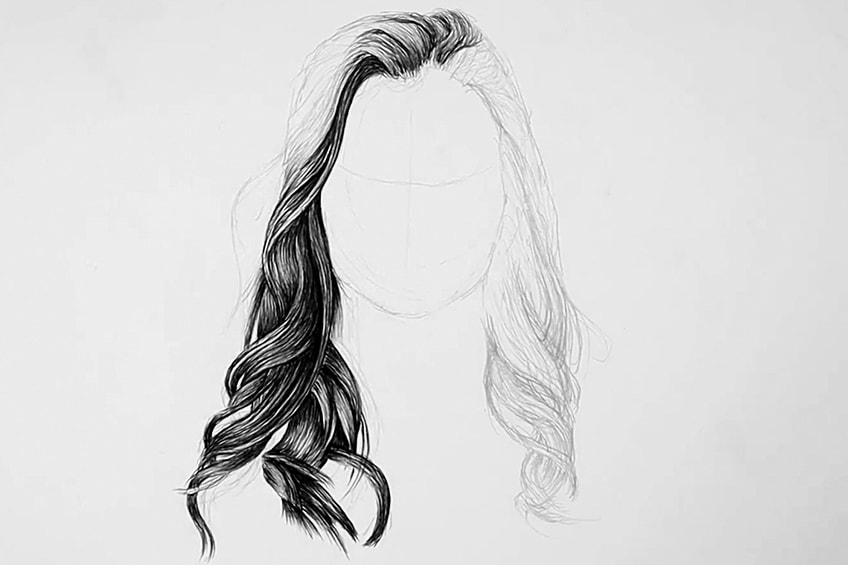
Step 1: Creating the Shape of the Hair
We will start by laying out the overall structure of the hair. To do this, create an oval with an H pencil that corresponds to the shape of the face of your model in your hair drawing reference. We will gradually outline the oval shape to mimic the contour in the face in the reference image.
Using the facial contour as foundation, start to sketch the hair to create the overall form of your hair drawing. While you are still finalizing the form, take care to keep your pencil marks very light.
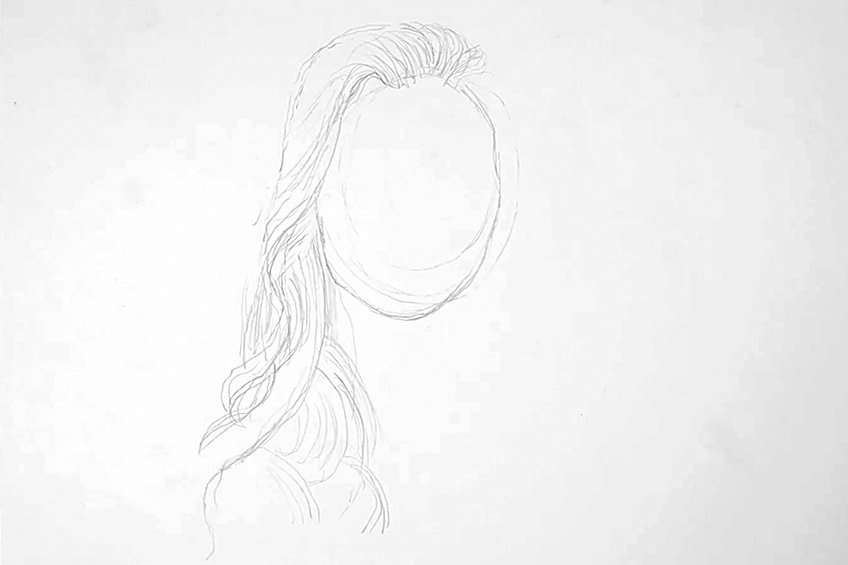
If you look closely at your reference image, you will see that when viewed as a shape, hair appears not as individual strands, but as sections divided into into several parts. As you proceed, carefully and gently outline these different areas with your pencil.
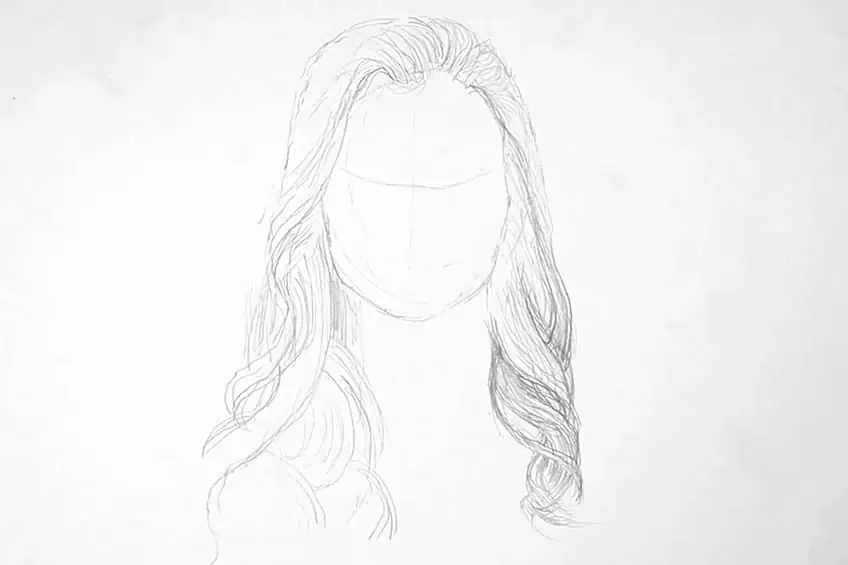
Consider the regions of the hair that provide a contrast between its lightest and darkest points by closely observing your reference picture. Contouring is very important when learning how to draw realistic hair, so take your time with this part of the process.
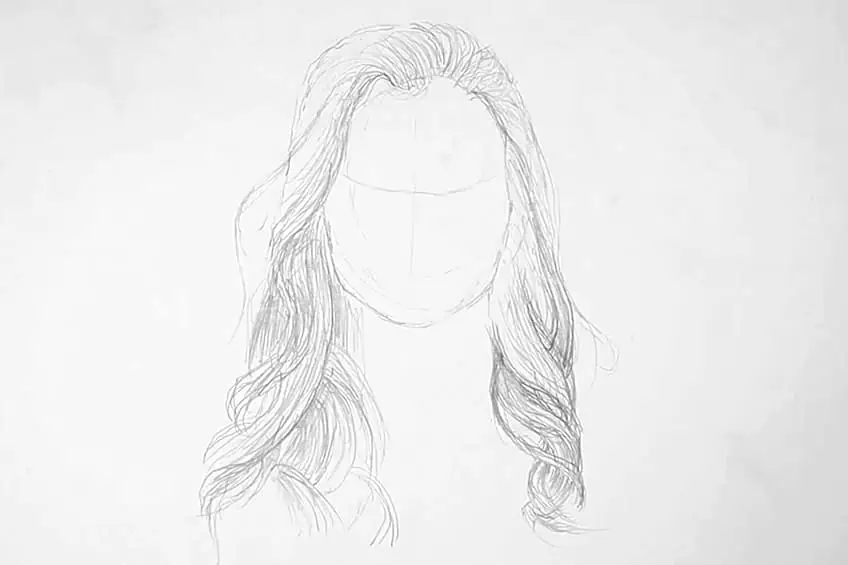
Once you have delineated the entire shape of the face and hair, you can take your pen and following the pencil strokes as closely as gently as you can, start to create your pen drawing, lightly shading selected areas as you go. Do not go too dark too soon, as it is easier to add dark tones than to remove them when drawing with pen.
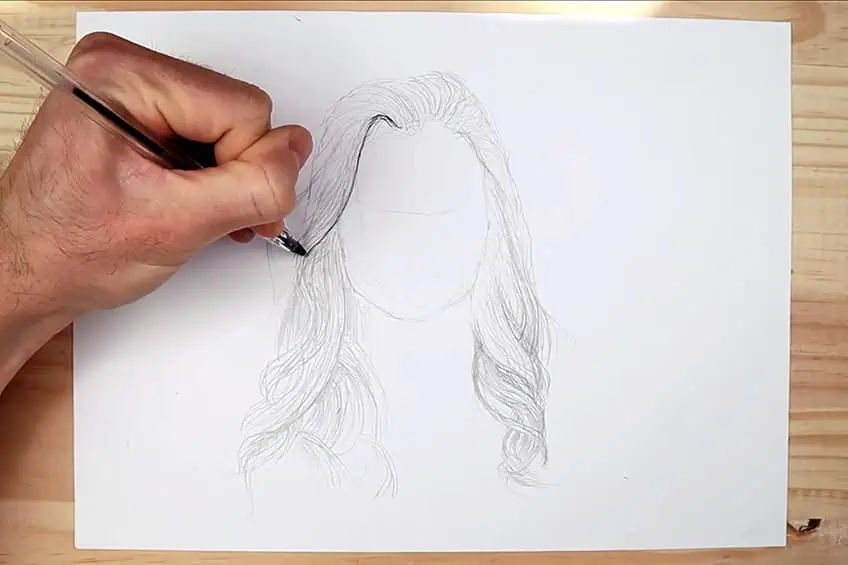
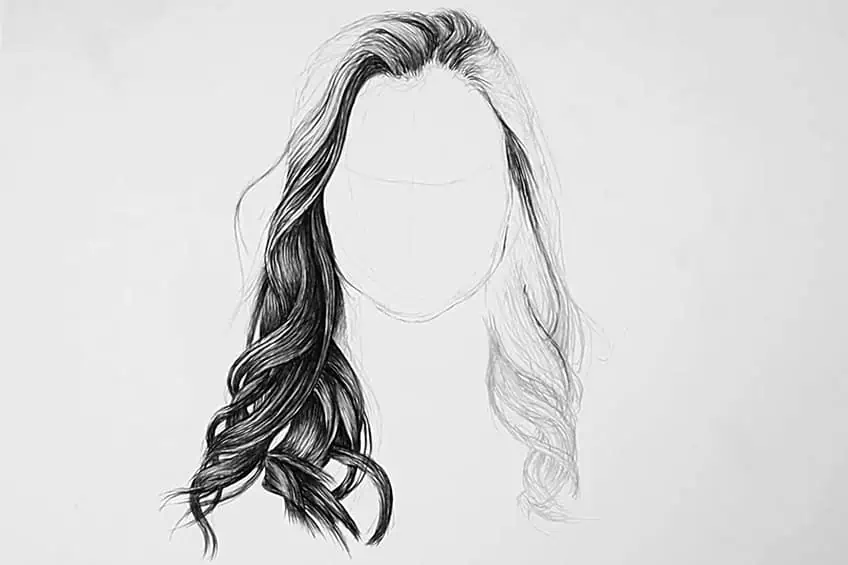
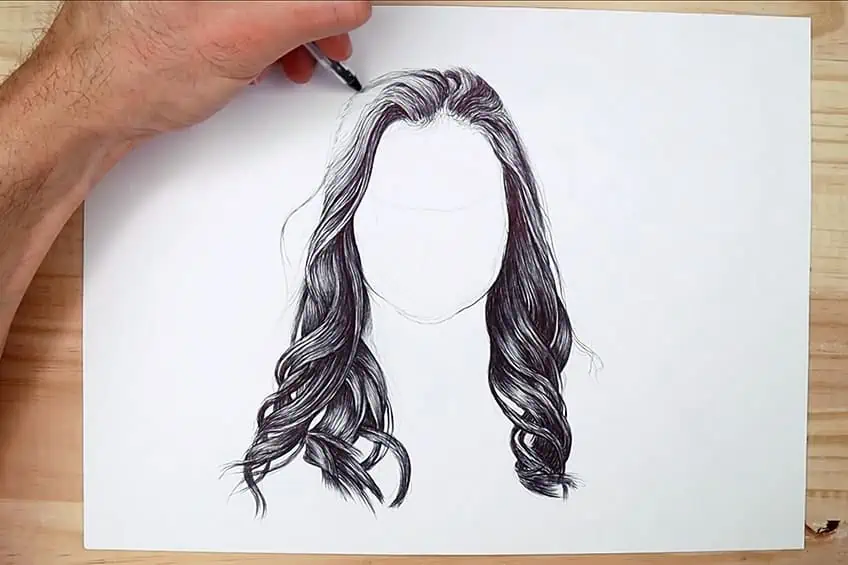
Step 2: Adding Shading to the Left Side
Take a minute to review your reference image one more before we start drawing and shading with a pen. Think over the different shadows in the hair. As can be seen, shadowing appears in small patches that appear to be inside the hair, as if one could see through the top layer of hair. Then there are times when the hair is tightly packed, making it impossible for us to see through it. We’ll start by shading the regions where we can observe the shadow using your ballpoint pen.
Be patient when using a pen to draw hair. We don’t want to darken all of the hair at once, but to proceed with extreme caution and constantly refer to the reference image. Start by applying these marks gradually, allowing your pencil marks to serve as a guide. Keep in mind that hair is simply a collection of lines that are flowing in one direction. Therefore, ensure that your marks lie in the direction that the hair is falling. Once more, pay attention to the overlapping areas where a section of hair lies below another and is bunched together with a wave-like action.

To determine which areas should be shaded and which should be kept light, pay attention to how light falls across the hair. For example, areas that lie below other sections of hair will not be exposed to as much light and will therefore be darker. Remember to keep your pen strokes light, only occasionally switching to heavier strokes in the darkest parts.
It’s a rather straightforward process to learn how to apply light and shade using a pen, but at times it could seem repetitive. An excellent idea is to take a break, relax for a bit, and then return to drawing with a renewed perspective. Taking a break allows us to reassess the artwork. One good trick is to look at your image from a slight distance in a mirror. Any mistakes in proportion and shading that you did not notice will suddenly jump out at you. Another really important aspect to pay attention to is to become acutely aware of how much pressure you should apply to achieve different tones in pen. Lighter strokes require a lighter touch, whereas darker ones require greater pressure. Draw with a light hand most of the time.
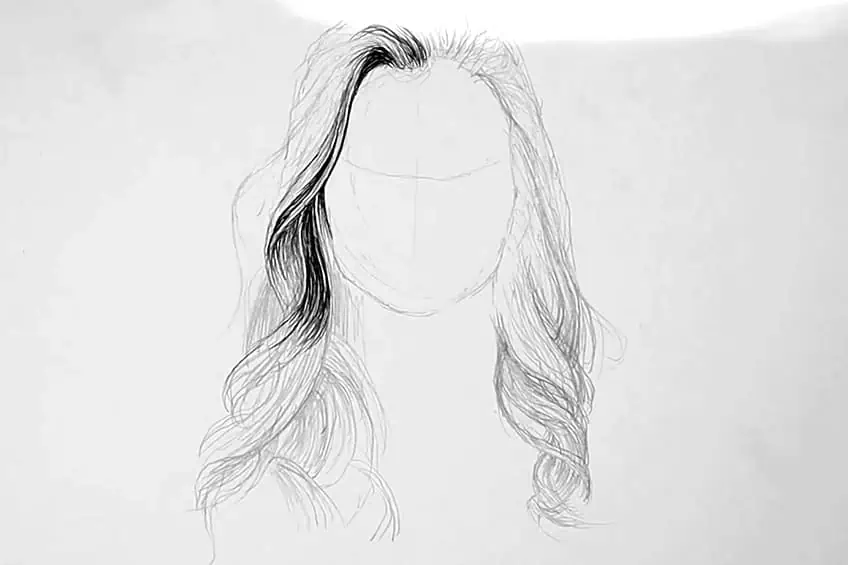
Having said that, there should be a few points in the hair where the layers thicken and then become thinner again to demonstrate the thickness of the hair and the many curls of hair that are hidden behind the layers that flow in front. The pen should be pressed more firmly during this motion. Once again, pay close attention to your reference image to guide you.
As we concentrate on the hair tips, damaged hair normally has split ends. The hair does typically split in different ways, yet there are times when it is trimmed straight. With a hand motion for the splits and a delicate line drawn to a tip for the straight-cut moments, we can produce a range of these traits. Accentuating these minute details is essential for drawing life-like hairstyles.
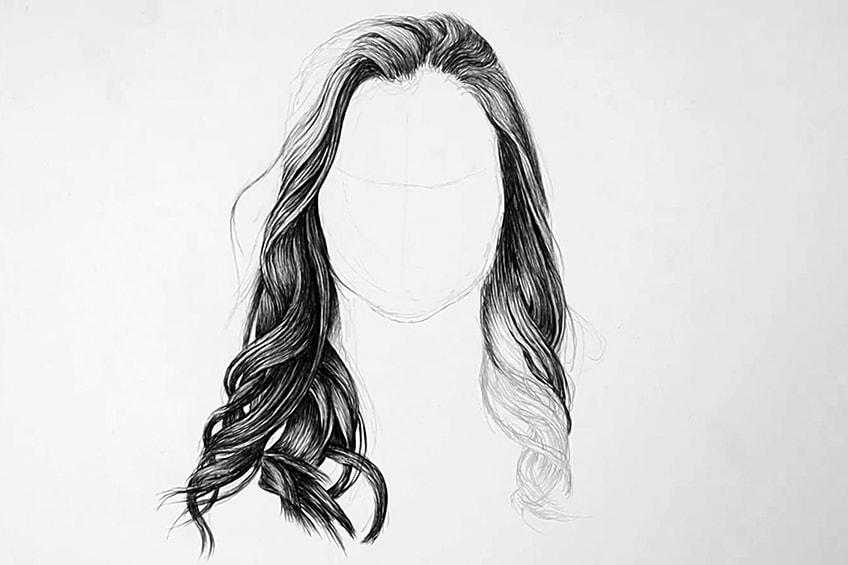
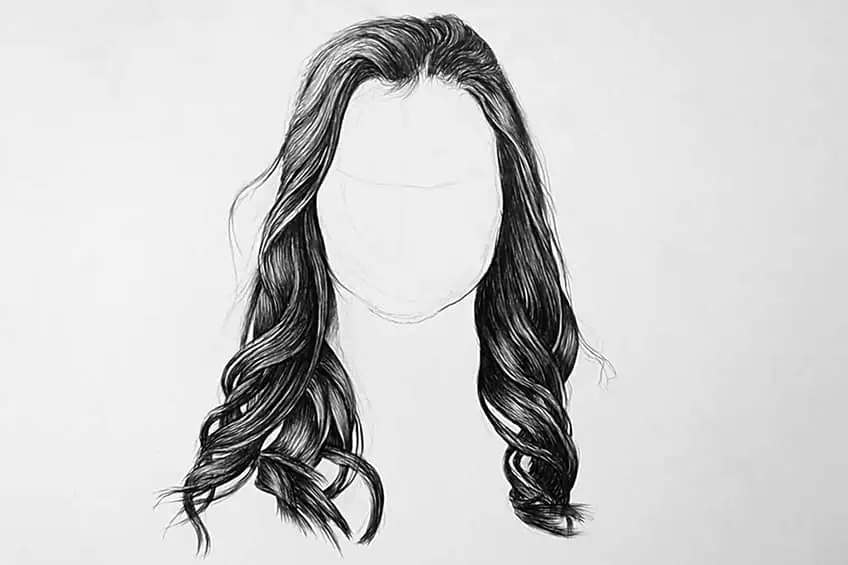
Step 3: Adding Shading to the Right Side
As we get to the right side of the hair, let’s turn our attention to the hair on top of the head. Examining the reference image will allow us to observe how the hair grows outwards from the top of the head in both the left and right directions, toward the area where the hair eventually falls freely.
Start shading where the hair casts shadows on the reference image. Given that the it is the density of the that casts these shadows, laying down these shadows on the drawing gives the appearance of volume in the hair. In these circumstances, we can use a little more force in our strokes.

Then, as previously said, we want to carefully and delicately start applying the more gentle pen lines. These lengthy, gentle strokes should closely follow the pencil lines. Remember to consult your reference image frequently. Don’t try to guess what your model looks like. Up until the areas where volumes of overlap, we can continue in this manner. Keep in mind that until the hair merges with other clumps of hair, it is often exposed to light. Given the number of shadows in these areas, our drawing strokes will be darker.
We want to focus on the many points where the hair interlinks as we approach the lower sections of locks. As we discover how to all volume by applying shading to our hair drawing, be sure to follow the direction of the hair and the manner in which it falls. As it coils toward its ends, the hair moves in a twisted manner. As you sketch, be careful to pay attention to this characteristic of the hair in the original image.
These lines should be drawn gradually and meticulously in a twisting motion. The curls are created by this little twisting motion. Take care to add a bit more pressure to your strokes when you draw these twists. Pressure should only be applied close to the regions of the hair where they intersect. It’s crucial to remember that where these sections of hair overlap they cast shadows, so we have to work harder to get that impression. Every time we sketch the hairs emerging from a darker area, soften your stroke. Consider it a fading effect produced by lessening the pressure applied to the pen.
We can continue making soft lines that follow the kinks in the hair slowly and delicately. To mimic reality as closely as possible, constantly compare your artwork to the original image. As you slowly approach the hair tips, try to observe how the hairs both break and cluster together in a straight cut there. This will reflect the characteristics of how actual hair actually grows from the scalp and falls toward the shoulders.
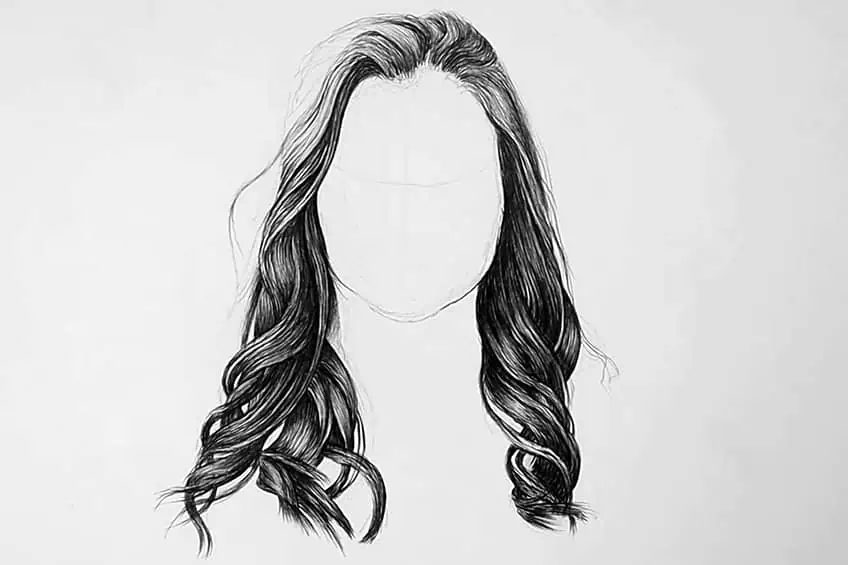
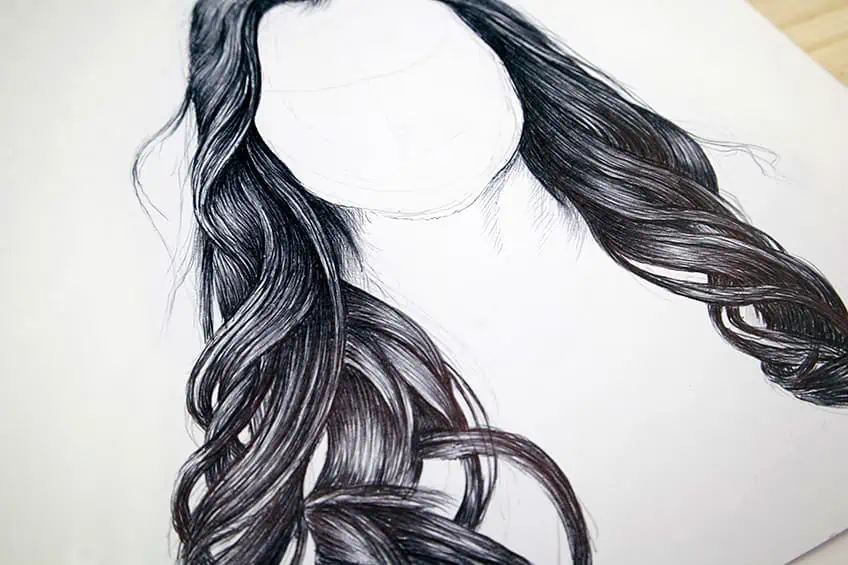
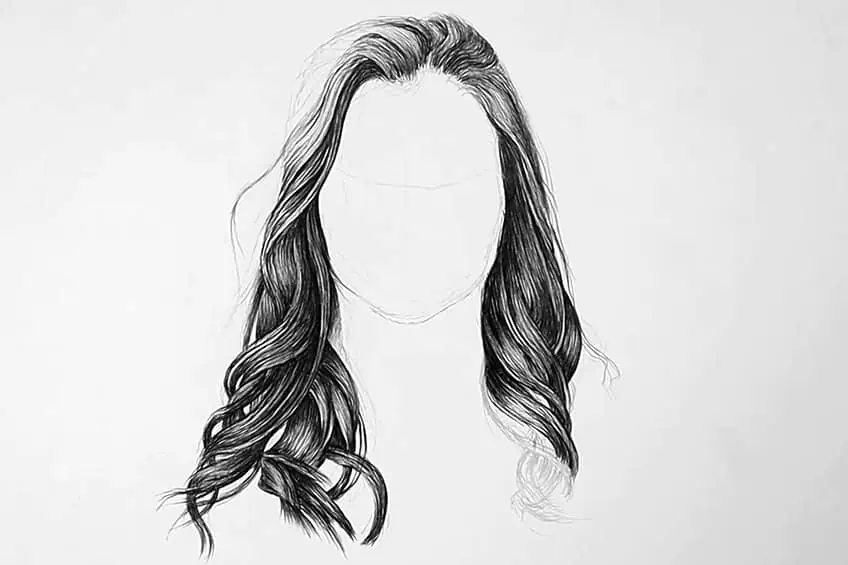
Step 4: Adding the Effects
Examining our reference image again, we want to notice all the little fine, wispy hairs on the head. With your pen, you may very softly sketch these little stray hairs. This is a fantastic technique to mimic the way hair behaves in nature.

Going to the lighter parts of the hair and adding a few extra touches there will add even more realism to you hair sketch. For the purposes of this drawing the light falls from the left, so carefully apply some black strokes there to create the illusion of volume.
Use quick, sharp strokes that go inside from the outside of the hair outline. As a result, the area of the hair that curves around the back of the head and receives less light will now appear darker.

Near the top of the head, where the hairs emerge, we can also discern these little details. These darker spots are typically located in the parting line. To delineate this area draw darker lines starting from the center.
Using our reference picture as a guide, we can also now add a tiny bit of shading to the neck. This provides the appearance that the hair falls onto the shoulders and gives the idea that there is depth under the hair.
When mastering how to draw hair, we should make sure to review our work one final time and compare it with the reference image. Review your drawing and make any further strokes you think are required. You now know how to draw hair in a few easy steps.
Useful Tips
- It takes attention to detail and constant comparison of your drawing to your reference image to learn how to draw hair, particularly realistic hair.
- In essence, this practice is about taking your time. Take a rest instead of compromising your sketching if you start to feel fatigued.
- When sketching hair with a pen, you should always use gentle, delicate strokes. Afterward, gradually add darker shading periods over the light lines.
- Before you start darkening in with a pen where the hair ought to be lighter in the parts you want to pay attention to last, try to thoroughly develop the design with a pencil. In order to maintain the illusion of light, apply shadows sparingly and contrast darker areas with light.
- As you gently work your way through the entire head of hair, always go back to your original photograph.
- Spend some time studying the reference image to have a better idea of how to color hair.

Always bear in mind that the goal of drawing hair is to resemble the true quality of hair. A collection of lines that might be wavy, curly, straight, etc. are what comes to mind when we think of hair. By approaching the task of drawing hair as representing a collection of shapes and volumes you will find yourself paying close attention to areas where the hair catches the light and those areas where it creates shadows. We draw these by gradually adding deeper tones and shadows. Another crucial point to keep in mind is that the lines of the hair are thick where it is dark and thin when it is light. This gives the impression of depth.
Frequently Asked Questions
Where Can I Learn How to Draw Hair?
Many people go to art classes to learn the basics of creating facial features and drawing portraits. Nowadays it’s easy to learn the same skills online. This guide should help you learn how to draw realistic hair perfectly.
How Do I Draw Realistic Hair?
Whenever you draw hair with a pen, make sure to use light, delicate strokes. Then progressively cover the lighter lines with darker shading. Try to fully develop the pattern with a pencil before beginning to shade with a pen. Leave areas where the hair catches the light clear and only add shading there very selectively near the end of the process.

Matthew Matthysen is a multidisciplinary artist. He completed his fine art degree, majoring in History of Art and Contemporary Drawing Practice at the University of Witwatersrand, South Africa. Before joining acrylgiessen In 2020, Matthew worked part-time as an art teacher at Reddford Blue Hills High school. Matthew creates drawing and painting tutorials for acrylgiessen and captures them not only photographically and in written form. He also records the creation of his works in his own creative studio as in video format, from which later with a voiceover and a video editor also drawing tutorials for the Youtube channel of acrylgiessen are created.
Learn more about Matthew Matthysen and about acrylgiessen.