How to Make Resin Letters – Exploring Unique DIY Resin Letter Ideas
This post may contain affiliate links. We may earn a small commission from purchases made through them, at no additional cost to you.
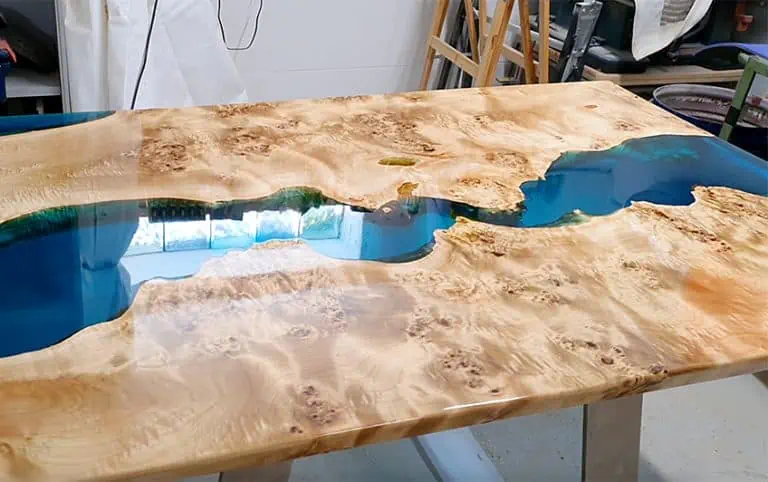
If you’ve been watching the crafting scene over the last few years. You may have noticed a substantial shift in mediums used to create various crafts and even professional art pieces. Resin has provided many of us with a means of creating intricate, polished workpieces that have an incredible aesthetic impact as well as longevity. Resin casting is generally an affordable medium too, which is why professionals and fresh-faced DIY enthusiasts alike use it as a jumping-off point to more intricate uses of the substance. Resin alphabet letters in particular are one of the most popular entry-level castings you can get your hands on, but why is this type of resin art so popular, surely there are better places to start off in resin, right? Let’s have a look at what you’ll need to get started in resin alphabet letters and what makes it such an enticing beginner resin medium.
What Do You Need to Make Resin Alphabet Letters?
Before we get into how to make DIY resin letters, it’s probably a good idea to know what exactly they are and what you might be able to do with them if you ever decide to make some of them (which we highly recommend super fun!). Resin alphabet letters are essentially little (or big) letters made from resin art, the art is highly durable, completely customizable, and can be used for a variety of applications.

These letters can be used for educational purposes, fridge magnets, party decorations, and smaller ones can be used to make things like friendship bracelets or necklaces. We mentioned that they can be pretty fun to make, so let’s have a look at what we need to make resin alphabet letters.
- Epoxy resin
- Resin hardener
- Some gloves graded for use with resin
- A mixing stick
- Alphabet molds for resin
- Two small silicone beakers
- A measuring cup graded for use with resin
- (optional) Glitter, paint, sparkles, resin dye
- Clean cloths or wipes for any mess
- A face mask
- A well-ventilated work area
Although most of these things are readily available in kits specifically designed for the creation of DIY resin letters, they can be a bit pricey. Therefore, people often go about getting all the things they need separately, as depending on where you shop around, they can be significantly cheaper.
This being said, let’s have a look at some large and small resin letter molds, and some good quality resin you can use to cast your DIY resin letters.
Best Resin Letter Molds: TOMOROTECH Small DIY Silicone Resin Mold
Smaller letters have so many uses, and the Tomortech team knows this. They’ve created small resin letter molds that are easy to use, affordable, and versatile for all of your resin letter needs! What’s more is that they’re 3D, fully customizable, readily available, and seem to have some really great user reviews too. They aren’t just letters either, this kit of resin letter molds also contains numbers and symbols in the event that you’re planning a phrase or simply making a happy birthday casting for yourself or loved ones. Still not impressed? Well, these letter molds for resin come packed with 20 key chain adaptors too, which means you aren’t limited to using them for pasting purposes alone, and what’s more is that they come in silver or gold so you can change them up according to your color scheme or simply because you feel like it. The molds themselves are pretty great too.
These letter molds for resin don’t turn brittle over time as many others do. Instead, they retain their shape pretty well and can be used with virtually any type of resin you find yourself using, plus they don’t stain when used with coloring agents like mica powder, acrylic paints, food coloring, or other coloring mediums.
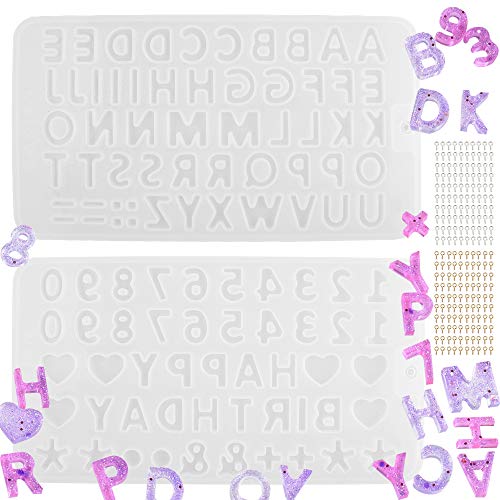
- Easy to use molds that are compatible with most resin types
- Includes 2 mold trays and 200 pieces of screw eye pins
- Smooth, non-stick interior surface makes unmolding simple
You’ll find that resin art letters made with these molds don’t stick either, this is thanks to Tomorotechs anti-adhesive surfaces on the interior of their molds, which greatly reduces the risk of your castings breaking or tearing during the de-molding process. This also means you’ll save some money on those pesky (but often necessary) release agents, which means you have some more to spend on resin and coloring agents. If you’re worried about cleaning up, don’t be. We know it’s often no small task to clean molds out once you’re done with them, but the Tomorotech team has ensured that all you need to clean your molds once your castings have been removed is a bit of rubbing alcohol and some elbow grease! Just be sure to store your mold in a cool, dry place out of any direct sunlight to avoid your molds becoming brittle.
PROS
- Easy to use
- Two molds in the box
- 20 keychain eyelets included
- Durable mold
- Casts letters, numbers, and symbols
- Easy to clean
- Ani-adhesive surface
- Reasonably priced
- Does not stain or discolor easily
CONS
- Made of silicone which isn’t environmentally friendly
- Molds can be a bit shallow for some applications
- No resin included with molds
- Eyelets present a choking hazard for younger crafters
Best Deep Pour Resin: INCREDIBLE SOLUTIONS Pourable Plastic
If you’re looking for a good quality resin that helps you produce the best quality resin castings, look no further than the Incredible Solutions brand. Not only are they essentially a household resin casting brand at this point, but they have an incredible dedication not only to the quality of their products but to the people who use them too. In their eyes, customer loyalty demands loyalty in return, so they’re always available for any questions or hiccups you might encounter while using their products.
There aren’t a lot of brands these days that take customer satisfaction this seriously, so you know they aren’t out just to make a quick buck. The best part about this brand? They are a 100% all-American brand, so if you’re up for supporting local businesses that value your business as much as you love their products, we think their clear pourable plastic resin range could be right up your alley.

- Custom formula causes minimal bubbles and avoids craters
- Epoxy when used and cured correctly it is safe with a low odor
- Mixes well with mica pigment powders and cures crystal clear
Their deep pour resin is suitable for beginners and professional crafters alike, and they include really easy-to-follow instructions, so you never feel like you’re missing a beat while casting. This type of resin is specifically designed for use with silicone letter molds for resin, so it never feels like you’re trying to fit a round peg in a square hole when pouring.
Some deep pour resins have a nasty habit of creating tons of bubbles which could leave you sitting for hours with a heat gun or blow torch trying to make your castings seamless, but thanks to their special formula the number of bubbles produced in a pour is reduced dramatically. Castings produced are also quite consistent, which is the kind of thing you want when making resin alphabet letters. Deep pour resin has a long working time too, so you have all the time you need to add all the paint, dye, powders, glitters, and anything else your heart desires to your resin alphabet letters. The only thing we think could use an improvement is the price of this product, but then again you definitely get what you pay for, making this product worth every penny in our book.
PROS
- Easy to use
- Long curing time
- Versatile
- Suitable for beginners and professionals
- Low-bubble formula
- Reputable brand
- Excellent after-sales service
- Cures completely solid
CONS
- Expensive
- Containers can be challenging to manage
- Challenging to store
- Contains volatile organic chemicals
How to Make Resin Letters
Wondering how to make resin letters? Creating resin letters is an easy and genuinely fun activity, but it can seem a bit intimidating to beginners. It’s for this reason that we’ve made a short tutorial detailing the best way to go about creating your resin art letters. Follow these easy steps and ensure that your workspace is well ventilated and that you have the appropriate personal protective gear before you get started.

Prepare Your Workspace
Before you get pouring it’s important to ensure that your workspace is ready for the task at hand. Although this is fairly simple, the better prepared you are the thinner the margin for error. As we mentioned previously, ensure that your workspace is well ventilated, next ensure that your surfaces are protected against any stray bits of resin by covering them with a tarp or some spare newspaper.
Finally, ensure that the immediate environment is conducive to resin curing by reducing the ambient humidity as much as possible. Finally, check that you have your resin, hardener, mold, mixing tool, cloths, and heat gun ready.
Prepare Your Mold
Preparing your mold might not be the first thing that comes to mind when casting but it is one of the most important steps. Place your mold on your workspace surface and clean it out with a dry rag, next apply some anti-adhesive spray or film. This ensures that the mold will not hold onto the casting once it has cured completely which reduces the risk of it cracking or tearing during this process.

If you have anything that you would like to appear on the surface of your resin like a photograph, glitter, or any objects that you would like to incorporate into the casting, add it to your mold. Once you’ve applied your mold release, ensure that you cover your mold to prevent any foreign particles from entering while you’re busy preparing your resin.
Prepare Your Resin
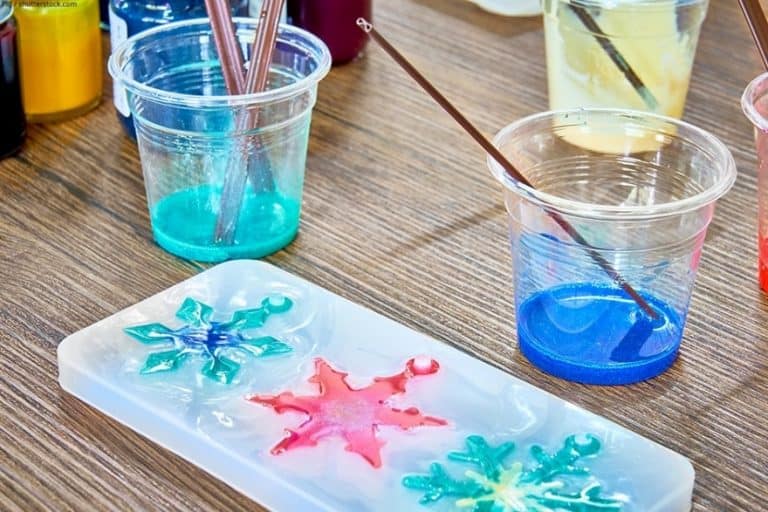
Before you get to mixing your resin, ensure that you have on some gloves, a face mask and that you have decent airflow in your workspace. Next, calculate the volume of each letter mold you’ll be using to get a rough estimate of how much resin you’ll be needing. Finally, get your measuring cup and mix together your resin and hardener, just remember that deep pour resin is mixed together in a 2:1 resin to hardener ratio. Once you have the volume you need, mix it together slowly and add any colorants such as resin dyes, acrylic paint, mic powder, food coloring, or glitter that you might want.
Once you’re happy with the color and consistency, remove the covering from your molds and ensure that they are still clean before moving on to the next step in the process.
Pour Your Resin
Now for the part you’ve all been waiting for. Pouring deep pour resin is weird because even though a lot more of it is needed to make a casting, it’s far runnier compared to surface pour resin. This being said, pour slowly and ensure that each mold you’re using is filled to the brim or manufacturer’s recommended capacity. To ensure this, pour slowly and get down to eye level with the mold every once in a while to ensure that you’re getting the resin right up to the brim of the mold.

If you happen to spill some resin on yourself or the surrounding area don’t panic, you have gloves on (you have your gloves on, don’t you?) and your work area has been covered, but on the off chance it landed on some exposed flooring or something, use a clean cloth or wet wipe to remove it from the surface in question. Once you’re happy with the filling of the molds, check that they have all been filled equally before moving on to the next step in the process.
Allow Your Resin to Cure
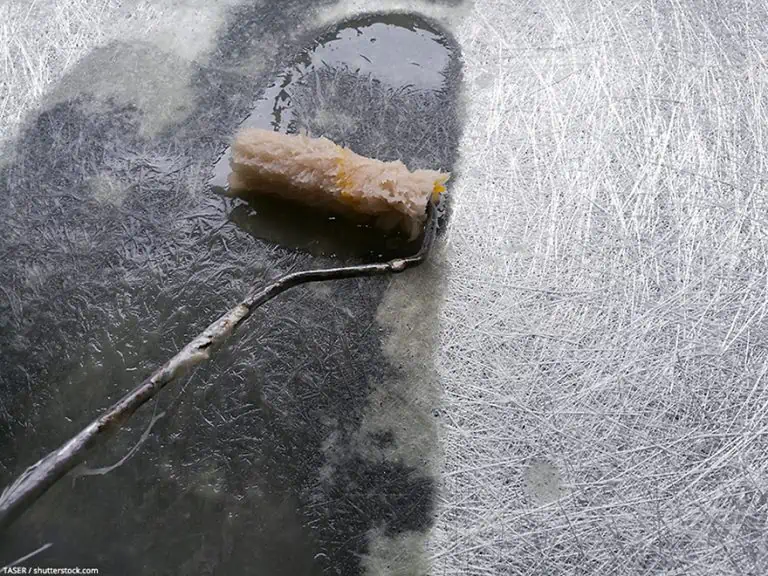
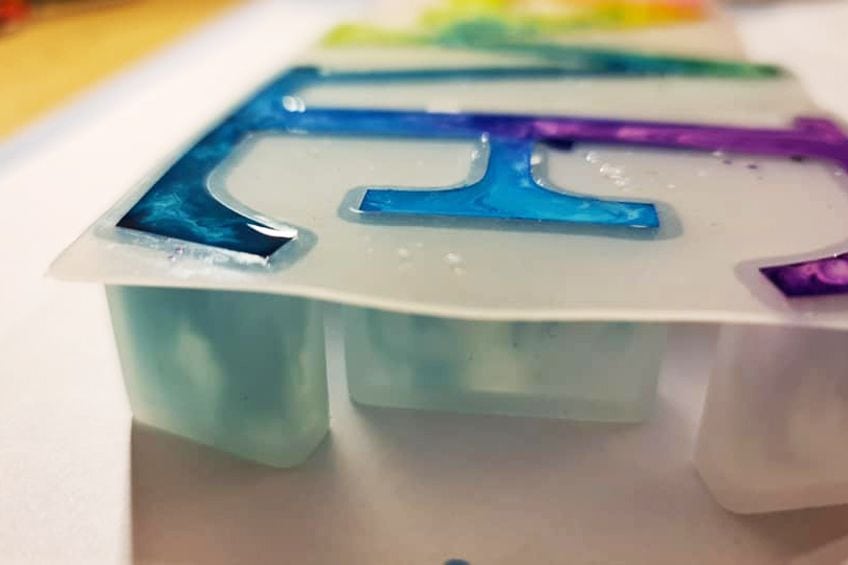
Now you play the waiting game. The resin might take a few hours to set, but most (if not all) deep pour resins take around 24 hours to cure completely, time in which there are few things you can do to keep yourself busy. Remember those bubbles we mentioned earlier? Get your heat gun or blow torch (depending on the size of the castings you’re making) and go over each of your castings. You want to be as thorough as possible with this one, ensuring that you get all of the bubbles that have formed since you poured your castings.
Lots of professionals use a circular motion at a medium distance from their workpieces to achieve the best results, but the effectiveness of this technique can vary considerably depending on the density of the castings you’re working with.
Remove Your Resin Letters
Once you have waited for 24 hours or whatever the manufacturer’s recommended time period is, it’s time to remove your freshly cast letters from their molds. Remember that when demolding resin casting, they should pop out if the mold is bent, if they don’t you could have under-applied the mold release, or the resin that you have used hasn’t cured completely.
Regardless, it’s a good idea to leave it for a few more hours just to be sure, as things such as temperature changes, resin compatibility, and even the quality of the mold can affect the curing process. Either way, you should be good t go after a few more hours of curing time. Finally, enjoy your new resin art letters, and be sure to show all of your family and friends the wonders of resin art!
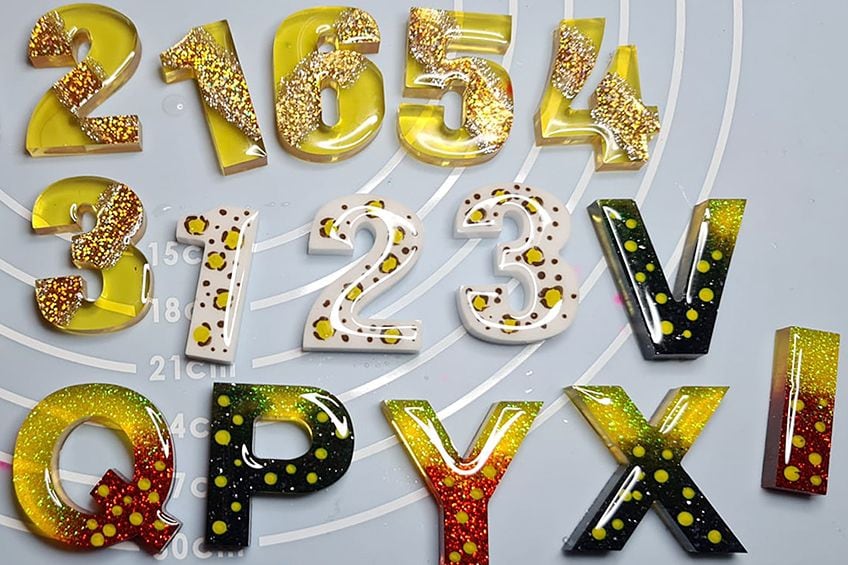
Some Resin Letter Ideas
In case all of that was a bit overwhelming, here are a few resin letter ideas to get your creative juices flowing. These are easy, and you can add your own unique twist to them as you go along. No matter what, remember that the goal here is to have fun and make some resin art that you and your loved ones can enjoy.
As with all artistic processes, the world is your oyster, and your unique touch is what makes your work so special.
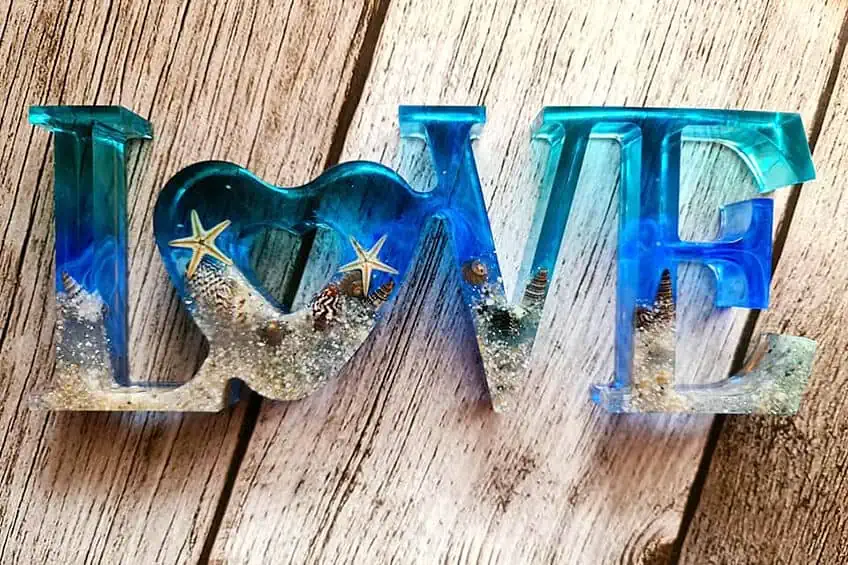
Tinted Resin Letters
Tinted resin letters are a great jumping-off point for beginners. Why? This coloring technique is easy and can be modified with loads of margin for error. The end result is resin letters that resemble lightly stained glass, which looks awesome on keyrings, bracelets, and even earrings if you make them small enough. All this requires is adding some oil-based food coloring to your resin and mixing it in thoroughly, adding more for a darker tint as you go along. The end result will look like little (or big) resin letters that resemble glass, without any of the drawbacks that material comes with.

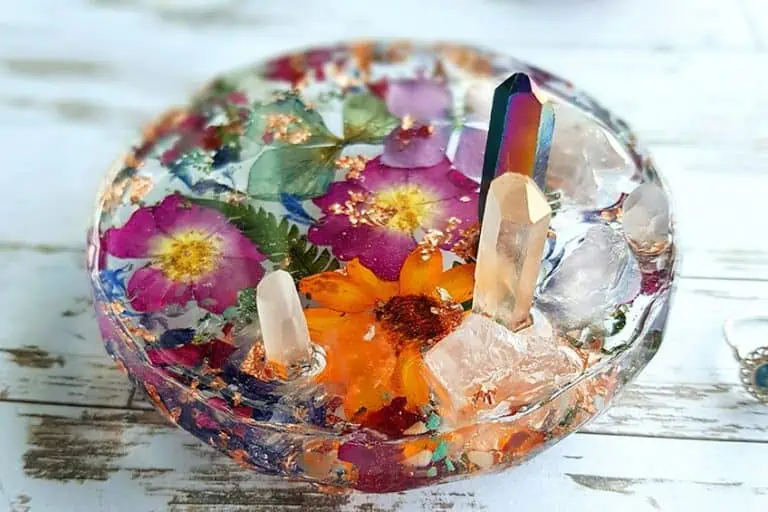
Flower Filled Resin Letters
This one is really popular but seems to be seldomly attempted by many newcomers. What are flower-filled resin letters? Well, put simply these are just letter castings filled with dried flowers, and if you have a garden or park nearby, you pretty much have everything you need. Start by applying your mold release to your resin molds, then position your flower petals (dried or otherwise) into the mold. Next prepare your resin and pour it in, starting around the petals and not over them.
All that’s left after this is to allow your resin to set and cure and soon, you’ll have some resin letters with beautiful flower petals that have been immortalized forever within them!
LED Resin Letter Art
If you’re a beginner, this can be a bit intimidating, but don’t worry you don’t need a degree in electrical engineering to pull this one-off. This is awesome because resin refracts light in different ways depending on its shape and the type of resin that has been used in a particular casting. This can be exploited by placing little LED lights either inside or on the surface of letter resin castings, in which case they can be used as a light source or simply some mood lighting for special occasions. We don’t recommend placing the LEDs inside the castings if you’re a beginner, rather simply cast your resin letters and add some colors you’d like to illuminate (mica powder works well). Then, add some LEDs underneath them once they have cured completely.
Now that you know what you need for casting letters from epoxy resin, what good small and large resin molds for letters look like, and what one of the best deep pour epoxy resin products on the market look like, it’s time for you to get out there and put your newfound knowledge to the test. Remember to always work in a well-ventilated area, always wear gloves and a face mask when working with resin, and always ensure all your surrounding surfaces are protected.
Frequently Asked Questions
What Are Resin Letters Used For?
There are loads of things you could resin letters for. Resin letters can be used as stamps, they can be used for educational purposes, they can be used for decorations, or to make jewelry like necklaces or bracelets. The possibilities are endless when making letters from resin.
Are Resin Letters Safe?
While resin poses a potential hazard when its two-part form it poses absolutely no risk once it has cured completely – in fact, 100% cured resin is completely food safe. In its two-part form though, resin and hardener emit harmful VOCs and are highly flammable.
Can You Glue Resin Letters Together?
Although resin is pretty much part of every facet of society at this point, it’s pretty hard to get most types of resin to stick to one another once they have been cured completely. You’d either need to get really creative or get a high-quality adhesive to make them stick to one another reliably.

In 2005, Charlene completed her wellness degrees in therapeutic aromatherapy and reflexology at the International School of Reflexology and Meridian Therapy. She worked for a company offering corporate wellness programs for several years before opening her own therapy practice. In 2015, she was asked by a digital marketer friend to join her company as a content creator, and it was here that she discovered her enthusiasm for writing. Since entering the world of content creation, she has gained a lot of experience over the years writing about various topics such as beauty, health, wellness, travel, crafting, and much more. Due to various circumstances, she had to give up her therapy practice and now works as a freelance writer. Since she is a very creative person and as a balance to writing likes to be active in various areas of art and crafts, the activity at acrylgiessen.com is perfect for her to contribute their knowledge and experience in various creative topics.
Learn more about Charlene Lewis and about us.