How to Paint Watercolor Leaves – A Guide to Watercolor Greenery
This post may contain affiliate links. We may earn a small commission from purchases made through them, at no additional cost to you.
For two main reasons, mastering how to paint watercolor leaves is a fantastic workout. For one thing, we learn a range of watercolor techniques and tricks, and for another, it’s a useful aspect for many more watercolor artworks in the future. Watercolors are available in a wide range of styles and palettes. As we progress through this method of leaves painting, we will see that there is flexibility in both color selection and forms that may be described by a few basic features. Most importantly, this lesson is simple and soothing; creating watercolor greenery is a really delightful and calming pastime. So, try to unwind and enjoy the process as you go through this guide on how to paint watercolor leaves.
How to Paint Leaves With Watercolor
Creating watercolor leaves paintings is not a difficult undertaking. As you will discover in this lesson on how to paint watercolor leaves, leaves come in a variety of forms. Creating any type of watercolor greenery or watercolor plants requires a few unique details that may be utilized. Watercolor branches, stalks, and arteries within the leaves, for example. As you gain knowledge on how to paint leaves, you will encounter a variety of methods such as wet on dry, wet on wet, and so on. With that stated, let’s take a look at everything we’ll need as we master how to paint watercolor leaves.

Directions on How to Paint Leaves With Watercolor
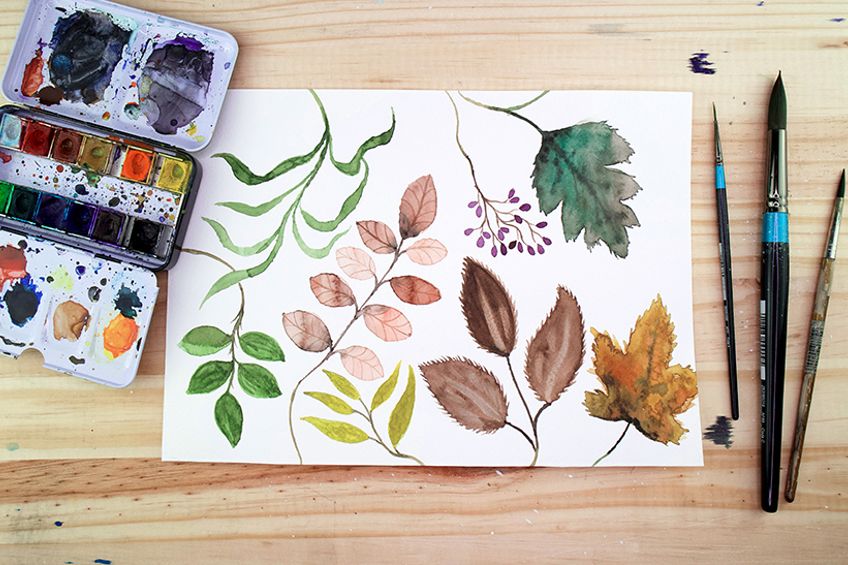
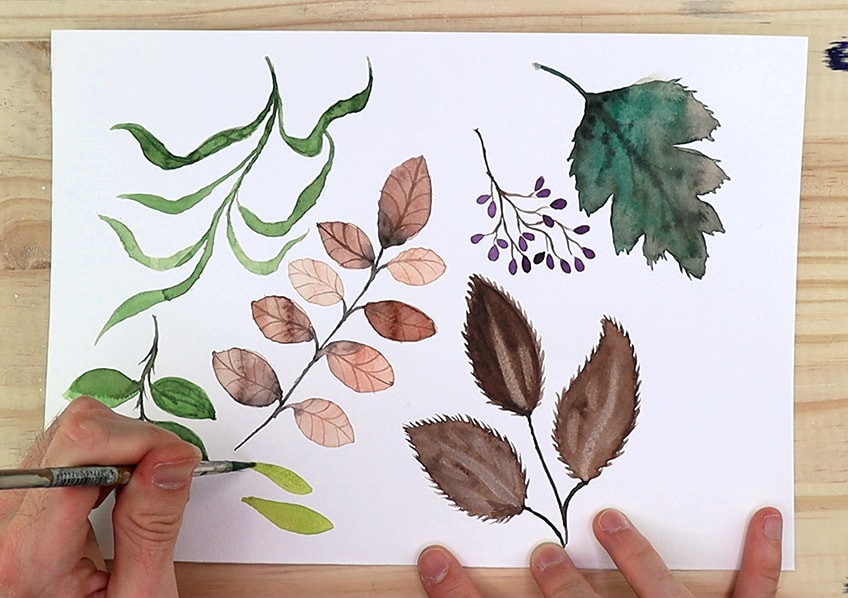
In this guide, we will create several various sorts of watercolor leaves, each with a distinct aesthetic quality. Understanding form and color variations are essential while studying how to paint watercolor leaves. There is a lot of leeways when it comes to adding features to each of these distinct types of watercolor greenery and watercolor plants from there. We will experiment with several approaches and color schemes for both summertime and autumn leaves. We will create watercolor branches and experiment with different methods of painting leaves. Don’t forget to also read our best watercolor paints and watercolor painting for beginners article.
With that stated, let us have a look at how to paint leaves with watercolor in a few easy stages.
Painting Black Locust Leaves
We will discover that painting leaves can be pretty intuitive as we explore painting black lotus leaves. Most of the time, we are working with variants of the same form. It is all about how we adjust the minute nuances in these designs that identify what type of plant they are.
Step 1: Painting Leaves
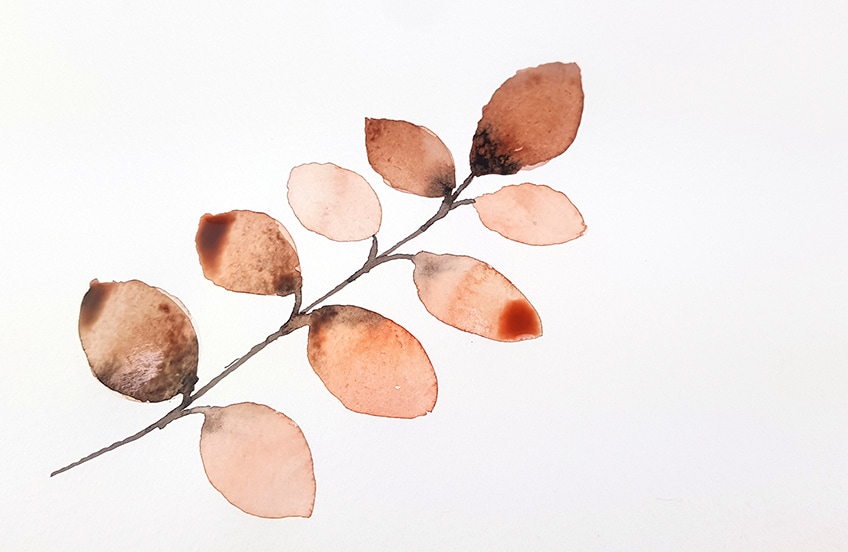
We will begin with the black locust leaf, one of many other varieties of leaves to create. The black locust leaf is a beautiful fall leaf that is very easy to create. We begin by producing a mixture of yellow, red, and brown; yet, we want the mixture to be primarily brown. Then we may paint a row of little circular pointed forms. For our single black locust watercolor branches, we want to create two parallel lines of leaves. Therefore, strive to keep them as tiny as possible. Draw one leaf perpendicular to the tops of each line as you paint two parallel rows of leaves adjacent to each other. This determines the branch’s shape.
Step 2: Painting the Watercolor Branches
After that, we’ll create a thin dark brown line through the center of the two rows. We may then use the same dark brown mixture to draw short, thin lines connecting the tips of each leaf. As you create the watercolor branches, ensure that all of the leaves are linked. You may also deepen your leaves by sprinkling brown and crimson pigment over the top of the previous layer. This adds complexity to the leaves and offers a beautiful rustic color character for the fall effect.

Step 3: Creating the Leaf Details
After your watercolor leaves have dried completely, create little arteries with a faint wash of color. Make a straight line from one side of the leaf to another. Lines that wander towards the edges of the leaf can then be painted from there. You need to create an arch over the deviating lines.

Painting Beech Leaves
The next leaf to paint in this tutorial is the beautiful beech leaf. As can be seen, we are virtually creating a black lotus leaf with the beech leaf. The forms are comparable spearhead shapes with minor variations. Let us go over the steps one by one.
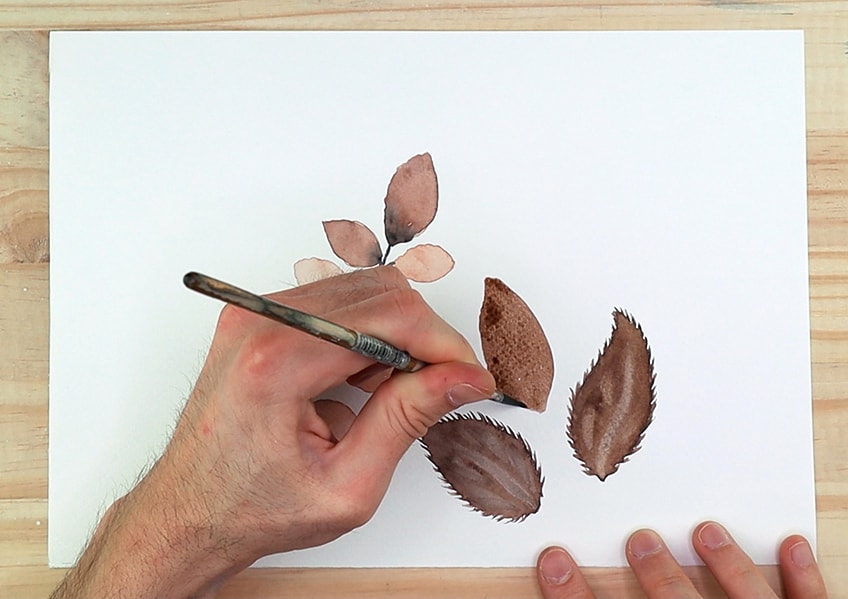
Step 1: Creating the Leaves
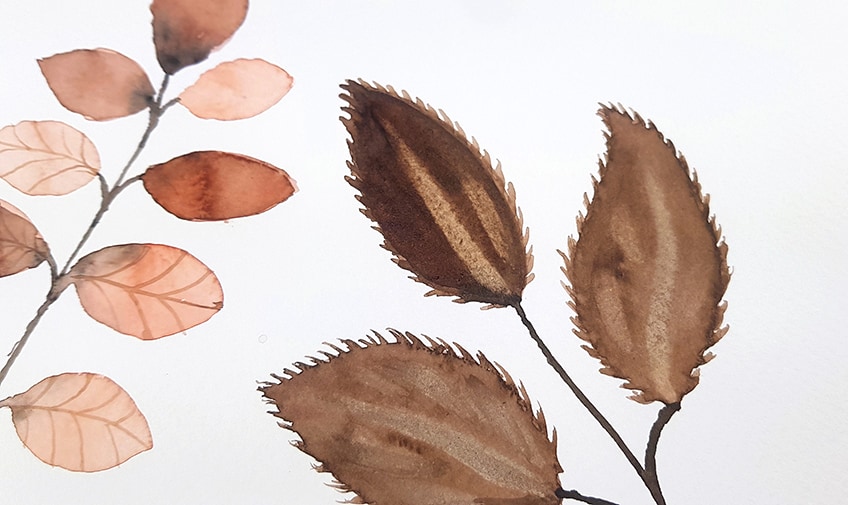
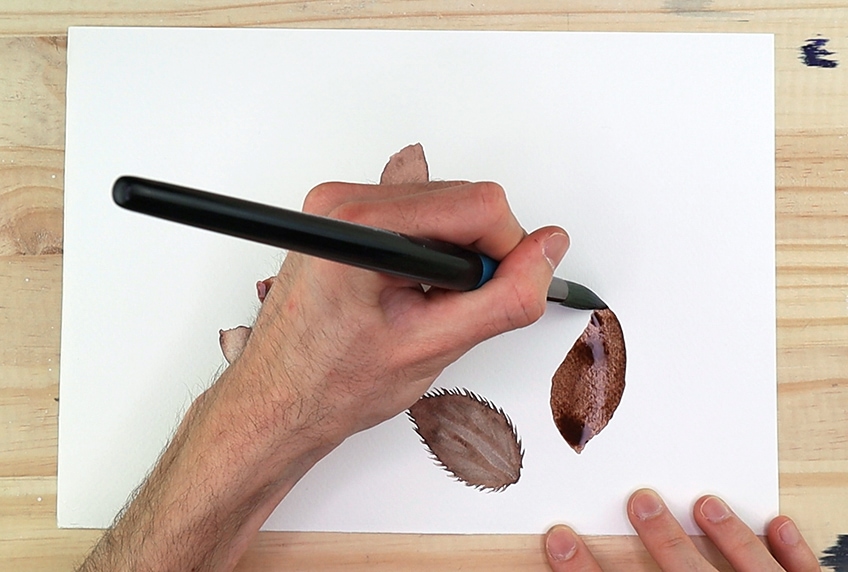
One of the most prevalent leaves is the beech leaf. Keeping with the fall theme, let us create a dark brown blend with traces of black. Then we can create a pointed design, but this time we can make the tip of the leaf somewhat thinner near the upper point. This leaf may be painted in any available spot on the page. After we’ve created the overall spearheaded form, we’ll use a little thin brush to apply miniature sharp spikes along the edges of the leaf. On the margins of the leaf, we want to add little spikes. This is a frequent characteristic of leaves that adds depth and helps them appear more natural.
We may now create another spearheaded leaf form on top of the last one. We want to construct a three-leaf arrangement to give it a fuller appearance. Likewise, the form may be seen as a circle. We want to draw these small spikes on all of the edges of the leaves. This is a prevalent characteristic of the beech leaf.
Step 2: Creating the Leaves’ Painting Details
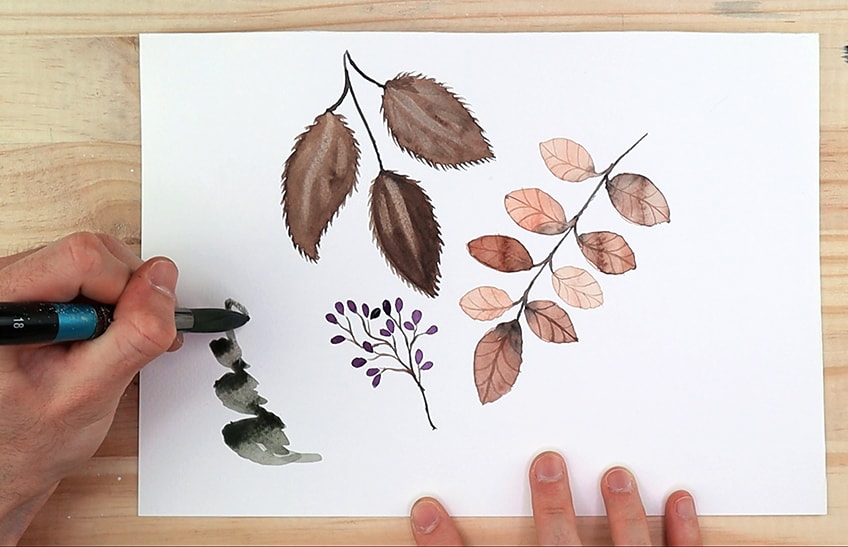
As you draw all three leaves, attempt to arrange them in a star pattern. With the lifting method, we may add some features to the leaves as you paint them. To lift the paint, we’ll use a little dry brush and create dry strokes on the leaves. With this approach, we may produce a variety of markings, giving the leaf different textures.
After we’ve created all three of our leaves, we can link them by putting a stem in the middle of each one. We want to ensure that we make our branches very thin so that we can link them to all of the leaves with diverging lines.
Painting Berries on Watercolor Branches
Let’s take a fresh approach and create something unique. It is rather easy to create berries. Berries are like tiny raindrops that are integrated by being grouped together and attached to branches.

Step 1: Creating the Watercolor Branches
Let’s shake things up a bit with this following stage. Let’s start by creating watercolor branches joined by small berries. Painting watercolor greenery or learning how to paint leaves can also include studying other small details that are commonly linked with them. We can start by drawing little lines to represent a branch.

For this limb, we’d want to use a thin, little paintbrush. Branches may take on a variety of shapes; in this example, let us create a geometrical and straighter branch. Consider it a combination of sharp angles and curving lines. We can let these acute angles and curving lines travel in whatever way we want.
Step 2: Creating the Berries
We may then create small teardrop forms at the ends of every branch. We want a dark purple blend, which we may get by combining purple with a tinge of black. If you like, you may add additional watercolor branches to your present branch. You may paint these many branches swerving in different ways. Provided you create small teardrop forms on the tips, they will automatically resemble small berries.

Painting a Northern Oak Leaf
Another fun-to-learn leaf in this leaf painting guide. The northern oak is painted in the style of a Christmas tree. Its sections resemble a Christmas tree. At the same time, it mimics the spearhead form.

Step 1: How to Paint Leaves of the Northern Oak Tree
Oak trees have some of the most recognizable leaves. There are many other types of oak leaves, but when we discover how to paint leaves, we will discover that the oak leaf is vital for this activity. To start, make a green mixed with a tiny amount of black. We will then create a Christmas tree form. Consider it a cross between an arrowhead and a typical Christmas tree form, with three parts on either side. This can be painted in any accessible spot on your website. A little stem or painted branch can also be added towards the bottom of the leaf.
Step 2: Detailing and Coloring the Oak Leaves
While the leaf is still wet, we’ll apply another layer of green paint to deepen it. This allows the color to sink into the leaves, adding body and substance. If desired, incorporate additional brown into the wet paint to create a wonderful seamless combination of brown and green within the leaf. Take a little paintbrush and quickly apply a single swipe up the middle of the leaf. Next, within every section of the leaf, create single line dashes with black color. By doing so, we are creating leaf arteries and enabling the black paint to blend into the wet paint.
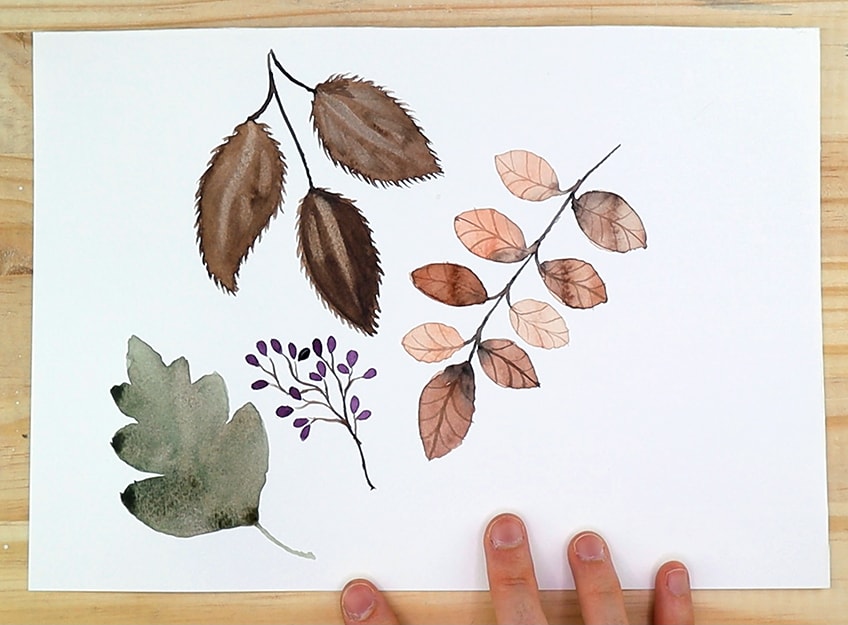
Because of the wet-on-wet movement, the features in the leaf appear to be inside the leaf. This is just a clever way of adding features to a leaf. After that, you may create little spikes at the extremities of each section of the leaf. Furthermore, this adds interest while also giving it a more natural and organic appearance.
Painting Ponytail Palm Leaves
Ponytail palms are a go-to when learning about watercolor greenery. These leaves are a lot of fun to create. They may be used in a variety of watercolor sceneries. Let’s get started with the various phases.

Step 1: Creating the Leaves
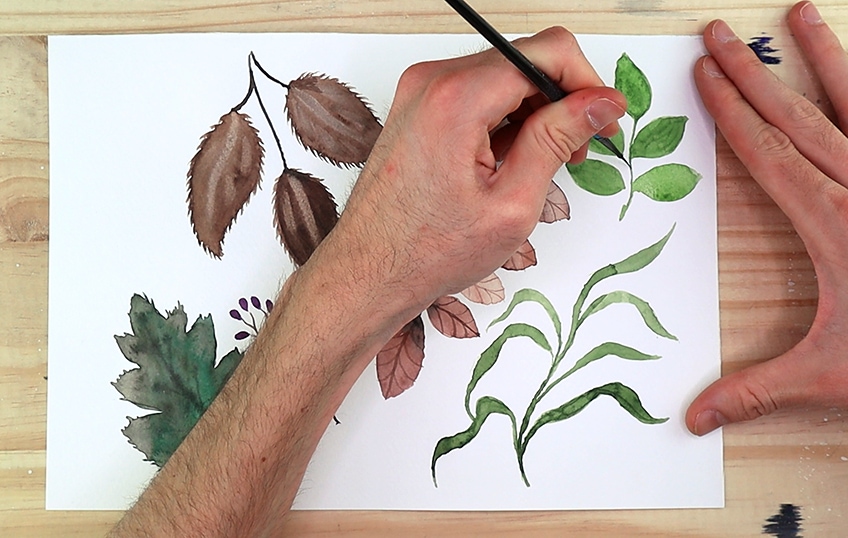
Watercolor plants and practicing how to paint watercolor leaves come in a variety of forms and sizes. The ponytail palm leaf is a relatively frequent leaf form. These leaves are a breeze to create. We start by creating a lighter green mixture. We next use our medium brush to produce lengthy strokes, finishing with a light-handed fine tip.

The painting of leaves is fairly easy. We can construct the sweeps for the ponytail palm leaf as long as we conclude them with a pointy tip. We may also make them bend by creating short, sharp strokes. We may then color from the tip and bend our strokes to make the plant appear to be dangling.
Step 2: Creating the Watercolor Branches
However, we must ensure that the bottom or foundation of these plants is directly connected to the primary branch. We accomplish this by creating a long, thin green line. The bottom of each plant is then easily connected by stretching the strokes into the branch. The leaves should blend seamlessly into the main watercolor branches or stems. You could repeat this as many times as you wanted, and it would seem like a long stem with numerous leaves attached to it. This plant is a stunning watercolor greenery component that may be used in a variety of natural watercolor scenes.

Creating Betel Leaves
Betel leaves assume the spearhead quality once more, although they are much smaller and have a comparable structure to the oak leaf. Let us now have a look at how to create these leaves in a few easy stages.

Step 1: Creating the Leaves
The betel leaf is perhaps the most frequent of all the leaves you’ve come across. This is a typical leaf form found in a variety of plants. Let us start with a light green mixture. We create this leaf by first drawing a circular form and then adding a little pointed tip to the ends. This leaf is quite easy to paint; it resembles the beech leaf but is usually smaller. The form is comparable to that of the black locust leaf, but the base is rounder. This leaf may also be used as a regular green leaf.

Step 2: Creating the Branches
You may create many of these leaves in a sequence and link them with thin green watercolor branches. Because the green hue signifies that they are more and less inflexible in their mobility, these branches should be curvier. These leaves have tiny branches that link to the plant’s primary stem. These look great with watercolor foliage and are a must-know leaf for anybody learning how to paint leaves. You may easily add another layer of green paint to deepen your leaves if you desire.
Painting Sandbar Willow Leaves
Sandbar willow leaves are smaller and fuller. Their form is similar to that of the black locust leaf. Likewise, these leaves have the spearhead appearance, but its body has been rounded out quite a bit. Now, let us go over the various steps.
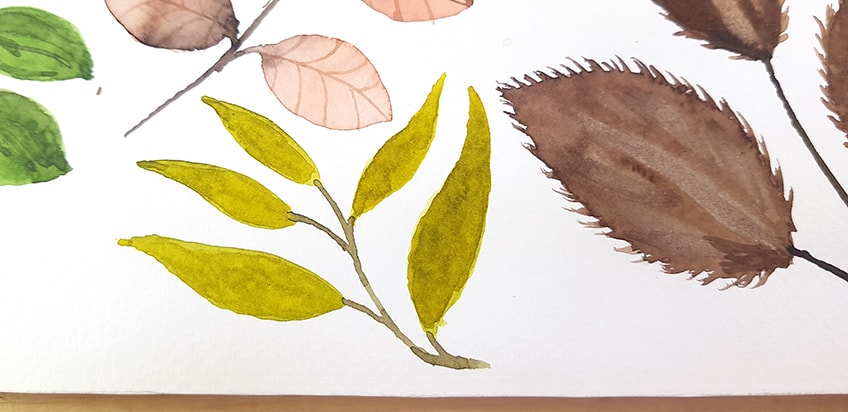
Step 1: Creating the Leaves
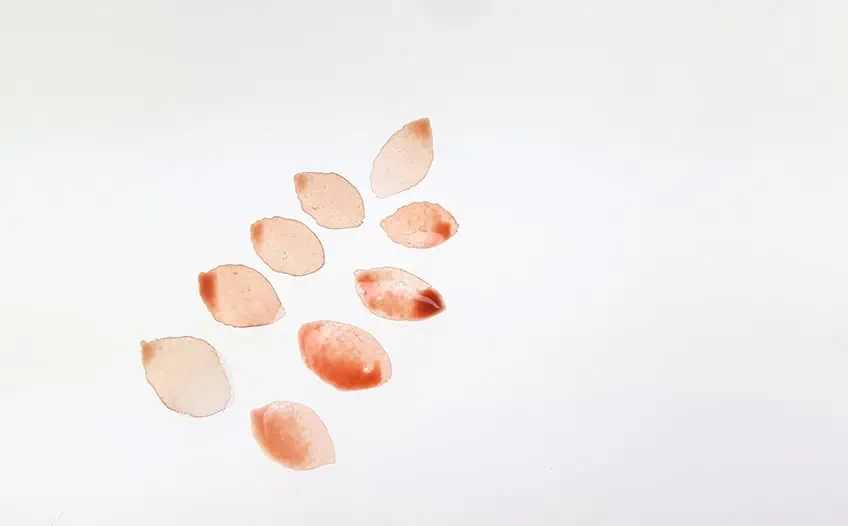
When creating leaves, you’ll see that the majority of them have a comparable form with a few slight differences. The sandbar willow leaf is a good example of this. It’s easy to paint this leaf. To start, we’ll make a pale yellow with a tint of brown. Then we cut out little surfboard forms with narrow points on both sides. This leaf is shaped like a surfboard, but it is pretty small, so we want to ensure we paint it thinly. Coloring these little leaves in a golden hue gives them a beautiful autumnal hue. If you need to turn your page around for space, go ahead and do so.
Step 2: Creating the Watercolor Branches
This is a little, pointy leaf that links to a narrow branch. Each little branch that connects to a leaf should be linked to the primary stem. This main stalk can be colored in the same yellow that runs through the center of the leaves.

Creating a Maple Leaf
Finally, there is the well-known maple leaf. The maple leaf has a pointed form as well, but it has small sharp ridges around the edges. The deviation of its numerous segments may also make it resemble the appearance of a Christmas tree.

Step 1: Creating the Leaves
There are many different types of maple leaves; nevertheless, we will only paint the popular northern maple leaf. Let’s start with a yellow with a tint of the brown mixture. Then we’ll paint the Christmas tree form again, but this time there will only be two sections on either edge of the leaf. We want to get started while the paint is still wet. Make some spikes on the tips of the leaf segments using your yellow paint mixture. The extremities of the leaf sections of the maple leaf have spiky edges. We may also incorporate touches of red and brown into the leaves to give it a lovely fall vibe.
Step 2: Detailing the Leaves Painting
After your leaf has dried, you may add extra features with black paint, although it also looks good without any further detail. The colors will dry together and produce a flawless integration with each other. If you run out of room on your paper, just paint over the border.

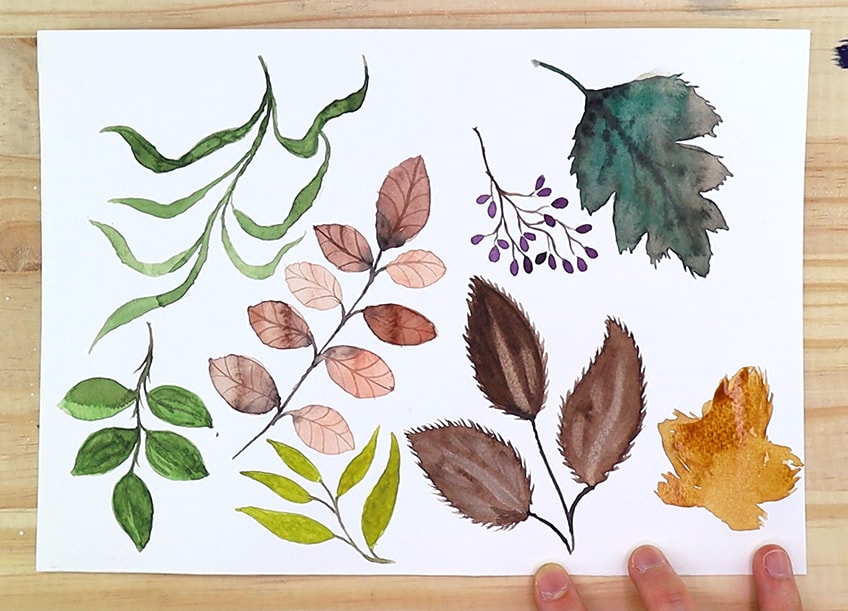
Additional Details
So now you have it, a presentation of watercolor greenery using several techniques for painting watercolor plants. We may also color the stems of all our branches outside the page boundaries to make them appear to be part of a bigger branch. You might also continue to add to your painting with the additional abilities you’ve acquired.

Top Tips for Watercolor Greenery
This article breaks down a few tips and tactics for watercolor leaves as well as watercolor branches in an easy and understandable manner as you learn how to paint watercolor leaves.
- You’ll want to experiment with different paintbrush sizes for different aspects of your watercolor foliage.
- Remember that watercolor branches are just lines. It’s merely a matter of arranging them and connecting them to the leaves.
- Watercolor plants can be created in a variety of green tones. Experiment with different color combinations!

- When creating watercolor leaves, keep two jars of water nearby to completely clean your brushes between paint applications.
- When adding details to wet paint before it dries, remember to move quickly.
- Most importantly, take your time, enjoy yourself, and unwind. Painting takes practice, so don’t be concerned with being flawless while you learn how to paint leaves.
As we discover how to paint leaves, we will also explore how to paint a variety of forms and color schemes that will allow us to create leaves that are both fall and summer-oriented in their color palettes. Watercolor greenery and plants are creative in many ways, allowing us to experiment with color combinations to produce intriguing and bright leaves and plants. If you are in need of an inspiration, we warmly recommend our article about watercolor painting ideas.
Frequently Asked Questions
How Do I Create Fall Leaves in Watercolor?
It’s primarily a question of what color combinations you employ while painting fall foliage. Autumn hues, as contrasted to watercolor greenery, have more warm and earthy tones owing to the leaves falling from the tree and decaying. Painting leaves, on the other hand, necessitates the considerable study of various leaf forms. The fall theme and color palette complement maple leaves and basic oak tree leaf forms. That being said, as you learn how to paint leaves, you will discover that by paying close attention to the color scheme you select while producing a leaves painting, you can turn every leaf into an autumn seasonal picture. Blacks, browns, yellows, and reds are good colors to work with. These complement each other nicely in order to produce warm mixtures and fall color palettes.
How Do I Create Simple Watercolor Leaves?
Painting leaves is a straightforward task. Despite its appearance, it is frequently a basic form that may be understood in context as a leaf with a few small dashes and lines. Watercolor branches and watercolor plants are typically portrayed as such by simply painting them together. Most frequently, a leaf painting may be fashioned like a surfboard or spearhead shape, to which you then add some lines for details and contextualize it further by joining lines at their ends, which can be categorized as a branch. Simply put, learning how to paint watercolor leaves entails identifying the general form and then selecting the appropriate color with a little detail to provide texture.

Matthew Matthysen is a multidisciplinary artist. He completed his fine art degree, majoring in History of Art and Contemporary Drawing Practice at the University of Witwatersrand, South Africa. Before joining acrylgiessen In 2020, Matthew worked part-time as an art teacher at Reddford Blue Hills High school. Matthew creates drawing and painting tutorials for acrylgiessen and captures them not only photographically and in written form. He also records the creation of his works in his own creative studio as in video format, from which later with a voiceover and a video editor also drawing tutorials for the Youtube channel of acrylgiessen are created.
Learn more about Matthew Matthysen and about acrylgiessen.