Watercolor Techniques – Learn the most Important Techniques
This post may contain affiliate links. We may earn a small commission from purchases made through them, at no additional cost to you.
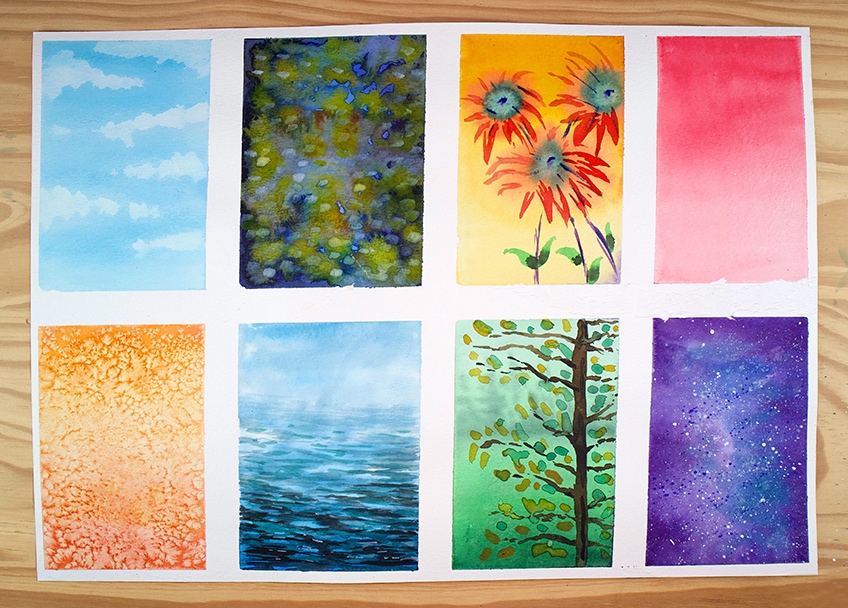
Watercolor is a very playful medium, there are so many ways in which one can make watercolor paintings. However, when starting watercolor for the first time it can seem confusing and overwhelming to make creative decisions. In this tutorial, we will be breaking down various watercolor painting tips and techniques into eight different types. The aim is to help you develop the watercolor basics by making a series of easy watercolor paintings that establishes confidence in you when painting with watercolors. Hopefully, by the end, you will have more confidence in how to watercolor.
Before You Begin
It is important to understand that when you watercolor there is no specific way of doing so. What is great about watercolor paint is that it can be applied in a variety of ways. We will be going through various watercolor techniques within this tutorial by breaking them down into digestible steps. We will also utilize them within some easy watercolor paintings, giving us a better sense of the watercolor basics. Most importantly our aim in this tutorial is to have fun, so feel loose and free as we go through this watercolor painting tutorial.

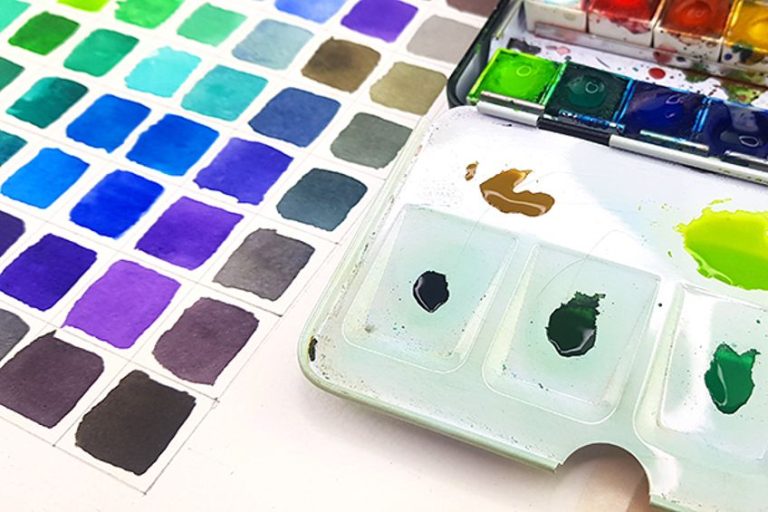
Necessary Materials
Firstly we want good paper, any watercolor paper is good and can be bought in your local art shop, however, make sure the grammage of the paper is above 300GSM. We will use a set of watercolor brushes, however, you can use various brushes for various effects. And lastly, we will be using a set of pan watercolors. Depending on where you are in the world and what is available to you is completely your choice. However, here are some suggested materials that potentially could be a preferred choice. Lastly, we will use some masking/scotch tape to keep our paper down and in place. You will need:
Preparation
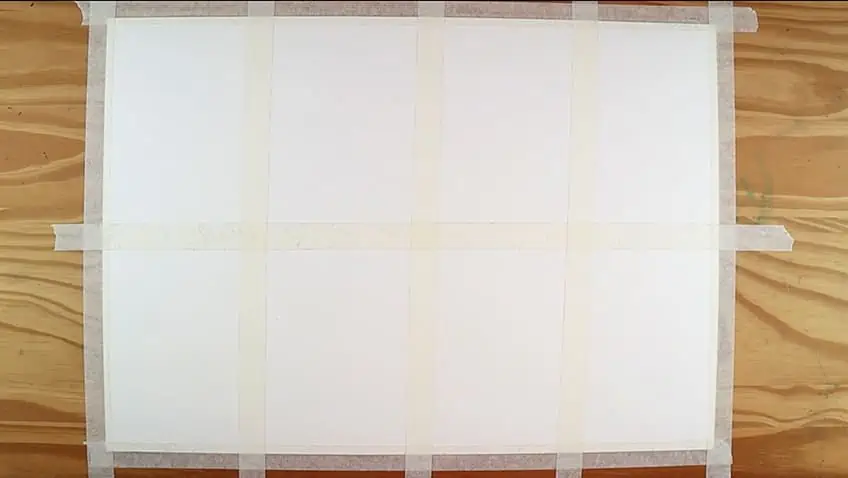
We want to make sure we have a good paper as a prerequisite. If we do not have a good paper it does not matter how good we are, the paper will have a great effect on the outcome at the end. Secondly, because we are using a water-based medium, our paper will inevitably warp due to the water’s warping capabilities. So let us make sure we use some scotch tape to tape down our paper. Lastly, because we will be exploring various techniques, let us divide our page into 8 segments using our scotch tape as the tool to divide our page.
Watercolor Techniques for Beginners
Watercolor is quite a loose medium which means it can be hard to control. Therefore, a great suggestion is to allow yourself to be very free during this process. Unlike drawing, watercolor has a different physical approach so let us come into this tutorial with a lack of perfectionism and precision in our mark-making. However, there are a few watercolor tips and techniques to help guide your mark-making within this tutorial. As we learn how to watercolor we will break down the watercolor basics by doing some easy watercolor paintings. Doing some easy watercolor painting will free us from trying to make it amazing.
Funny enough, the more carefree you are the better it is when painting with watercolor. Let us begin.
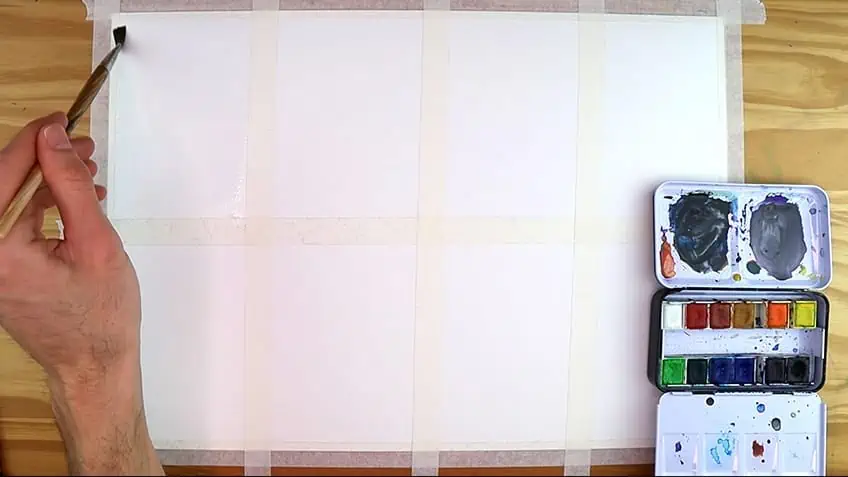
Technique 1: Lifting the Paint
Lifting is a very specific way of lifting paint off of the surface of our paper or canvas to create marks. This can be a great technique for creating negative space for either painting without other colors interfering or it can be a great way to create light marks or even clouds. let us make some clouds with this technique
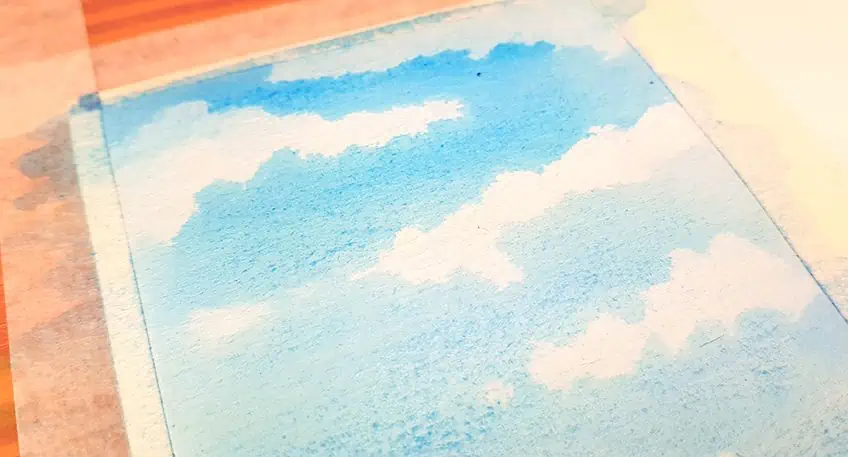
Let us begin by giving our first section in the top left of our page a light coat of water on the surface of the paper. This is an essential technique for your watercolor basics repertoire.
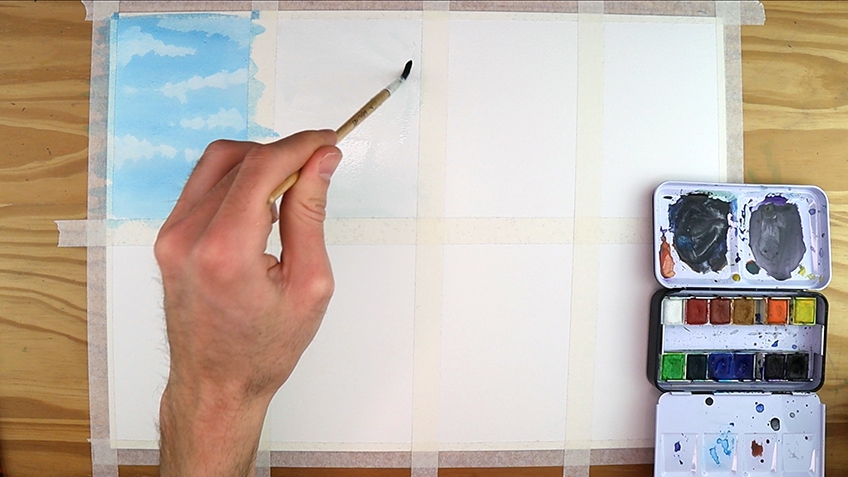
Once we have a thin coat of water evenly spread out on our paper we can be quick about applying a light blue that resembles the color of an afternoon sky. Once we have the color on the paper we should act whilst the color is still wet. Either with a clean dry brush begin to firmly rub off the paint.
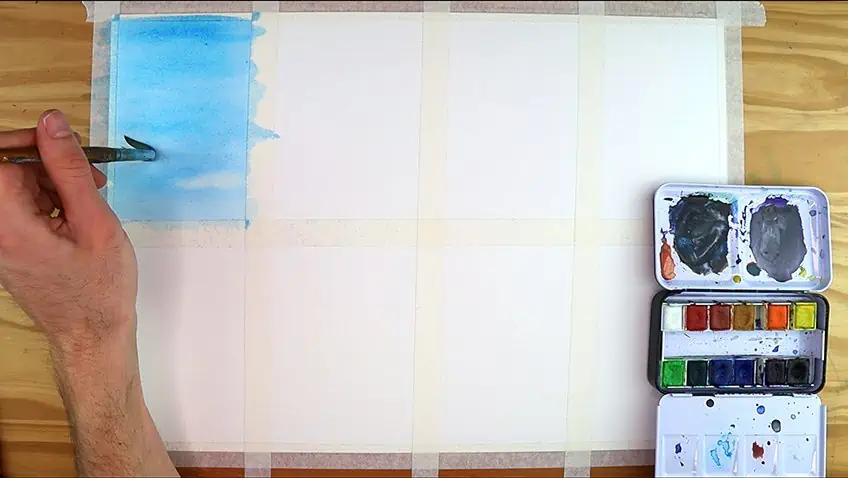
We can also make these marks with either a paper towel or some crumpled-up tissue. Try to give a slight squiggle motion to create the appearance and shape of a cloud.

This is a very easy watercolor painting as this technique works well with clouds. However, we can apply this watercolor technique to create negative spaces for a variety of features when painting with watercolors.
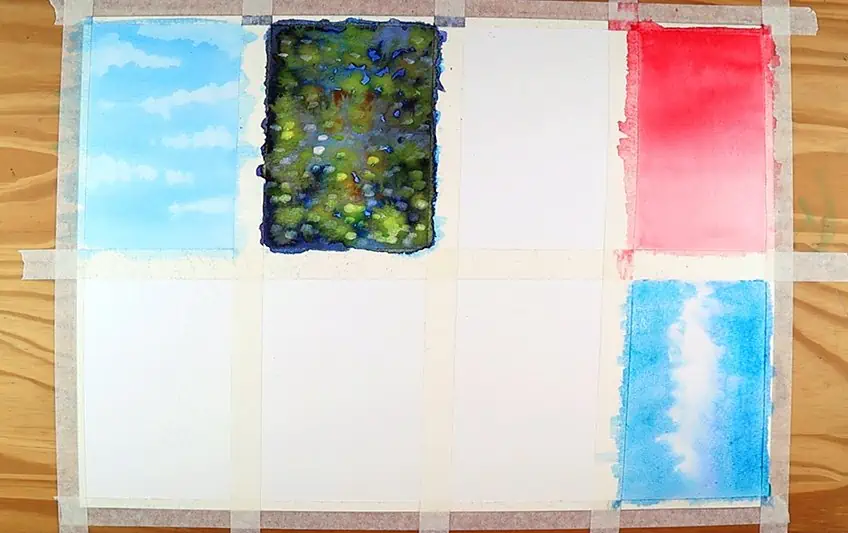
Technique 2: Developing a Dark to Light Effect
This technique is quite a unique way of making marks. What we do here is we, in a very unconventional way, but darker colors before our lightest ones. This is how we do it: Start by priming the next section of your paper with a thin coat of water.
Once we have a thin coat of water on our surface we can begin by applying an interesting dark color. Start by placing the light blue that you may have already mixed as a first layer and try to act quickly by then applying a darker blue.
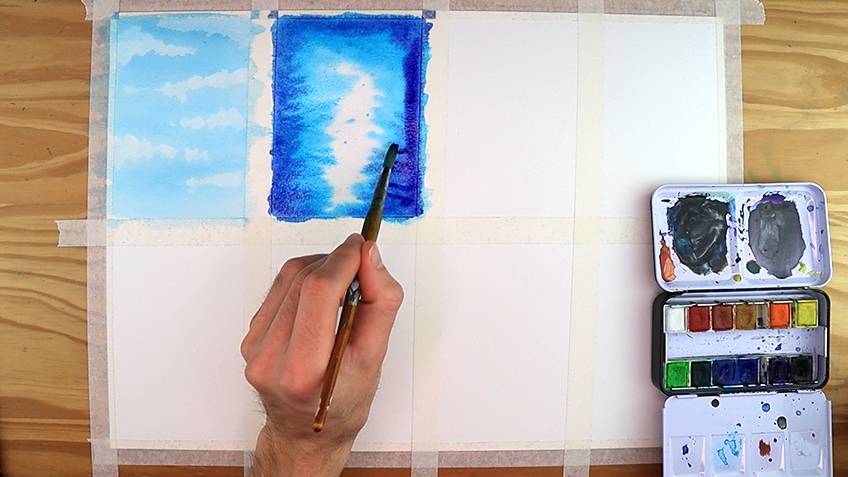
Whilst it is wet we can add some purple and black on the edges so that it may seep into the wet paint mixing and creating an interesting color combination. This is a good technique to add to your watercolor basics. Give the paint a moment to get damp so that it is not completely wet. What we want to do now is place another color in little spots such as red and yellow on the damp paint. This will create little cauliflower back runs (we will define cauliflower back runs in detail later on). However, essentially what it does though is create little explosions of color.

Then allow the paint to completely dry for about one hour, then feel free to apply various kinds of light colors including white. This is a great way to create more abstract combinations or something that resembles an organic composition such as Lillies on dark water.

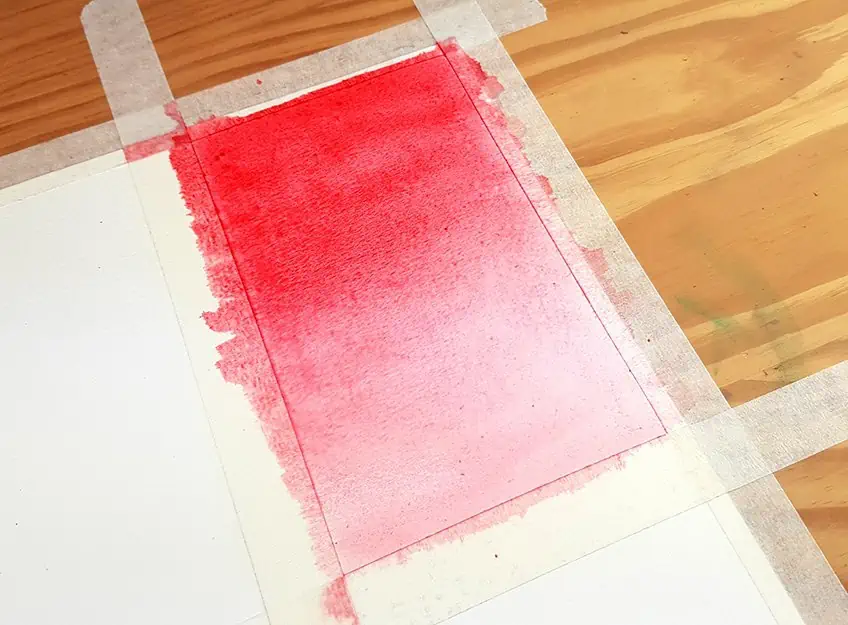
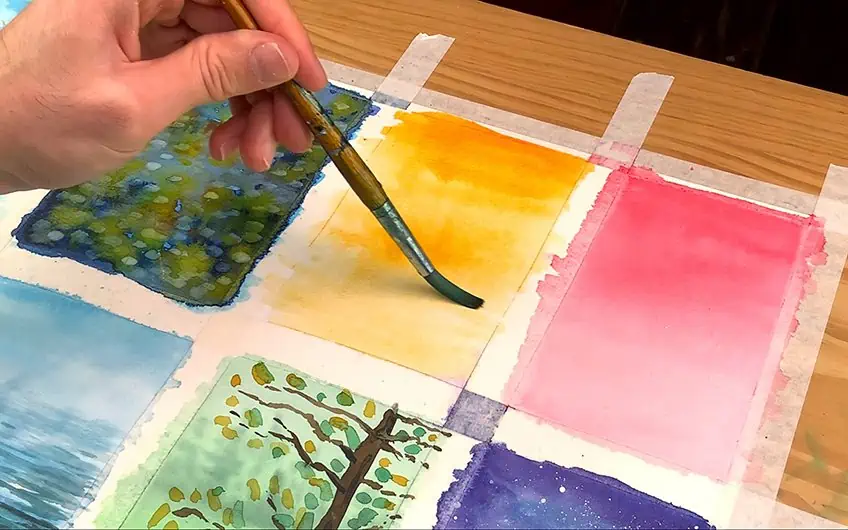
Technique 3: Making a Seamless Gradient
Let us move on to something a little more simple like a gradient. That being said, making the gradient seamless does require attentiveness to the application of the paint on the surface. If done right, it can come out looking beautiful and it is an essential technique for various reasons such as landscape backgrounds, horizons, and many more.
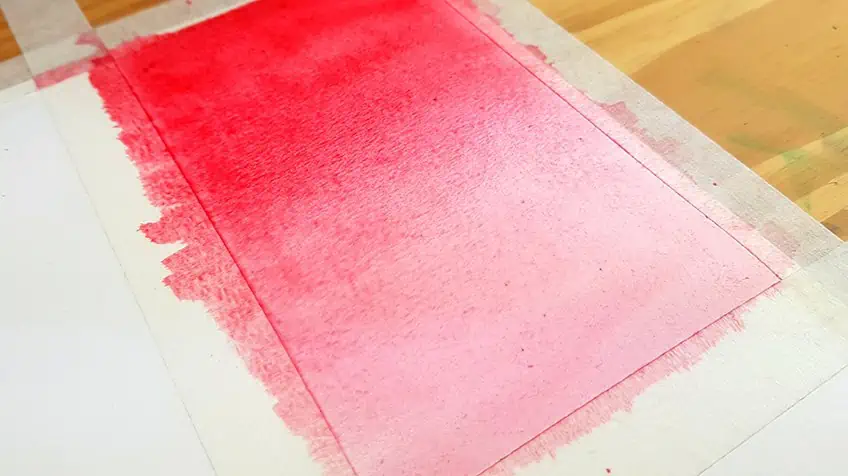
Let us premix a color for this gradient, let’s say red. Once again, with a water primed surface, let us give a stroke of thick red paint at the top of the section onto the wet surface. Whilst still wet we want to act fast and smooth, so with gentle strokes from left to right bring the paint down to the bottom of the section. Keep consistent with your strokes as you go down to the bottom of the section. As you go to the bottom of the page the color should fade from the brush keeping to top more saturated whilst it slowly fades as the paint reaches the bottom of the segment.

Whilst the page is still wet you can go over it again with another layer of the same color or a different one following the same pattern of movement. However, make sure you consistently stroke the paint down to the bottom of the page creating a seamless gradient. Once your paint has dried the gradient should have dried in a way that shows no distinctive lines that separate the dark and light moments. The gradient should be seamless. This can take some practice so keep trying until you get it.
Technique 4: Creating Splatters
The splattering effect works well with watercolor painting. To achieve this effect is an easy and fun activity that can be used to create textures, stars, and even a galaxy. Let us create a mini galaxy with this technique.

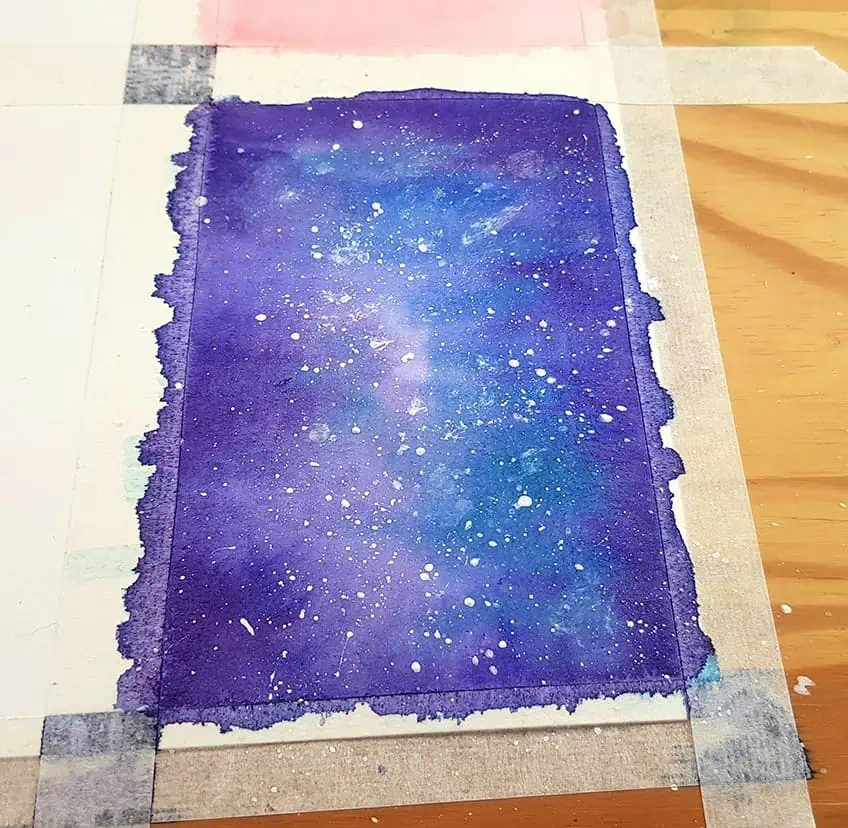
Once again, we will prime the page with a thin coat of water evenly distributed throughout the whole section. Similar to the above techniques, the aim here is to build up layer by layer. With an evenly wet surface begin to apply a light blue on the sides.
Whilst the page is still wet let us act quickly and add another layer onto the sides. Let the next layer we add be a darker blue, we can darken the blue by adding a purple or a touch of black.

We want to leave the center slightly untouched as the water will allow for the colors to seep into the center slightly. We can now add some purple with a touch of black mixed into it, all applied along the sides of the sectioned-off piece. Allow this to dry completely. The colors should merge and slightly move into the center, keeping the sides darker and the center light. This will create a milky way effect that resembles the quality of a galaxy or nebula.
Once we have allowed the paint to completely draw we can begin to create splatters of paint with our white paint. You can either use a paintbrush by dipping it in wet paint and then knocking it against another brush whilst having the spray of paint aimed at the dry surface. Another good suggestion is to use an old toothbrush. What you will do is make a mix of white wet paint and then dip the bristles of the brush into the paint. Once loaded with paint, rub your thumb along the bristles whilst aiming the spray of paint at the dried surface.
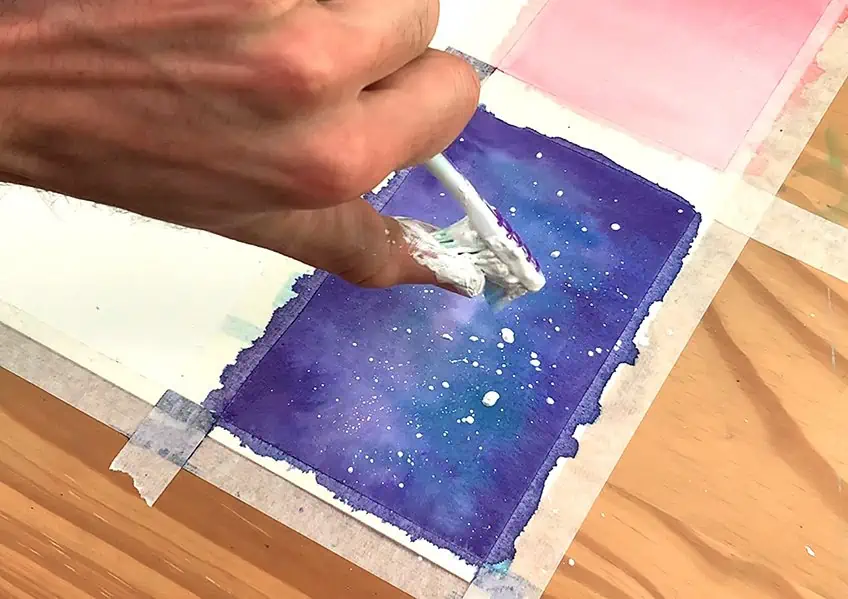
As you do this keep a paper towel around to give a light dab to any unnecessarily large blobs that may have accidentally come off. Just make sure you give them a dab whilst they are still wet. And apply these sprays until satisfied and then allow them to dry. You should see an image that resembles a galaxy if done correctly.
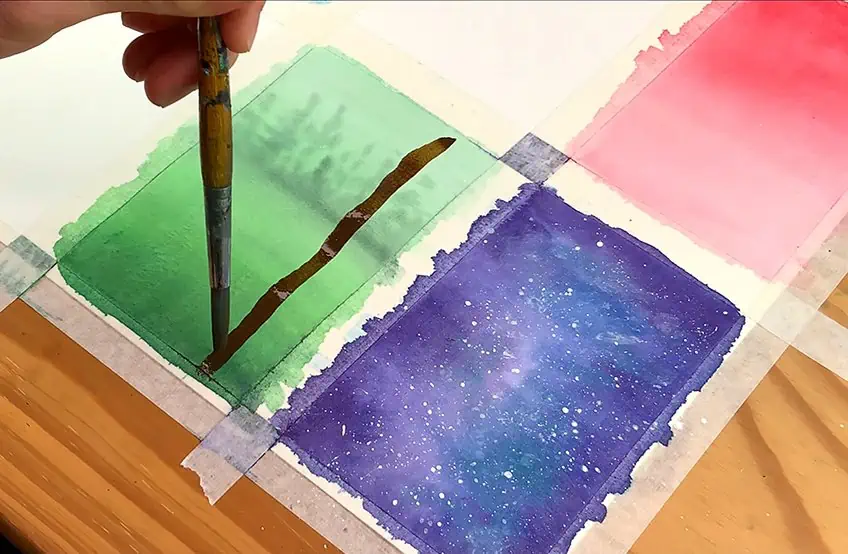
Technique 5: Wet on Dry
Up until this point we have done a lot of techniques that are focused on applying wet paint to wet surfaces. This technique is about applying wet paint to a dry surface which is great for adding details that should stand out or potentially be in the foreground of a landscape. So let us create a little landscape with this technique.
Let us begin by applying a thin coat of water to the surface of our paper. Make sure it is evenly distributed throughout the whole section of the paper. Now, with a mix of green and a touch of brown and black let us make a dark green. Whilst the paper is still wet begin to apply the green at the bottom of the section.

Whilst the paper is still wet add another coat of green at the bottom of the paper to maximize the contrast. Then swiftly make strokes from side to side, moving all the way to the top of the paper. Now, what we are going to do is dip our brushes in our green paint and create a line in the middle of the section. As we do so we want to make little short side to side marks moving up, However, as our hand moves up our strokes shorten which should make the shape of a tree. We want to do this whilst the paint is still wet.
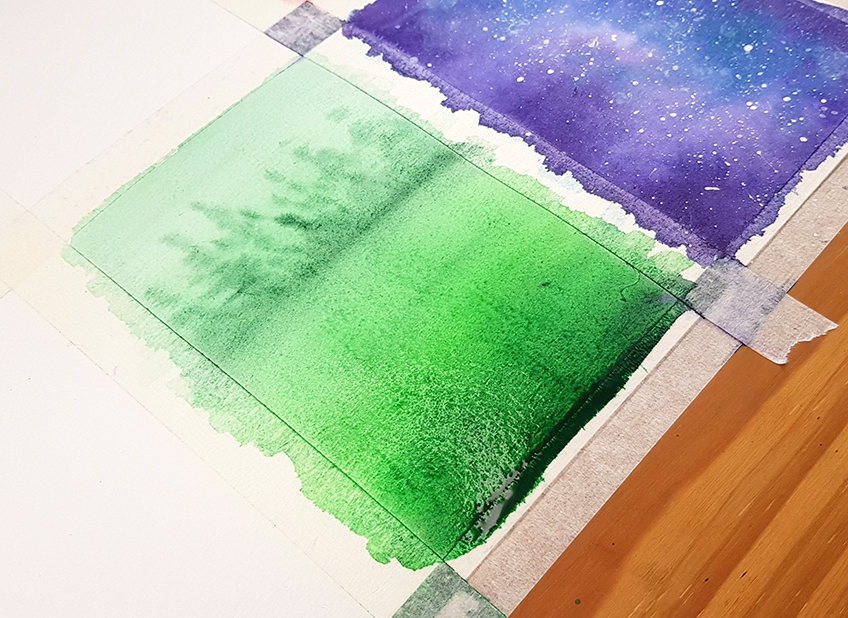
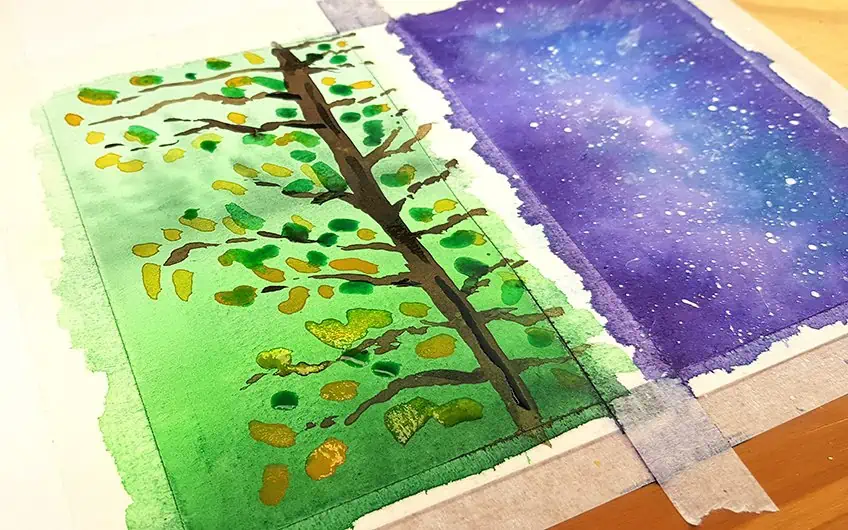
Allow that to dry completely and what should be seen is a row of trees that seem to be faded, giving the effect that they are in the distance. This is a simple and easy way to create a background to an image that we can paint over. This technique is great for adding in foregrounds and details because the technique allows for the wet on dry paint to be in focus. Now we can begin to make a dark brown mix of paint. Now paint a single vertical line moving all the way up the page.
We can then proceed to draw horizontal lines outwardly from the vertical line. Give your motion a slight squiggle to create the quality of a branch. This technique is great for adding darker layers on top of lighter layers as well.

Once that has completely dried we can add in leaves by a dotting action of yellow paint along each little branch.
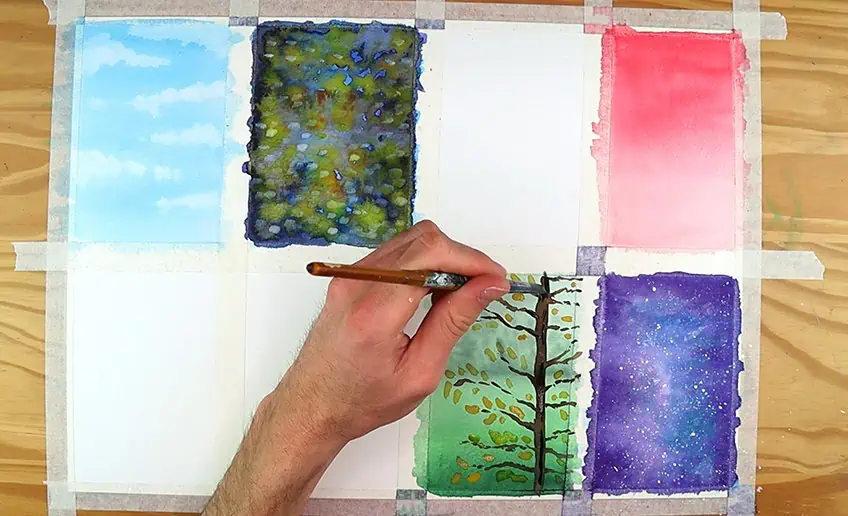
Once again you can add in little details once the paint has completely dried until you feel satisfied. Perhaps you can darken the tree with a few strokes of black paint or create darker leaves with a dark green mix of paint. and there you have it.

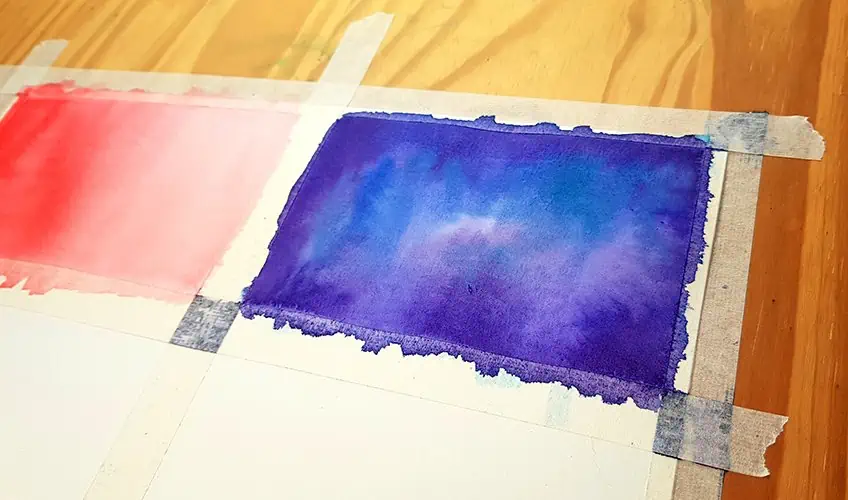
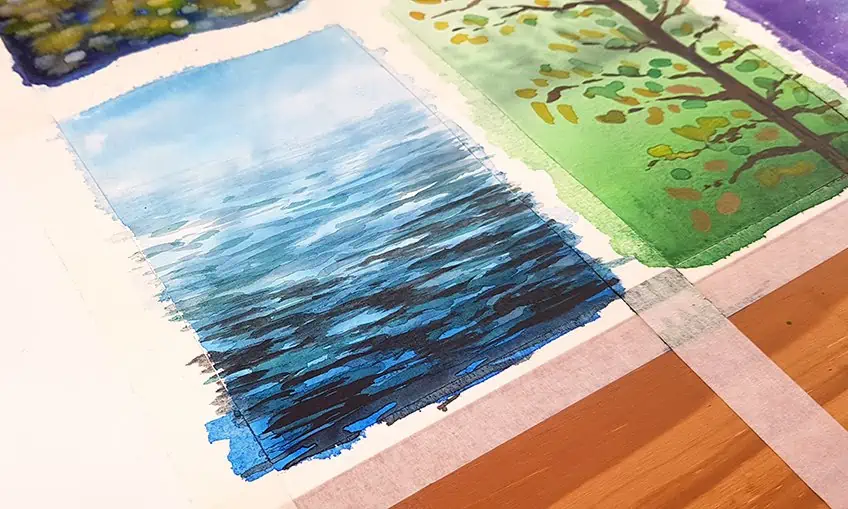
Technique 6: Wet on Wet combined with Wet on Dry
This part of the tutorial is more specifically related to how to paint water, such as ocean water or lake water. This is a common technique used for sunsets, clods and is quite often used in the landscape in general. However, water can seem daunting to try and paint but when done right it can come out beautiful, so it is a great technique to learn. Let us begin by priming the surface of the paper with a thin layer of water once again. Now whilst the paper is still wet, we will begin a similar action to creating a fade but this time as we stroke the paint up the page we want to pull our hand back now and then to create negative space.

Whilst that paint is still wet we are going to slightly darken our blue with a tiny bit of black or a darker blue. Then we want to load our brushes with a darker blue and whilst the paint on the paper is still wet we are going to put dark strokes in the areas of the blue starting from the bottom. The darkness should fade as you move up the page.
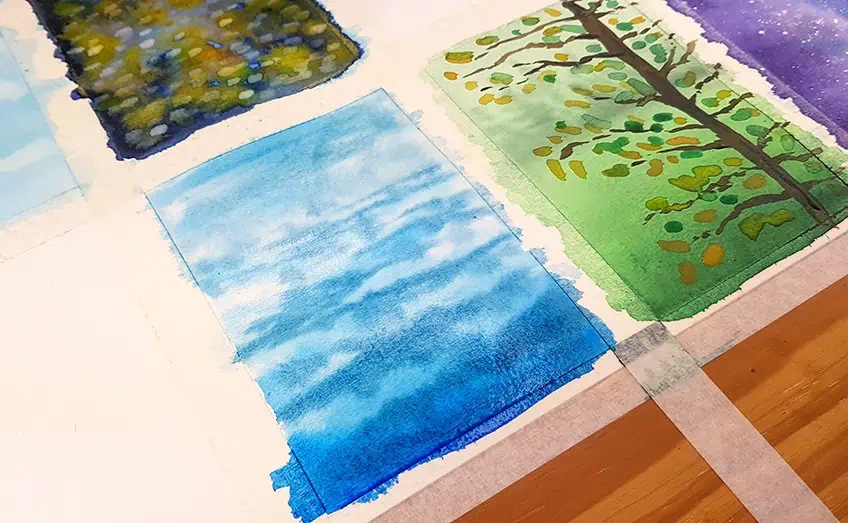
We want the dark blue to seep into the light blue to create a unique color combination. We are then going to let that completely dry and once it is completely dry we are going to add strokes of blue once again. The action is swift side to side moving up the page allowing the paint to fade. We are painting jagged strokes by a swift wrist action moving left to right. However, you can give your hand a slight up and down motion to create a wavy motion. This will help nuance your marks allowing it to seem more interesting.
Then lastly it is about applying the darkest layer of blue on a dry surface for the darkest moments.
The darkest marks can be applied with the most caution. The reason is that you want to have a variety of motions in the water to resemble the qualities of ripples in real water. Sometimes these side-to-side strokes connect which may produce a series of jagged X-type-shapes in the water.
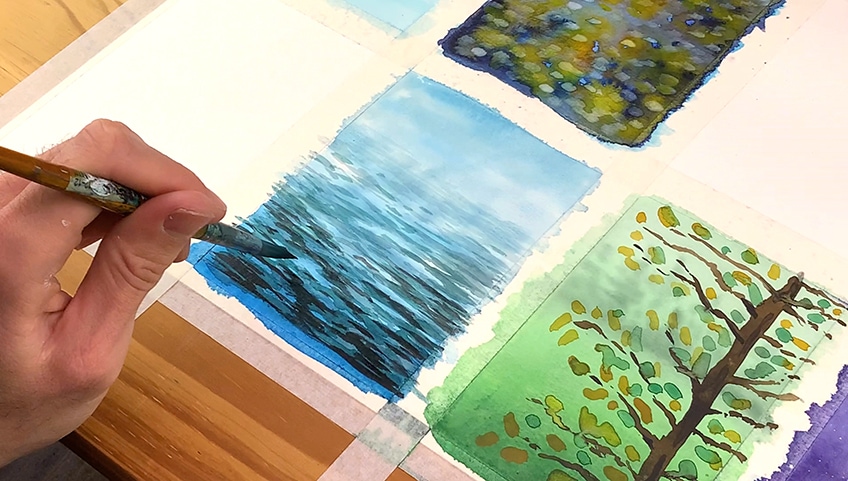
Be cautious as you apply each darker layer on top of the next. Remember, you want the light layer to dry before you apply the next one. Once it is completely dry you can add little moments here and there of white strokes to create a sense of light reflection. There you have it, a general guide on painting water.
Technique 7: Cauliflowers and Back Runs
This technique has been a common accident or commonly used technique in watercolor painting. When used correctly it can be used to create very interesting color combinations and mesmerizing effects in a painting. In this step, we will use this technique to create abstract flowers, which is a great tool in the arsenal for watercolor painting

Let’s begin by applying a thin coat of water on the surface of our sectioned-out page. Let us mix a vivid orange color and apply a stroke at the top of the page slowly stroking the paint left to right moving down the page.
Now, allow the paint on the page to dry slightly until damp. Once the paint is slightly damp we will begin to take a new color, let’s say red, and dot our page with a blob of the color. What we will do is the same thing for a new color. We will allow the red to get to a damp stage and once it is damp we can add another dot of a new color (blue) on top of the red blob.
What is happening here is the paint has a back run effect that eventually stops because the page is too dry for the wet paint to move any further.
Once again let us allow the blue paint to get to a stage of dampness. What we want is the color to be slightly wet but not completely, this is what is meant by damp. Once the blue seems at a damp stage we can apply a new color, let us go with white. The back runs or blooms create a flower-type shape.

Once these blooms have dried completely we should be left with a unique layered effect of colors that sprout outwardly. Once it has dried we can add various strokes to create a flower. We can begin by using red paint to create triangular strokes around the blooms. We can also add some general lines at the bottom of these blooms to create the effect of stems for the flowers. Another cool trick is to add a little dot in the center of the blooms to give it a bit more features. You can add as many little details to give it a unique and interesting look.

And lastly, perhaps add some green petals with green paint. Allow yourself to not get hung up on the shape of these features. Remember to keep loose and gestural with your marks as this approach works well with watercolor as a medium.
Technique 8: Using Salt In Watercolor
This technique is quite strange as it requires a pinch of salt. Some of the greatest effects in watercolor painting are produced with external tools and items. This particular technique can come with great results that can be used for abstract paintings, snowflakes in a landscape, and many other interesting effects.

Firstly we will prime the surface of the paper with a thin layer of water. Once that is done let us use orange again but instead of fading from just the bottom, we will fade from the top of the page as well. With your orange paint put a stroke of paint at the bottom and stroke it upward towards the center of the page. Let us do the same for the top of the page by reloading our brushes with orange paint and applying a stroke at the top of our page.
We can then make strokes left and right down the page until it fades into the middle with the other orange paint.
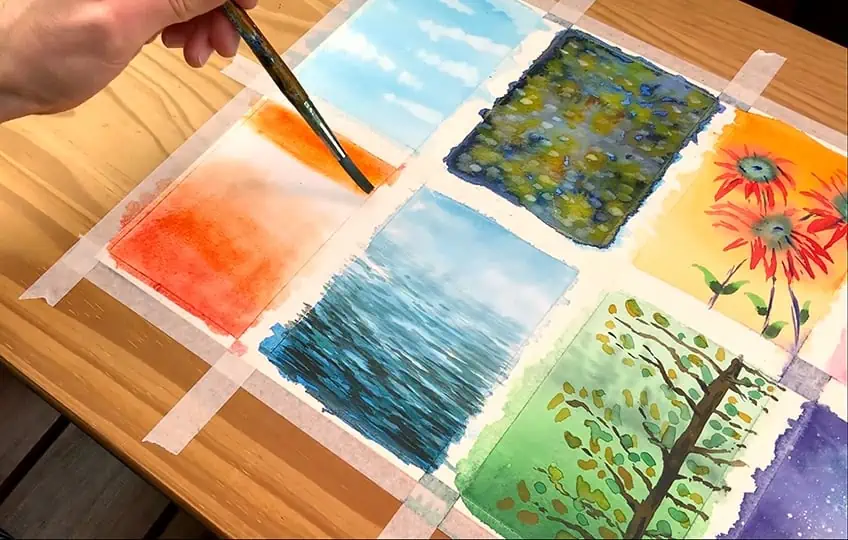
Whilst the paint is still wet take some salt in your hand and begin to sprinkle some all over the painted section. Try to be swift with this action as we want to do it whilst the paint is still wet. As the salt dries with the paint it will pull some paint off the surface of the paper to create an interesting effect. This could be used as a way to create deserts, snowflakes as well as an interesting way to represent different surfaces.

Once the paint has dried completely with the salt on the top of its surface we can begin to remove the salt by gliding the finger over the surface of our paper. There you have it, an interesting way to create a unique effect in watercolor painting.
Lastly, we can remove our masking tape from the paper. Be very careful with this and go slow and steady as if we go too fast it may rip the page.

There you have it, a combination of techniques that helps to establish a bit more variety in your watercolor skills. I hope that this tutorial gives you a greater sense of confidence in your watercolor skills.
Tips to Remember
Watercolor is one of the most diverse and vibrant paint mediums. There are so many beautiful and vivid watercolor techniques to explore. The most important thing to remember when experimenting with watercolor painting techniques is that there really are no rules. Have fun, get creative, and follow our top tips below when you need guidance!
- First of all, take your time, take breaks in between the process of painting. This helps to give us a fresh perspective every time we re-engage with our painting.
- You can use a plate to mix your watercolors on as the porcelain works well for smooth mixing.
- Always make sure you stick your page down with scotch tape as the page will warp due to the water.

- Some good watercolor painting tips can often be about the environment. If you want to enhance your skills try painting watercolor scenery from life. Watercolor nature paintings are often best produced from painting directly from nature.
- It’s always good to keep jars of water, this way you can make sure your brushes are clean before using a new color.
Learning how to watercolor is a really fun and relaxing task. When we learn the watercolor basics we give ourselves the best opportunity to know generally how to paint with watercolor. This allows us to create easy watercolor landscapes and other easy watercolor paintings. This tutorial breaks down a few watercolor tips that help guide you and build up your watercolor basics. Painting with watercolors is also a very peaceful endeavor and should be approached with a free and relaxed demeanor.
Frequently Asked Questions
What Are the Watercolor Basics?
There are a few common ways to use watercolor when learning how to paint with watercolor. However, the most common are wet-on-wet and wet-on-dry. When you learn how to paint with watercolor these two methods encapsulate a variety of applications within them. Wet on wet is where we prime the surface of the paper with a coat of water and then begin to apply wet paint onto the wet surface. Hence the term wet-on-wet. Wet-on-dry is simply applying wet paint onto a dry surface. Both of these techniques can come with a variety of applications which are broken down in this tutorial.
What Are Some Good Watercolor Painting Tips?
When learning how to paint with watercolor, the first thing is to make sure you have the correct paper, preferably you want your paper to be thicker than 300Gsm. Secondly, you want to make sure you have some scotch tape to tape your paper down to a surface. This helps with keeping the paper in place as it will inevitably warp due to the water. Third, some good watercolor brushes help. These you can purchase from your local store however if you really want to go the best route you would want to purchase natural over synthetic brushes.
What Are the Different Watercolor Techniques?
There are various watercolor techniques. In this tutorial, we go through some of them such as wet-on-wet for instance. This technique is where we apply our wet paint to our wet surface. This is good for soft and blurring backgrounds, as well as creating seamless gradients. Another technique is dry brushing. This technique is great for adding details toward the end of the softer tones. This is because we are applying dry paint which then will have less of a translucent quality, which will result in a stark appearance. These are just a few that are helpful for watercolor landscapes.
How Do You Paint Water With Watercolors?
Painting with watercolor works well with natural environments. Water specifically, is actually quite simple to paint in watercolor. With water you need to understand that there are various ways it can be, sometimes settled and sometimes in motion. With ripples in the water, it is about creating quick and swift strokes generally moving along the plain of your landscape. This means if the plain of your landscape depicts a scene where the water should be moving horizontally then we want to make swift strokes from left to right. We use light tones first and then we can and in darker strokes to give a sense of reflection variations. Lastly, you want to keep negative moments or white moments in the water to diversify the shine effect on the surface of the water.

Matthew Matthysen is a multidisciplinary artist. He completed his fine art degree, majoring in History of Art and Contemporary Drawing Practice at the University of Witwatersrand, South Africa. Before joining acrylgiessen In 2020, Matthew worked part-time as an art teacher at Reddford Blue Hills High school. Matthew creates drawing and painting tutorials for acrylgiessen and captures them not only photographically and in written form. He also records the creation of his works in his own creative studio as in video format, from which later with a voiceover and a video editor also drawing tutorials for the Youtube channel of acrylgiessen are created.
Learn more about Matthew Matthysen and about acrylgiessen.