Clouds Drawing – Create a Fluffy Cloud Sketch
This post may contain affiliate links. We may earn a small commission from purchases made through them, at no additional cost to you.
Clouds are like nature’s paintbrush, painting the sky with their ever-changing shapes and colors. They can be fluffy and white, dark and ominous, or painted with vibrant hues during a sunrise or sunset. Clouds not only provide us with stunning views but also serve important functions in regulating our planet’s climate and weather patterns. Whether you’re a daydreamer who loves to stare up at the sky, a photographer capturing the perfect shot, or a scientist studying atmospheric conditions, clouds never fail to captivate our attention and imagination!
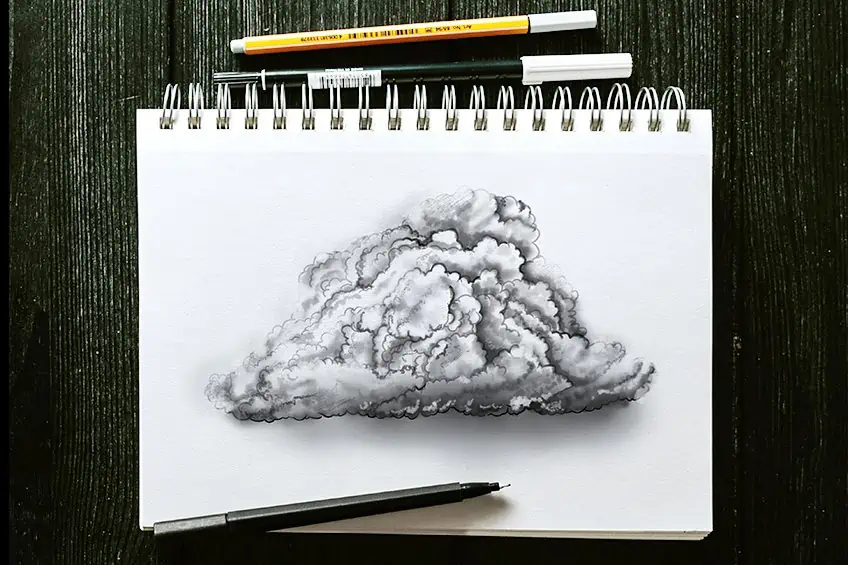
Learn How to Draw Realistic Clouds in Today’s Easy Guide
Drawing a cloud can be a great way to improve your drawing skills and gain confidence in your artistic abilities. Don’t worry about making mistakes or creating a perfect likeness – the process of drawing is all about learning and exploring new techniques. With each stroke of your brush, you’ll gain new skills and insights into the art of drawing, building a strong foundation for future projects and creative endeavors. So grab your sketchbook, find a comfortable spot in the outdoors, and let your imagination soar as you bring your cloud drawing to life.
By following the steps displayed in the collage below, you will soon be able to draw a cloud with ease!
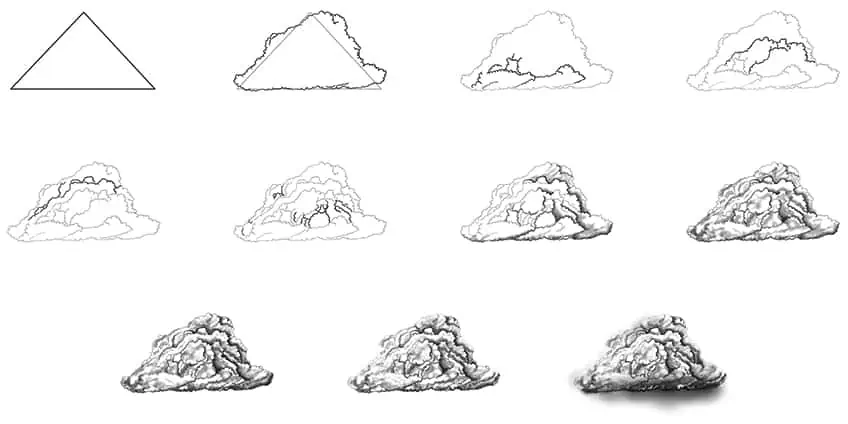
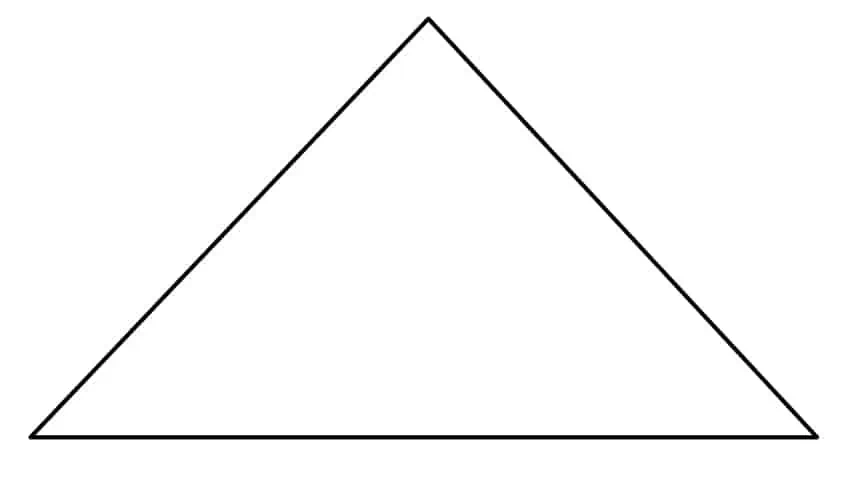
Step 1: Draw the Main Shape of Your Cloud Sketch
Begin your cloud drawing by finding the center of your drawing area, and draw the main cloud shape represented by a triangle.
Step 2: Outline the Cloud Sketch
Use the previously drawn triangle to aid you in outlining a more realistic cloud drawing. Do this by drawing small fine waves surrounding the triangle. Once completed erase the still visible construction lines.

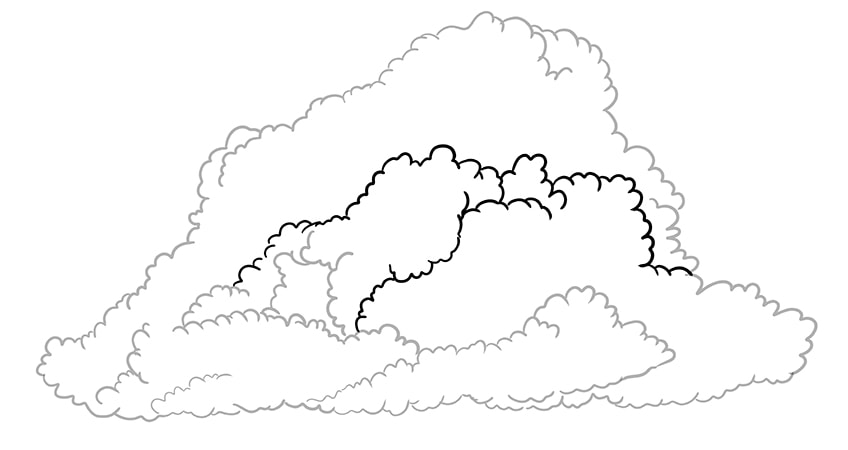
Step 3: Begin Filling the Lower Area of the Cloud
Within the lower area of the cloud, begin drawing the smaller inner particles of the cloud.

Step 4: Fill the Mid-Area of Your Cloud Sketch
Within the middle area of the cloud, continue drawing the inner particles of the cloud.
Note! The inner area should be stacked above the lower particles drawn previously.
Step 5: Continue to Fill the Top Area of the Cloud
Repeat the previous step, however, only fill in the top area of your realistic cloud drawing.
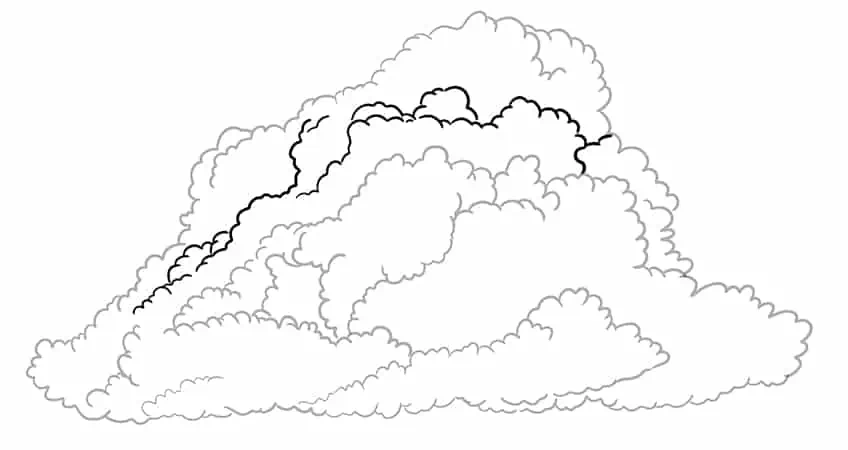
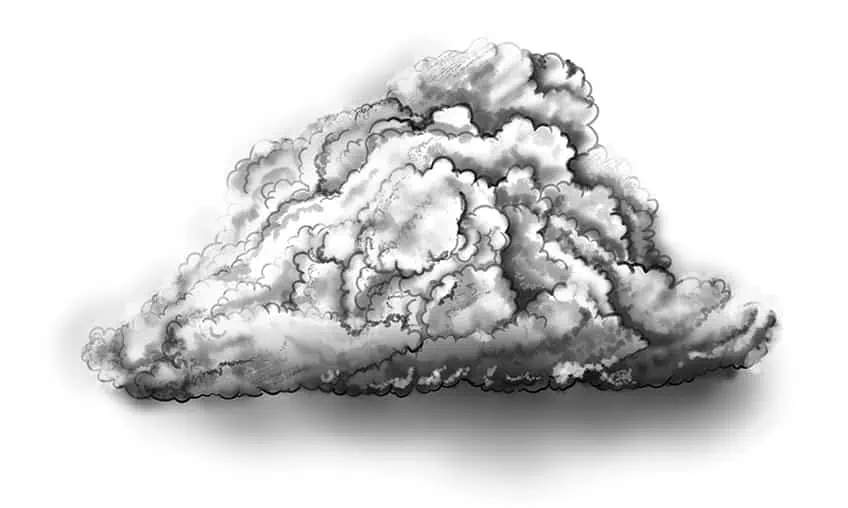
Step 6: Add the Final Cloud Particles
In this step, draw the final smaller cloud particles unifying the cloud as a whole.
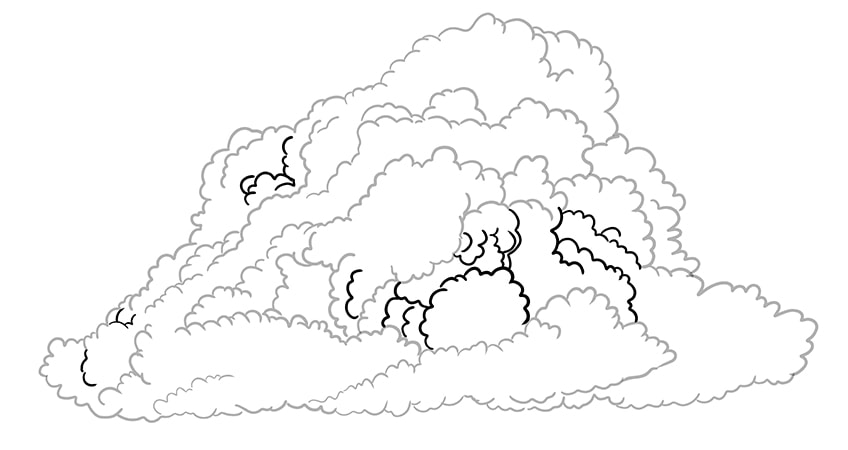
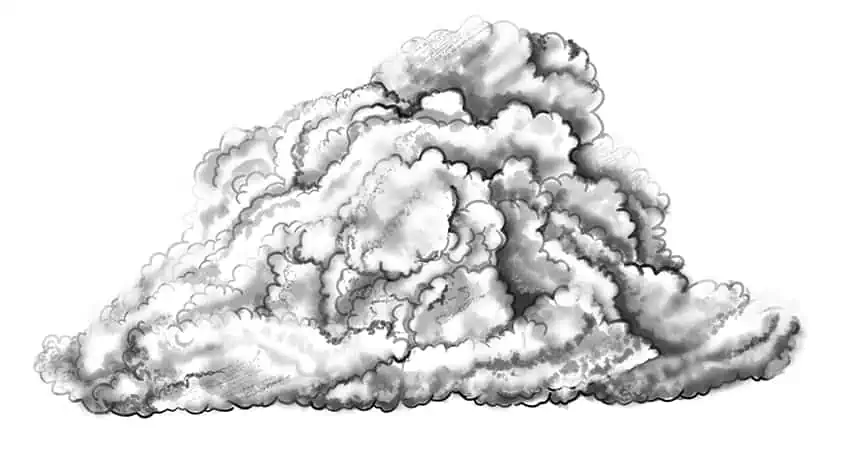
Step 7: Shade the Front Cloud Particles
Select a fine, sharp brush and black paint, and begin to enhance the outline of your realistic cloud drawing. To do this, shade the inner cloud particles. Repeat using a small, soft brush to spread the shading.
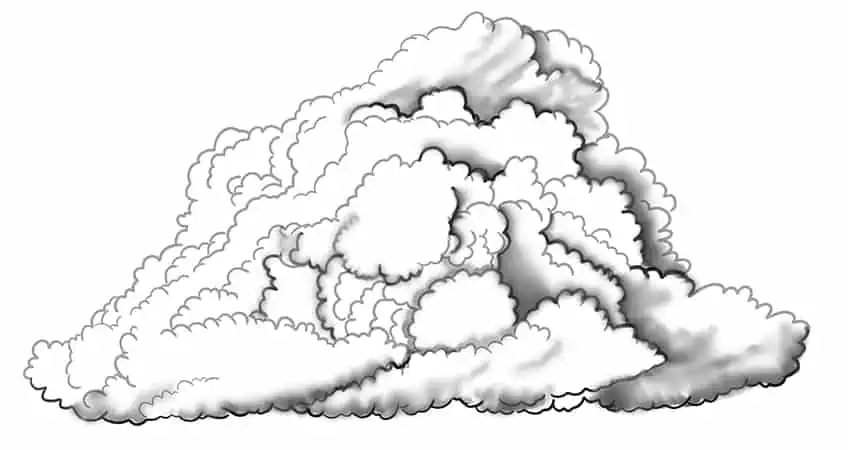
Step 8: Contour the Rest of the Cloud
Using a small, soft brush and black paint, lightly add spots and patches along the rest of your cloud drawing.
Step 9: Enhance the Shading
To enhance the cloud particles, use a soft brush and black paint, and repeat the shading process done in step seven. Switch to a blending brush to soften and spread the shading.
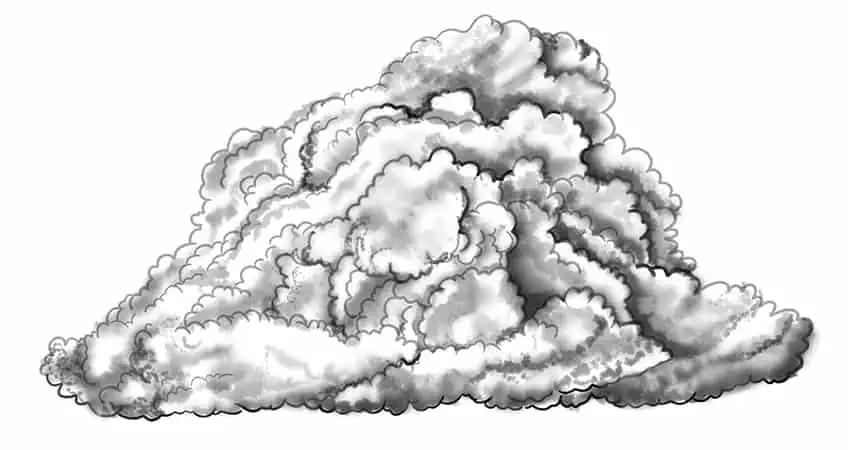
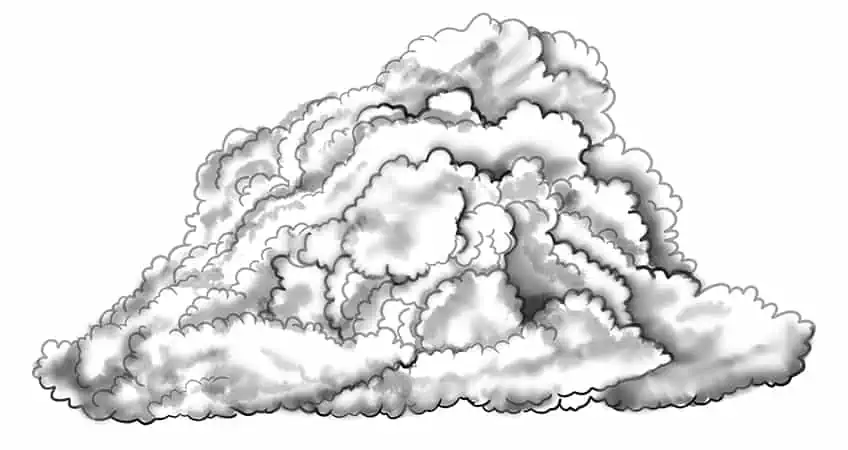
Step 10: Highlight Your Cloud Drawing
This step can be done in one of two ways. The first way is to use a soft brush and white paint and apply soft highlighted patches between the cloud particles. The second way is using a thin eraser to erase several spots and patches creating a more realistic highlighted tone within the cloud.
Step 11: Add a Background Shadow
With a small, soft brush and black paint, lightly add shading surrounding the cloud. Switch to a blending brush and softly spread and enhance the background shadow of the cloud.
Congratulations on finishing the tutorial on how to draw realistic clouds! It’s always rewarding to complete a work of art and be proud of your efforts. By following along with our drawing tutorial, you have gained new skills in drawing and likely learned some techniques that you can use in future projects. We hope that you had fun during the process and enjoyed the sense of accomplishment that comes with finishing a piece of artwork. Keep up the great work and keep exploring your creativity!
Frequently Asked Questions
How to Draw a Cloud and Make It Look Realistic?
Learning how to draw a cloud and make it look realistic, you can start by observing the shape and texture of real clouds. Sketch the general shape of the cloud using light and soft brushstrokes. Use an eraser to refine the shape and add details such as wisps and edges. To make the cloud look more realistic, add shading by using a darker paint color. Identify the direction of the light source and shade the areas of the cloud that would be darker, leaving the lighter areas untouched. Use blending tools to create a smooth transition between the shaded and lighter areas of the cloud.
How to Add Shading to a Cloud Drawing?
To add shading to a cloud drawing, you can start by identifying the direction of the light source and shading the areas of the cloud that would be darker. Use a darker pencil or shading tool to create shadows and emphasize the cloud’s shape and texture. You can also use blending tools to create a smooth transition between the shaded and lighter areas of the cloud. Another technique to add shading is to use cross-hatching or stippling to create texture and depth. Experiment with different shading techniques and observe real clouds to create a more realistic effect!

Matthew Matthysen is a multidisciplinary artist. He completed his fine art degree, majoring in History of Art and Contemporary Drawing Practice at the University of Witwatersrand, South Africa. Before joining acrylgiessen In 2020, Matthew worked part-time as an art teacher at Reddford Blue Hills High school. Matthew creates drawing and painting tutorials for acrylgiessen and captures them not only photographically and in written form. He also records the creation of his works in his own creative studio as in video format, from which later with a voiceover and a video editor also drawing tutorials for the Youtube channel of acrylgiessen are created.
Learn more about Matthew Matthysen and about acrylgiessen.