DIY Resin Petri Dishes – Alcohol Ink in Resin
This post may contain affiliate links. We may earn a small commission from purchases made through them, at no additional cost to you.
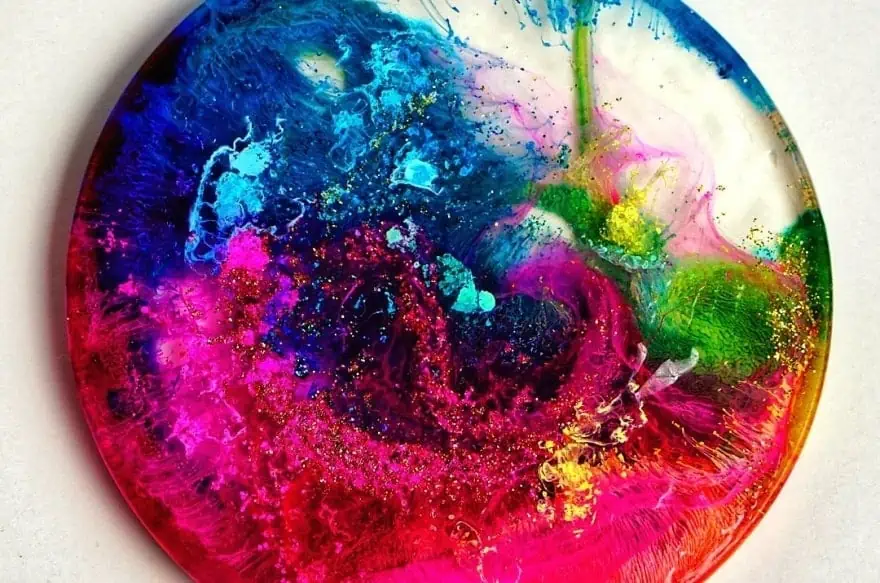
With this tutorial I want to show you how to make colorful Resin Petri Dishes with Alcohol Inks – also called Petrified Rainbow – by yourself. I’ll show you step by step how you can cast these breathtaking unique pieces in silicone moulds and which supplies you need.
What are Resin Petri Dishes or Petrified Rainbows?
Petrified Rainbow – If you are a resin art fan, chances are, you have come across this term. One day, very talented resin artist Josie Lewis, has dropped alcohol ink into her resin to see how they react with each other. To her amazement, she has invented a very colorful and almost unpredictable resin art which is expanding among other resin artists in a tremendous speed. She has given this art the name “petrified rainbow”. It’s a very smart name as it describes the process of capturing a rainbow in a petri dish format mold and perpetuating it for all eternity; petrifying. Other, also very common terms for Petrified Rainbows are Resin Petri Dishes or Resin Coasters. Coasters because these cast resin moulds can also be used wonderfully as glass coasters or the like.
Supplies for Resin Petri Dishes

- Specifically designed for art projects, excellent color stability
- Very easy to use with 1 : 1 mixing ratio, 100% solids, hard-shell finish
- High gloss and crystal clear, your all-seal solution, excellent air release
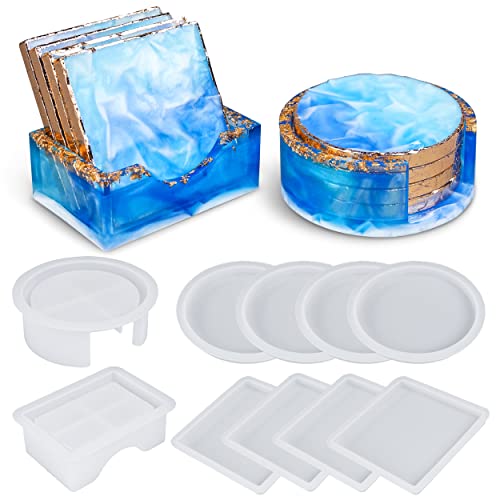
- High-quality 10pcs Coasters Resin Molds Set
- Includes 4 pcs round coaster molds and 4 pcs square silicone molds
- Made of high-quality silicone, very flexible and durable

- Offers 26 vibrant colors, providing a wide range of options to create dynamic and colorful resin art
- Highly concentrated alcohol-based formula
- Versatile application
Other materials required
- Isopropyl alcohol 99%
- Silicone Oil
- Epoxy mixing set with cups and mixing stick
- Butane Torch
- Nitrile Gloves
- Respirator Mask
- Safety Glasses
- Plastic Drop Cloth
Dedicated Course on how to learn Resin Petri Dishes

![]()
![]()
Alcohol Ink and Resin DIY Projects Drink Coasters and Knobs!![]()
- This course is for all levels of Alcohol Ink painters or crafty/creative folks looking to create!
- This course is about learning to play with colors and freeing up your expectations.
- This is a basic short and simple course filled with 3 demos on how create Alcohol Ink Resin Coasters and DIY knobs.
Kellie Chasse give you the secret to creating this super cool DIY unique Drink Coasters and Unique one of a kind Art knobs for your cabinets, dressers, and more!
Get the Resin Petri Dish Course
Step by Step Tutorial for Alcohol Ink Resin Petri Dishes
1. Safety First
First things first; always wear enough protection when working with resin. Gloves and face mask are the minimum protection. Even if the resin label says non-toxic, always work in well-ventilated areas. Alcohol is a solvent, when put into the resin, it tempers with the non-toxicity of the resin. Do not inhale the possible fumes.

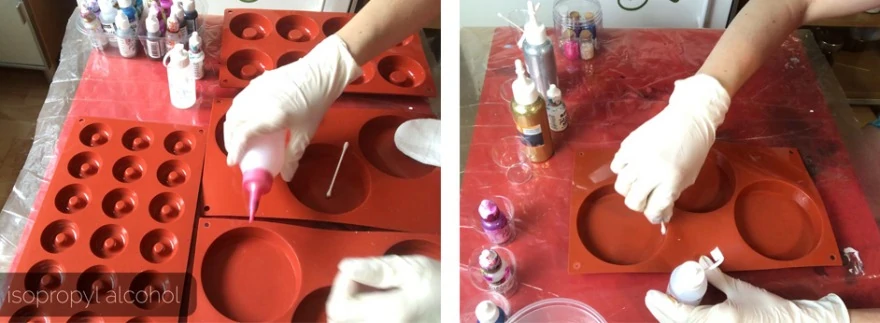
2. Prepare the Mold
Now that you have taken all required precautions, let’s start with the preparation of the molds. It’s important to work with a clean mold, free of any debris, hair and dust. If let in the mold, they cure with the resin and it might be very cumbersome to impossible to take it out of the cured piece. Wipe your mold with a clean piece of cloth or kitchen roll and rubbing alcohol or even better with 96% isopropyl alcohol. After wiping let it dry. In order to prevent sticking, wipe the sides of your mold with silicone oil. You can use a cotton swab for this purpose.
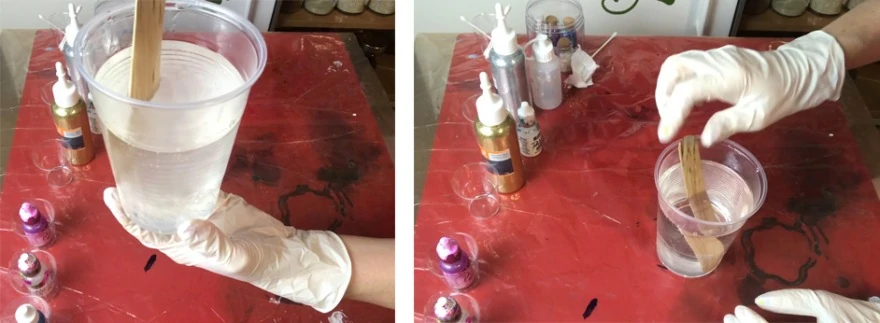
3. Prepare the Resin Epoxy
Follow the instructions on your resin’s label to prepare your resin. I use about 400 ml ProArt Epoxy Resin to pour into a 3 cavity mold, each about 10cm in diameter. Depending on your projects, you might want less or more, Although more resin means deeper petri, which some brands can’t cope with and they get too hot. Check

Stir very very very slowly. The label says for 3 minutes but instead of looking at the clock, I look at my resin. At first, when resin and hardener mix, it’s very cloudy. The mixture gets clearer when you start stirring. Again it’s important to emphasize the speed; the slower you stir, the less air bubbles you get. The less air bubbles in the mixture, the easier to get rid of them. We want clear petri dishes without any air bubbles. When your mixture is clear like water, then it’s ready.
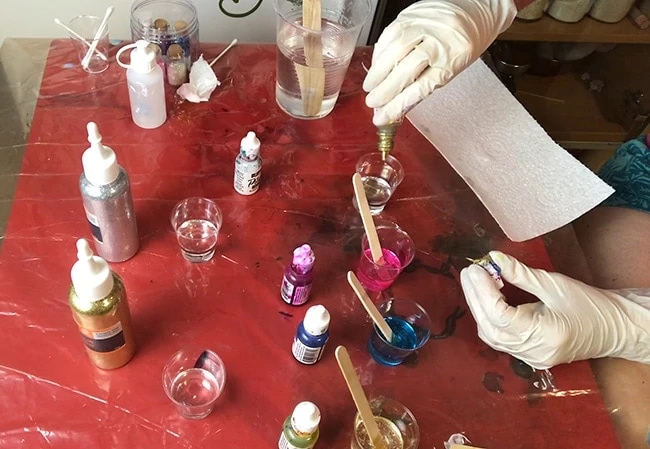
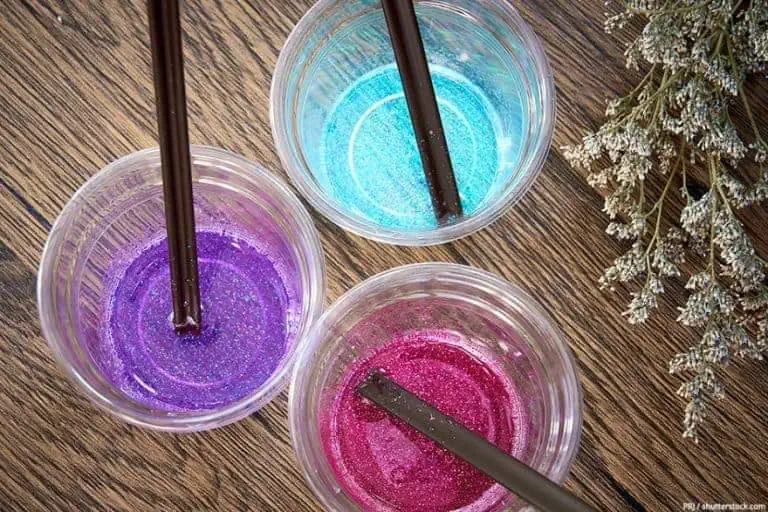
4. Prepare the Tinted Resin
I tint my resin with Let’s Resin Alcohol Inks. I tried one drop of Golden Fluid Acrylics once and it was simply too dominating. Put some resin into a silicone cup and torch slightly to get air bubbles out. Add a few drops of your alcohol ink. Stir slowly to avoid air bubbles and thoroughly to integrate the ink into the resin homogeneously.
5. Pour Resin into the Mold
Level your workspace (table, desk, etc) to ensure that your petris will be of the same height. Test your resin by putting a wood stick and observing the flow of the resin off the stick. If it flows slowly, your resin is ready. If it flows quickly, wait a few more minutes.
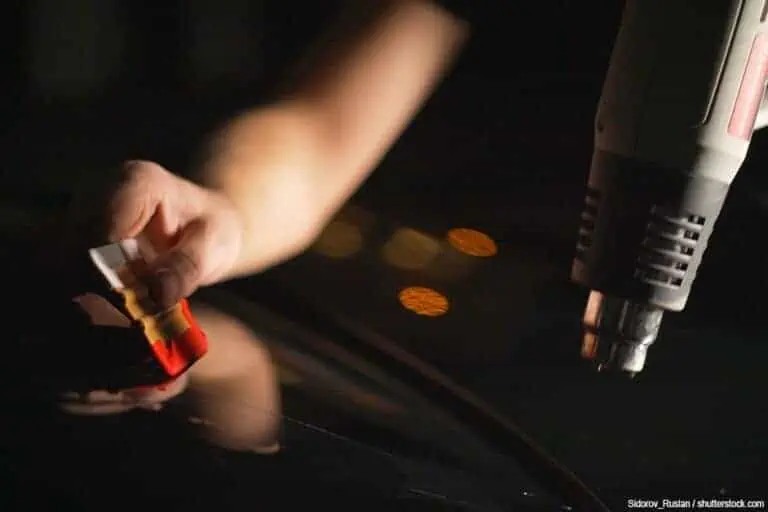
When your resin is ready, pour it into the 3 cavities in equal parts. If there are still air bubbles, torch the resin quickly and carefully.
Again it’s important to read the label of your resin if you can torch it or not. ArtResin says explicitly that it can be torched. The heat of the torch bursts the bubbles and leaves a clear resin. Now the resin is ready to create some magic.
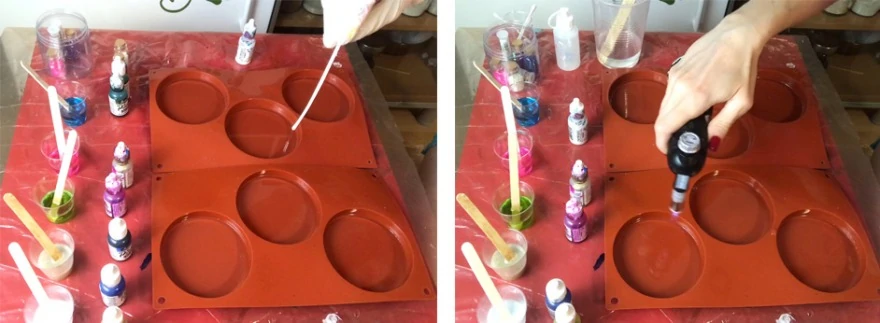
6. Drop Alcohol Ink into Resin
Put all the alcohol ink bottles next to your mold and unscrew the caps but leave them on top of the bottles. Drop a few drops of alcohol ink into the resin. If it spreads immediately, your resin is still pretty fluid. If it doesn’t spread much, your resin has started to cure a bit.
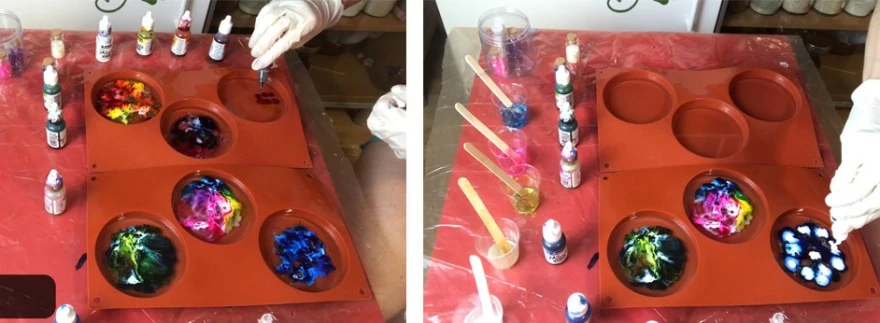
This state seems to create the most beautiful pieces for me. For you, it might be different, so experiment. Try different fluidity of the resin. After dropping some colors, drop one drop of white alcohol ink on top of each color drops. This is how the petri magic happens. White is heavy so it pushes the color beneath it to the bottom. While doing so, ink reacts with the resin and creates the typical anemone like tiny tentacles. If your resin is too fluid, white might drop straight to the bottom which causes unwanted white spots in your petri.

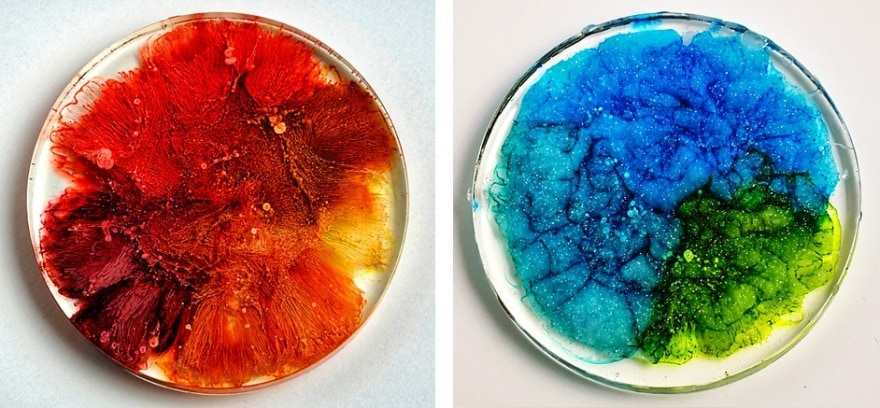
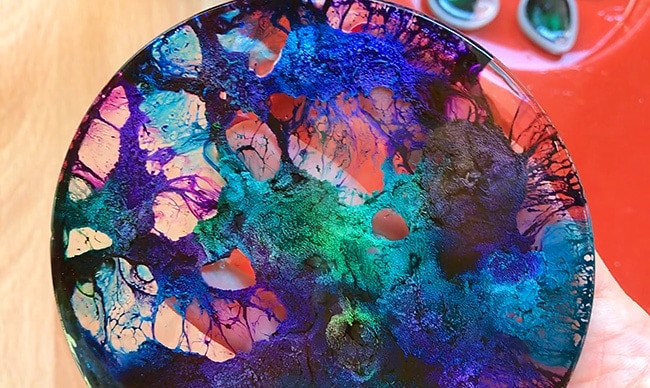
left: If you want to have tentacles in your petri, use only alcohol inks and white.
right: If you want cloudy, brainy petris, pour your tinted resin on top of alcohol inks.
7. Cover your Work
When you are done with dropping the inks, cover your mold. You can use a cardbox or a storage box for this purpose. Make sure that the box doesn’t touch the mold or the resin. Leave your mold on the leveled surface and let it cure depending on the time your resin needs. You can get the info from your resin’s label. ArtResin ccures to the touch after 24 hours and fully cures after 72 hours.
8. Demold your Art
This is definitely the most exciting part of the entire process. You never know what you’ll get until you demold your piece. Carefully unmold your resin piece starting on the sides. Now you can view your art with awe and be mesmerized by the chemical reactions which have created the most beautiful patterns.
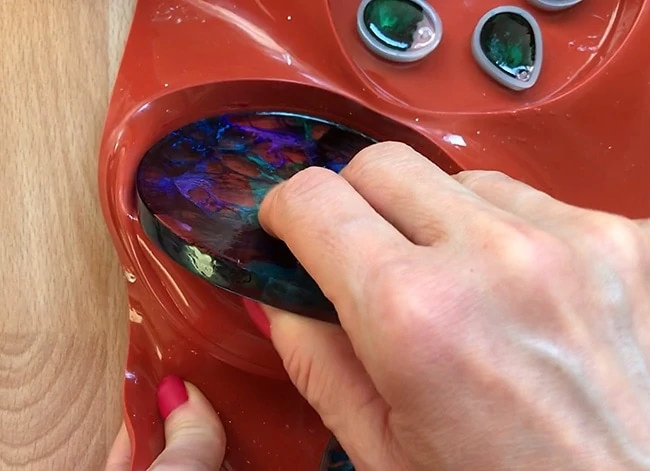
BONUS: If you want to create lacing in your art, wipe the entire cavity of your mold with silicone. Silicone prevents the alcohol ink to spread much and creates the cells which result in gorgeous lacing.
Video Tutorial Alkohol Ink Resin Petri Dishes
So that the whole thing is somewhat more descriptive, you see here one of my video tutorials:
I wish you a lot of fun and good luck pouring your first Petri Dishes in resin epoxy! Would you like to try out other variations of resin art? Then you might also be interested in the following articles:
- Resin Epoxy Art – Basics for your first Steps in Resin Art
- Beach Art – Resin Art Tutorial with Textures
- Resin Geode Art DIY (Free Form Style)

Seda Özses is a mother, computer scientist, artist, and content creator from Austria. Every day she masters the balancing act between all these different obligations and responsibilities. That’s why Seda always takes short breaks in nature to recharge her batteries. In her search for a creative outlet for herself, she also found a super way that completely fills her: art. She loves painting and colors, for her they are pure moments of happiness. Her creativity lets her forget everyday life and immerse herself in a magical world. Seda creates various artworks from resin, alcohol ink, and acrylic paint. Recently, she has also discovered the drawing of mandalas for themselves.
Learn more about Seda Özses.

Very helpful, thanks!