Best Epoxy for Tumblers and how to make Glitter Tumblers
This post may contain affiliate links. We may earn a small commission from purchases made through them, at no additional cost to you.
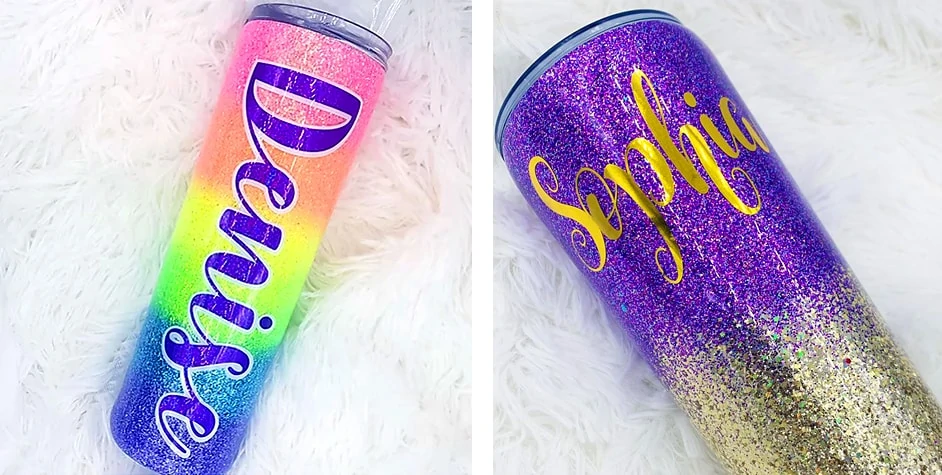
Resin Art has always found a special place in the hearts of artists. With Epoxy Resin, you can create your personalized tumbler. Depending on your own choices, you can the customize the epoxy tumbler your own by using colors, glitter and other materials. These decorations are complimented with the good quality resins used to make your tumbler stand out.
Important Things to find the Best Resin for Epoxy Tumblers
All craft and art enthusiasts usually wonder how to epoxy tumblers in the best way. And what kind of epoxy to use on tumblers? While searching for the best resin and what kind of epoxy to use on tumblers, you should always check for all the features of the resin.
- Resistance to UV rays: Some Epoxy Resins demonstrate resistance to the ultraviolet rays, which prevent the chances of yellowing. Such resins qualify as the best epoxy for tumblers.
- FDA compliance standards: To ensure the best quality for your epoxy cup, check if the epoxy resin meets the FDA compliance standards. The FDA regulations confirm that the resin is safe to use and is not hazardous for your food, water or skin
- Size of the resin: Commonly, it is recommended that the epoxy resin thickness is about two folds. However, for certain applications, the resin goes through thinning. Thus, be cautious of the size for using the best epoxy for tumblers.
- Usage by tumbler artists: It is always better to get the choice of what kind of epoxy to use on tumblers reviewed by a tumbler artist. If the majority of the artists use it, it may be a trusted option.
- Heat resistance: Choose heat resistant epoxy for tumblers. Normally, tumblers use epoxy resins that are cured with heat.
- Odor: Typically, it becomes difficult to work with resins that have a strong odor. Choose epoxy resins that are easier to work with.
The Safety Data Sheet should always be considered before resin is used. It is always advised that the top of the tumbler is left clear of epoxy resin for drinking. You can also refer to the article “Food Safe Epoxy” for more information.
Images: © Ivette Moreno / www.maestracreations.com
Best Epoxy Resin for Tumblers
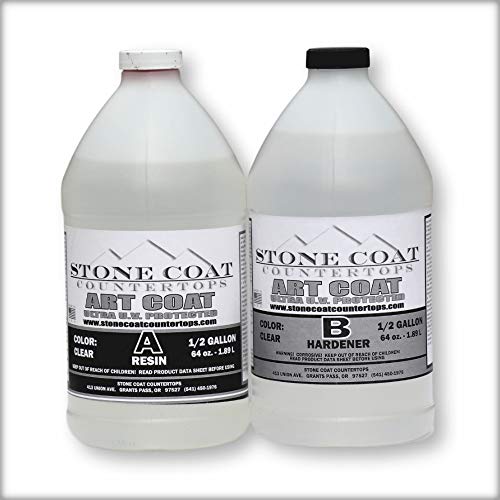
STONE COAT Art Coat Resin
For a professional touch to your creative project, Art Coat serves as one of the best crystal clear resins to epoxy tumblers. The 2-part kit with an easy to use 1:1 mixing ratio makes the topcoat easy to prepare that cures within 72 hours. All you have to do is combine and stir equal parts of the resin and hardener. Apart from tumblers, it also works perfectly well for paintings, wood, photos, jewelry, etc.
- Specifically designed for art projects, developed with professional artists
- Heat resistant, scratch resistant, food safe, maximum UV resistant, water resistant
- compatible with alcohol inks, acrylics, silicone oils, metallics, oil-based paint
- Extended working time, easy to clean
The best feature is that it enhances your artwork by providing a smooth and lasting finish which is beautiful to look at. It also is very safe to use as it protects your artwork from yellowing. STONE COAT Art Coat comes with a low odor making it very easy to work with. It also shows additional chemical and heat resistance properties and has been certified as non-toxic with no VOCs or fumes.
For a tinted and mixed epoxy, Art Coat is flexible enough to be mixed with other pigments and dies. It also provides a liquid pigment that can be used with the resin. For tinting, it is always advised to test your epoxy on a sample piece.
Art N Glow Casting Resin Review
This resin is one of the most loved resins being very trust-worthy and easy to use for beginners. This casting resin is odor-free. To get a crystal clear epoxy tumbler, this resin is just perfect along with which it can be used as both casting and tabletop resin. It can be used in the sun as it is UV resistant and is not prone to yellowing. Thus, the product is flexible in both indoor and outdoor settings.

- For all of your casting and coating applications. Cures crystal clear and hard as a rock
- Rigorous testing was done to ensure that our resin is a perfect match for all of our glow in the dark and other craft pigments
- The resin is self leveling, self degassing, odor free, resistant to yellowing from UV exposure, and is made in the U.S.A.
- One to one mix ratio is fool proof and has a forgiving 40 minute work time
Art N Glow is an example of what kind of epoxy to use on tumblers. Being self-leveling and self-degassing, this product can be easily manipulated and adjusted according to the time. It normally takes 40 minutes for it to get ready. It is very user-friendly and is very suitable for tumbler epoxy. The product has been tested rigorously to assess its applicability for other areas.
The product shows the best results for the epoxy to cure when it is kept in the temperature range between 72 degrees and 78 degrees. Temperatures near the upper limit are preferred for curing. It can also withstand temperatures of 120 degrees.
Selling as a 16-ounce kit, 32-ounce kit, and one-gallon kit, this product has been the artist’s top pick. Some users try warming up the epoxy to reduce any bubbling in case the resin is cool in its temperature. This can be easily done by putting it in warm water for the best results. The time for this process is reduced to 30 minutes instead of 40 minutes.
Bubbling can also be reduced by pouring the hardener down the bucket. Make sure your hand is slow and steady and prevent any air bubbles. Make sure you choose the side of the bucket that has the resin. An artist torch can also help you see and prevent bubbling. In the case of multiple coats, you will have to wait for three to five hours as the process will lengthen. With adequate time, your project will be devoid of any stickiness or cloudiness. If you further wish to apply another coat, wipe down the resin.
Envirotex Lite Epoxy Resin Review
Envirotex Lite Epoxy Resin is known for its glossy finish. It is thick and cured in about 8 hours in the temperature of 70°F after it is poured in. It is best to leave it for 48 hours to set for the best results. Many epoxy tumbler artists have acknowledged the ease with which one can work with this resin and also that it has minimal odor as opposed to other brands. The Envirotex’s USA Safety confirms so by saying that the odor is not distinct.

- High Gloss 2 component polymer coating
- Solvent free formul, Waterproof, Heat and alcohol resistant
- 32-Ounce kit covers approximately 8 square feet
The FDA Compliance must be read before an artist starts using it for making their epoxy for cups as it has been mentioned on the packaging of the product and confirms that the coatings can be used for indirect and direct food contact under this compliance when it is correctly measured, properly mixed and completely cured.
Envirotex’s Safety Data Sheet (SDS) is provided on its website. It is extremely easy to understand and straightforward in its approach. Since it is easy to find, it aids the user in making his/her decision for his/her usage.
Though there are a lot of great things about Envirotex Lite Epoxy Resin, there are a few artists who have confirmed a few problems with it as well. The one which is mostly experienced is the yellowness, which is often seen if the resin is exposed to UV rays. This can happen over time. But the majority still stands with their decision to go forward with it as it is the best of epoxy tumblers as all resins tend to become yellow over time.
Images: © Ivette Moreno / maestracreations
Choosing Design and suitable Materials
There are, of course, many choices one can make while choosing the kind of tumbler they wish to go for. But we suggest the artist goes for a double-walled or insulated one because they can easily suffice temperatures more than 120°F or 50°C. Now, what is the need for that?
The heated aromatic coffee that you have just filled into the epoxy tumbler might cause it to soften. So, in this case, going for an insulated tumbler makes it possible for the exterior to remain cool and also going for a plastic lip, for it will not let the resin come in contact with the beverage at all. Therefore, if the tumbler requires that it can be used for hot beverages, do not compromise your cup of tea or coffee and go for an insulated or double-walled tumbler.
Now, other than the resin, there are a lot of other materials which are required as well. Let’s have a look at which materials are good to choose:
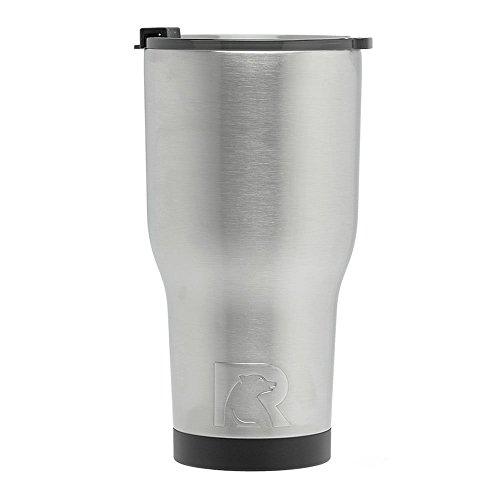
Metal:
When applying the resin to the tumbler, there can be no better choice than stainless steel. It does not even require you to coat it with spray paint though it becomes your choice completely according to your color palette.
Plastic:
Plastics are not a good choice for epoxy cups or tumblers. Epoxy resin can peel off with time as it does not adhere to it. In case you still wish to go for it, or your tumbler has some amount of plastic attached to it, then it would be good to use some plastic-compatible spray paint to help the resin stay.
Glass and Ceramic:
This combination or the individual material can only be used if the purpose of making this tumbler does not contain the word ‘hot’ in it. Glass and ceramic are quick to absorb heat and can lead the resin to soften. There are still some options that can be considered open like the tumblers with glass interiors with the exterior of stainless steel.
How to make an Epoxy Tumbler on your own
Images: © Ivette Moreno / maestracreations
Setting up the Work Space and Framework
It is important to prepare yourself before working for better results. Here is how to be prepared for anything while making an epoxy resin tumbler.
Firstly, make sure that you have lined your work surface with a plastic sheet so that the dripping mess sticks to that instead of the actual surface. Start with placing the cup turner on it, and following this tape, the plastic lid to the surface for better stability. At this point, you can choose to spray paint the tumbler if required or if you desire to do so.

- Fits with Most Tumblers&Mugs: Supports 20oz and 30oz tumbler or other similar sizes of tumblers and ceramic mugs; Perfect for DIY Crafts cups or enjoying together with family
- Includes a Kit of DIY Tools - Glitter Powder, Silicone Epoxy Brushes, Measuring Cup, Mixing Sticks, Latex gloves. Perfect Epoxy Cup Turner Tools Kit for You DIY Glitter Tumbler
- Stretchy Foam blocks replace jagged bubble wrap
Now use the pointed rod of your spit rod and secure it by inserting it into the foam football and then insert it into the tumbler. While doing this, make sure you push the football and the rod down to the bottom of the cup. Keep your motor and bracket ready and insert them on either end. Using a level, check if the cup is perfectly horizontal. Lastly, secure the spit rod with painter’s tape to save it from resin drips.
Preparing your Resin
Don’t forget to wear gloves before preparing the ArtResin and follow the label instructions to the T. The things that have to be accurate are the measures and mixing. For making it efficient, use a plastic shot glass for every color tint and then divide the resin into these cups and mix it thoroughly.
Start with less tint than required to avoid the possibility of a foggy resin mixture. Every time you are working with resin, remember that a little goes a long way. Whatever color you use, do not forget that there should not be more than 6% opposed to the combined volume of the resin and the hardener, or there is a chance that the resin may not cure. That is a risk we cannot take.
Apply Resin
Now comes the crucial part – you will understand why we covered up everything at the start.
For the next step, flip the motor on, and as the cup starts turning, pour the resin over the spinning tumbler. For spreading it evenly, use a popsicle stick or your gloved finger and spread it. Keep repeating this process with every tint, and if you want, you can also drizzle a little bit of white over the colors to get a marbled effect.
Let the Tumbler Cure
Keep the motor running till the resin is dry to touch, which will take approximately 18 to 24 hours. After you have achieved this by putting through your immense patience, remove the cup from the tumbler, and then remove the tape. Let the cup cure until the total time of curing becomes 72 hours.
If the tape is still sticking on parts of the resin, then use some vegetable oil or any product like Goo Gone to remove it. Though the tape helps in securing the parts, sometimes ArtResin seeps under it and can make the part dirty. You do not have to worry if this happens.
You can use acetone or rubbing alcohol to clean it and get rid of the stuck resin. If the resin has already cured in these areas, then a blade or sandpaper can help you to scrape it off. If there is any residue left from sanding, it can be wiped using a damp cloth.

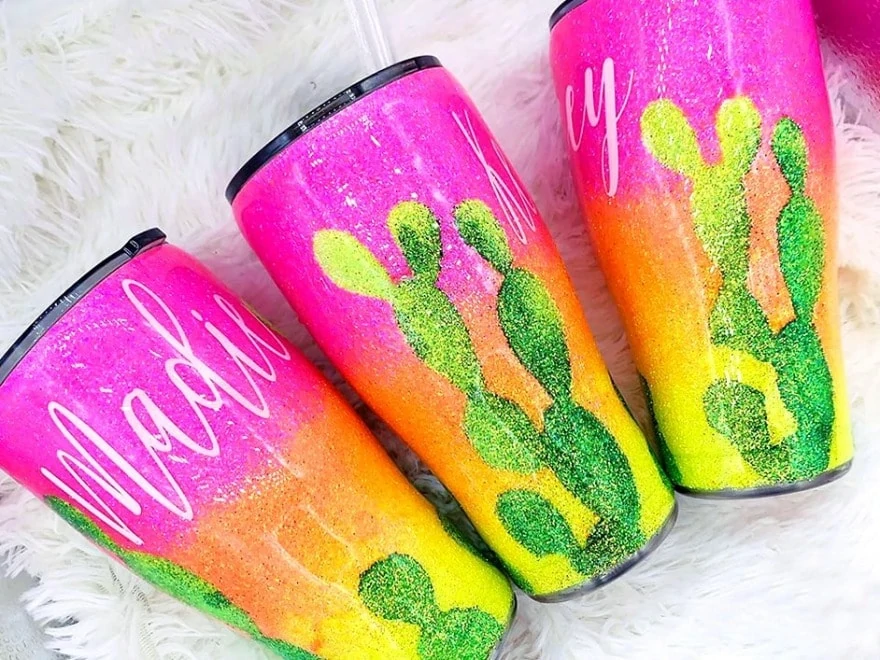
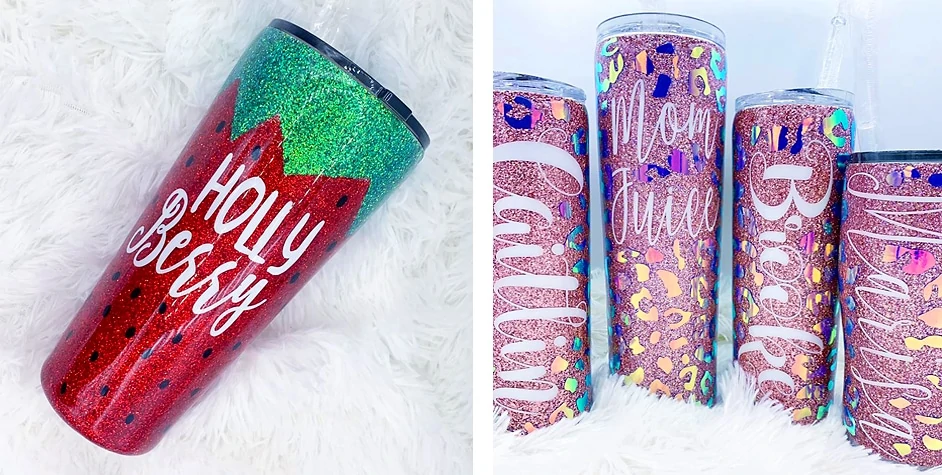
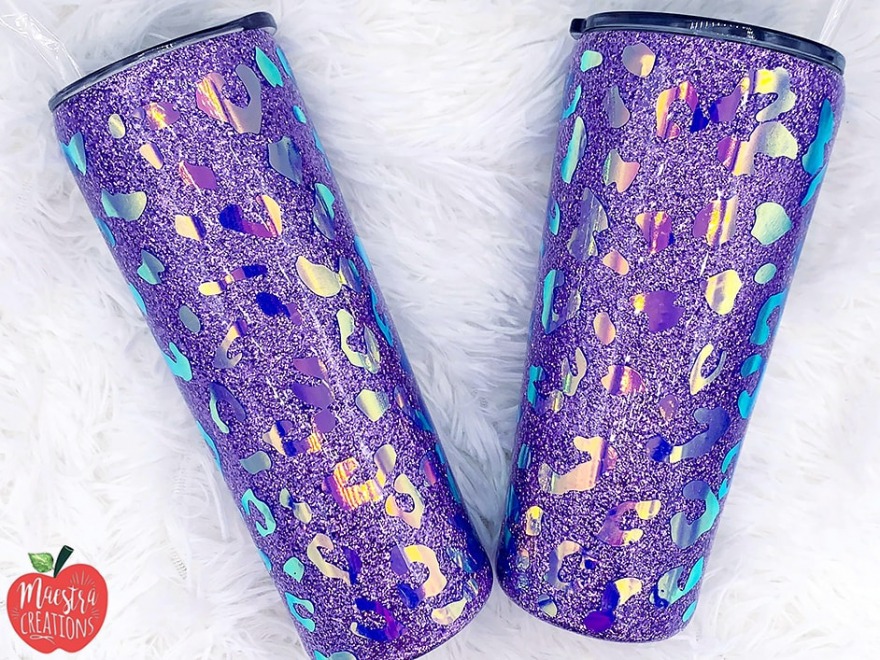
How to Epoxy a Tumbler with Glitter
For adding a special touch to your end product, let’s see how to epoxy a tumbler with glitter. The first thing that you need to keep in mind before applying the glitter is that the base paint should be the same as the glitter you are putting. If not the same, it can be synonymous to some extent for better presentation.
There are a lot of forms in which glitter can be applied. One of them is using acrylic glitter paint. You can apply the paint using a brush to the surface of the tumbler while waiting for it to dry.
In case you have loose glitter, then apply adhesive on the surface of the tumbler or spray it with the adhesive and sprinkle it over generously on the entire surface. Don’t forget to do this over a sheet of paper to collect the remains and control the mess. Let the tumbler dry.
Apply a Coat of Resin
Post applying glitter and making sure it is dry, mount the tumbler on the cup turner. Wear your gloves and then very carefully mix a very small amount of ArtResin. Turn the motor on, then let it turn while you slowly pour the glitter on the surface while simultaneously smoothing out the edges. Let it be covered evenly and let it dry following the same procedure along with the 24-hour mark to remove the tape and 72-hour mark to let it get cured completely.
Make sure that a lot of resin is not used as this might lead to ‘slick’ spots, and it might change the color of the glitter as well.
Cleaning it Up
To clean the rim of the cup, you can use a knife while heating it. If the knife doesn’t glide through, more heat has to be applied to make sure that the seal of the cup does not break. If this happens then, moisture will get between the layer of epoxy and stainless steel and will lead it to peel off. This can also let epoxy and steel hold the moisture by letting it mold.
Trim the epoxy from the inside, around the rim, and at the bottom so that the hold of the tumbler is stable and it does not rock. If the bottom is not level, it is either because epoxy gathered in the bottom since it was turned off too soon or because the cup was not level while turning.
Always check the inside of your tumbler and get it cleaned. Use alcohol to clean the spray paint residue inside the epoxy cups. Once it starts to shine, wash it with soap and let it dry.
Handling your Epoxy Tumbler
Now that you have learned how to epoxy tumblers, here are some things to take care of when using tumbler epoxy.
- The tumbler should be fully cured before its use.
- The tumblers can not be left in hot places, and they have to be washed by hand using warm and soapy water. If the tumbler is not double-walled or insulated, it can only be used for cold beverages.
- The lip of the tumbler should be clean from epoxy. If it is not, it is essential to use sandpaper or a blade to remove the resin which seeps through. The sand dusting has to be wiped using a damp cloth.

Images: © Ivette Moreno / maestracreations

In 2005, Charlene completed her wellness degrees in therapeutic aromatherapy and reflexology at the International School of Reflexology and Meridian Therapy. She worked for a company offering corporate wellness programs for several years before opening her own therapy practice. In 2015, she was asked by a digital marketer friend to join her company as a content creator, and it was here that she discovered her enthusiasm for writing. Since entering the world of content creation, she has gained a lot of experience over the years writing about various topics such as beauty, health, wellness, travel, crafting, and much more. Due to various circumstances, she had to give up her therapy practice and now works as a freelance writer. Since she is a very creative person and as a balance to writing likes to be active in various areas of art and crafts, the activity at acrylgiessen.com is perfect for her to contribute their knowledge and experience in various creative topics.
Learn more about Charlene Lewis and about us.