How to Make Skin Color – Skin Color Mixing Tutorial
This post may contain affiliate links. We may earn a small commission from purchases made through them, at no additional cost to you.
Human skin tones are incredibly variable, so it can be tricky to mix the perfect skin color. If you are a budding portrait artist or just beginning to paint, knowing the basic principles behind mixing skin colors is essential. Once you have mastered skin tones, the painting world is your oyster. Come with us as we guide you through the basic techniques involved in producing a range of flesh tones and give you some tips on painting skin tones successfully.
First Things First
There are a few starting steps that you need to have down before we can move on to explore how to make skin color with paint. What we want to do here is to become oriented within the world of painting skin tones.
Pinpointing Your Ideal Flesh Tone
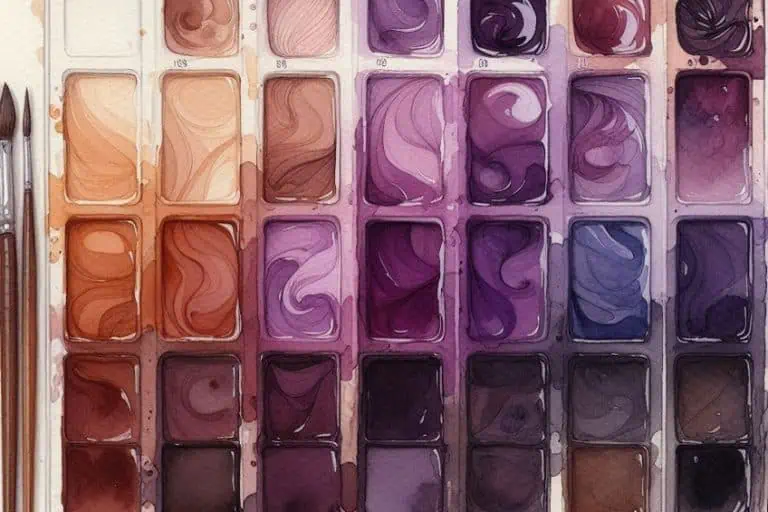
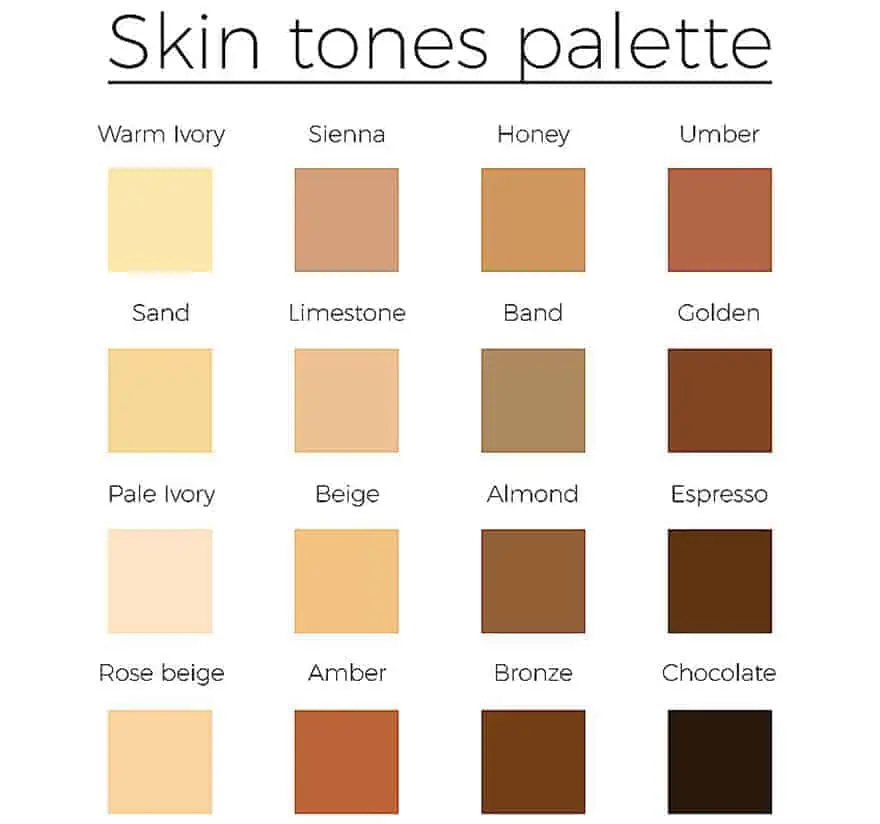
We always recommend using a skin color mixing chart when you begin to work with flesh colors. A color chart like this will include a wide range of shades and is a wonderful tool you can use to pinpoint the exact tone you want. Not only do you have to consider the overall flesh tone, but also the undertones. Flesh color undertones are complex and can include colors you would not expect, like green or blue!
Bringing Together Your Family of Shades
There is not a person in this world whose face is only a single shade. Natural variations in skin tones, including bags under the eyes and the contours of the face, are to be expected. Once you have selected your base skin color from your skin color mixing chart, you need to create a few variations of this tone. You will need some lighter tones for highlights on the nose, cheekbones, and forehead. It is also important to have a few darker variations of your chosen base skin color. The more variations in flesh tone you have, the more realistic your painting of skin will be. You can capture the nuances of the human face in much greater detail and create a more three-dimensional image.
The Basic Shades of Skin Tones and How to Mix Them
Despite the multitude of slightly different tones that are ideal for painting a human face, there are three broad levels of flesh tone: light, medium, and dark. Once you have determined which of these levels you are aiming for, mixing the family of shades is much simpler.
How to Mix Lighter Skin Tones
- Lighter flesh tones are typically the easiest to create. The colors you will need are red, yellow, and blue in equal proportions. Mix these three colors, and then you can use either white or a little more yellow to lighten the color. The lighter the skin tone you want, the more white you will add.
- To make the skin tone appear more blush, you can add a little more red paint. For more tanned skin tones, add more yellow and red paint.
- Play around with the proportions to find the perfect balance for your project. Blue is the color that will darken your skin tones, so use it with caution.
How to Mix Medium Skin Tones
- As the skin tone becomes darker, the number of color variations involved increases. Medium skin tones will generally incorporate colors like raw sienna and burnt umber from your skin color mixing chart.
- It is always best to start mixing a medium skin tone by creating an orange shade from red and yellow. The ratio of red to yellow depends on whether you want a more pink or tan flesh color. Once you have your orange shade, begin to add small amounts of blue paint. Slowly but surely definitely wins the race here, as you can always add more blue, but it can be hard to remove it.
- You can add a very (very) small amount of black paint for skin tones on the darker side. Keep adjusting until you are happy with your base color.
- There are some other color options with mixing medium skin tones. If you mix burnt umber with raw sienna at step one, you can create a much darker flesh color. You can use this mix instead of the blue, and this will create a more olive skin tone. You can also add a small amount of green paint at this stage.
To create the highlight variations of your base skin tone, you can use yellow to lighten your shade. Now it is time for experimentation. As with everything, practice makes perfect.
How to Mix Darker Skin Tones
- As we have progressed from light to dark, the mixing of skin shades becomes more tricky. We suggest starting your mixing process with red, yellow, purple, raw sienna, and burnt umber on your palette.
- We will start by creating two base undertones. Begin by mixing equal amounts of burnt umber and raw sienna. This mixture will be your initial base undertone. Your second base undertone will be a combination of equal parts of red and yellow. Now, mix both of your base undertones, forming your base shade.
- For the highlights and details, you will use purple, yellow, and red. To create your darker shade variations, slowly add purple. As there are so many colors already involved in this shade, adding black risks making it muddy. Another option for the lowlights is to use a dark grey.
- To create your highlights, add small amounts of yellow to your base shade. You can also make a rosier shade by adding a little more red color. Again, because there are so many different colors involved in your base shade, always add new colors in small increments.
Skin Color Chart
Creating Variations in Your Skin Tones
Environmental factors within your composition like light, moisture, or heat can require slight variations in your base skin tone. Here, we will take you through how to make skin color paint shades that represent dapples of sunlight, blush, and shadows.
Crafting Skin Tones That are hit by or Hidden from Light
Light affects skin color in two distinct ways. Firstly, light can hit the skin creating a bright highlight. Or, areas of skin may be in shadow, which requires a slightly darker skin tone. To create a highlight shade, you can add yellow or white to your base skin shade. For darker shadow shades, depending on your base shade, add a little blue or purple.
Crafting Skin Tones with Blush
Blush shades can be used to paint rosy cheeks or add extra highlights to areas of skin exposed to sunlight. It is never a good idea to simply dot a little pink or red straight onto your canvas. Always create a unique variation of your base shade so that it blends smoothly into the tones around it. Creating a blush skin tone is very easy and depends on the shade of your base tone. For lighter base tones you can add a little red and yellow. For medium and darker skin tones you can do the same but also add a little white.
How to Make Skin Color with Paint Types
While having the basic theory of mixing skin tones is great, the practical application adds another layer of difficulty. The way in which you create a particular skin tone depends greatly on the type of paint you are using. Each medium has slightly different properties and these make a big difference when mixing flesh colors.
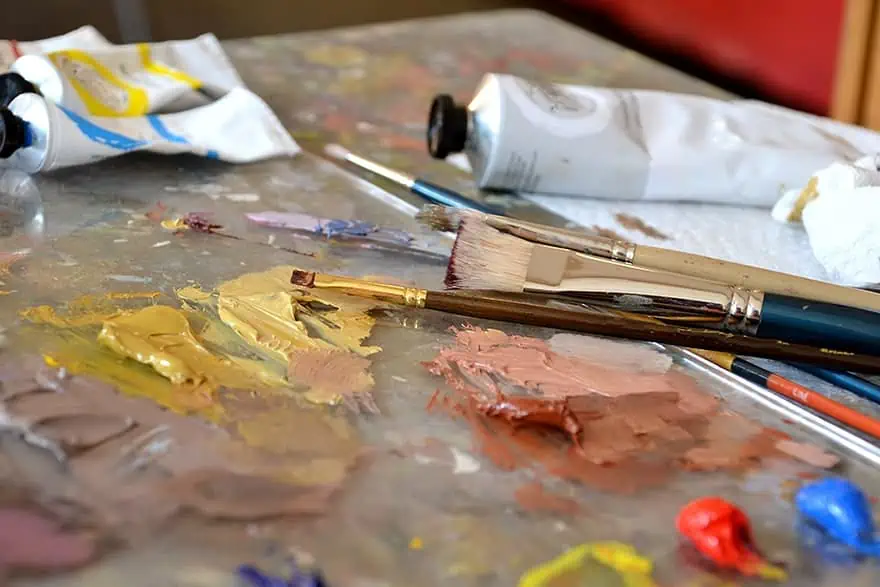
How to Make Skin Color with Oil Paints
The slow drying nature of oil paints makes them ideal for mixing skin tones. You can mix one large batch of your base tone and use it for longer. Oil paints also offer a wide range of colors, much more than the color mixing chart for acrylic paint, meaning you can create very subtle variations in flesh tone.
The theoretical process for mixing skin colors with oil paints does not deviate much from what we outlined above. Firstly, begin by combining a red and yellow shade. We suggest using yellow ochre and vermillion red to make your shade of orange. Then you can mix in a little ultramarine blue to darken the tone a little and add some depth. Finally, a little titanium white will create a good base flesh tone. Depending on whether you want to make a light or dark flesh color, you can adjust this basic skin tone using the skin color mixing chart.
It is also possible to start with a green base when using oil paints. Begin by mixing blue and yellow. You can then add a little red or orange paint to create a lighter skin shade. To finalize your base skin tone, add a little white for a lighter tone or a little blue for a darker tone.
You have a lot of space for experimentation with oil paints. There are many colors and no strict formula, so play around!
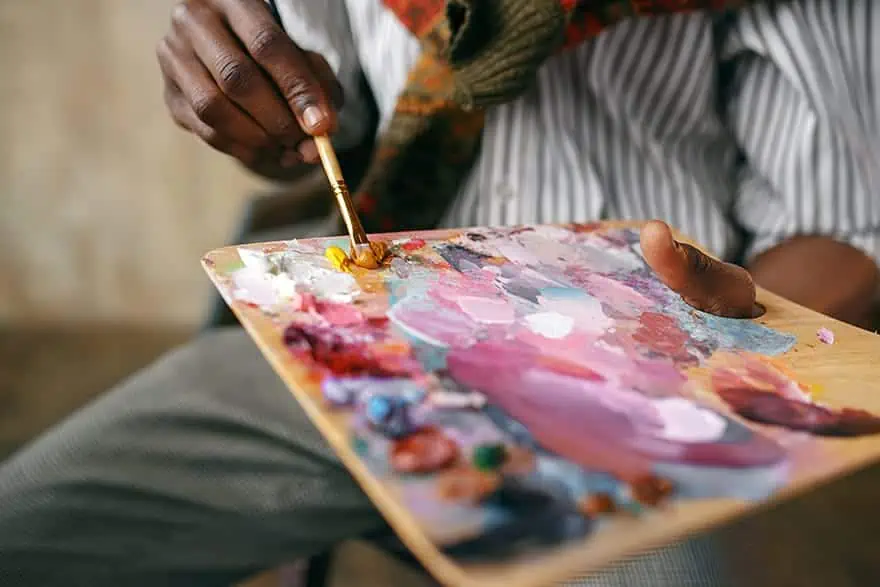
How to Make Skin Color with Acrylic Paint
Acrylic paint is widely available and a wonderful medium to work with. There are, however, a few problems with acrylic paints. Dry acrylic paint is always darker than wet acrylic paint. Acrylic paints also dry very quickly, so you will likely have to mix your base shade from scratch several times. As long as you are aware of these potential problems, the theory behind mixing skin tones with acrylic paint is the same as oils.
It can be helpful to make notes that include the amount of each shade of paint used to craft a particular variation of skin tone. The basic colors to make your base skin tone remain the same. Start with a little red, yellow, blue, and white on your paint palette. You can mix equal amounts of each of your primary colors (yellow, red, and blue) to create a dark brown tone. This brown can be the basis of any skin color you desire.
The next step is to modify this brown shade to create your base flesh tone. As with oil paints, use white to lighten the skin tone and blue to darken it. You can make rosy shades with a small amount of red, and you can use yellow to make the skin tone lighter and brighter.
Using Watercolor Paints to Make Skin Color
Watercolor paints are the most challenging to mix. Like acrylics, watercolor paints appear lighter when dry than when wet. We suggest that you have a piece of paper available when you are mixing skin tones. Paint a small amount of each skin tone onto your test paper to see how it dries.
When mixing your base flesh tone, start with yellow. Add a small amount of red and a small amount of blue to your yellow paint. This mix should produce an orangy brown color as your base. You can alter your base color by adding very small quantities of yellow, blue, red, and even a little green. Experiment with mixing different skin tones until you find one that you are happy with.
We extend caution about using white and black when mixing skin tones with watercolor paints. White watercolors can make skin tones more translucent, and black watercolors can quickly make your skin tone muddy. We suggest using a brown watercolor to darken your skin tone rather than black. You can also lighten your skin tone with yellow.
You can make highlights and blush tones in much the same way as with acrylic and oil paints. Use a touch of red for the blush and a little yellow for the highlights.
Our Top Tips and Tricks for How to Make Skin Color Paint
Here are some extra tips to help you with mixing your perfect skin tones.
Do Some Color Matching Exercises
If you are working with acrylic paints or watercolors, you may need to continuously mix colors to match the ones you have already used. To accurately match your colors you can practice with color matching exercises. Find a few snippets of different skin tones from a magazine and tape them onto some paper. Draw small squares opposite each snippet, and then practice matching your paint mixing to each snippet. With practice, you can easily become a pro at mixing skin tones.
Always Consider Your Light Source
The light source within your composition will indicate where you should put highlights and shadows. Highlights and shadows also work on a gradient, with areas of skin closer to the light source having the most highlights.
Be Very Cautious When Making Your Skin Tones Darker
It is so much easier to darken a skin tone than to lighten it, so always start with a lighter shade and darken it slowly. We suggest steering clear from black as it can easily make your skin tone muddy. Try using blue, purple, or brown shades to create shadows and darker skin tones.
FAQs
How do You Make Light Skin Tones?
As with all skin tones, begin by mixing equal parts of red and yellow and add a little blue. To lighten the skin tone, you can add a little bit of white and a little more yellow for brightness.
How to Mix Paint for Skin Tones?
Typically, the base colors for any skin tone are the primary colors. Start by mixing a shade of orange from red and yellow and add a little blue. You can then lighten this shade with white paint or darken it with more blue or purple.
How to Mix Dark Skin Tones?
The process for making the base skin tone is the same as for lighter shades. Once you have your mix of red, yellow, white, and blue, you can add a little more blue or even purple for a darker shade.

Duncan graduated with a diploma in Film and TV production from CityVarsity in 2018, after which he continued pursuing film while taking on a keen interest in writing along the way. Since having graduated, he began working as a freelance videographer, filming a variety of music videos, fashion and short films, adverts, weddings and more. Throughout this, he’s won a number of awards from various film festivals that are both locally and internationally recognized. However, Duncan still enjoys writing articles in between his filming ventures, appreciating the peace and clarity that comes with it.
His articles focus primarily around helping up-and-coming artists explore the basics of certain colors, how these colors can be paired with other shades, as well as what colors are created when you mix one with another. All while relating these shades to historically significant paintings that have incorporated them into their color palette. As a lover of the arts himself, he takes great interest in the Renaissance era of paintings, an era that has directly inspired many of his favorite films.
Learn more about Duncan van der Merwe and about us.