How to Use Watercolor Paint in Tubes – Complete Guide
This post may contain affiliate links. We may earn a small commission from purchases made through them, at no additional cost to you.
Children, students, and even professional artists love to work with watercolors. There is hardly any mess, no strong odors from solvents as they are water-based, and it is easy to clean up. Watercolors can also be bought anywhere, and they are the most affordable art mediums on the market. The art of using tube watercolors is a little difficult for beginners, but you can learn to master it. However, using watercolors in tubes can be challenging and can take some practice. So, we are going to take you through the process step-by-step of how to use watercolor paint in tubes, helping you to achieve those unique watercolor art pieces.
A Brief Definition of Watercolor Paints
When a pigment is taken and combined with a water-soluble binder, usually gum Arabic, and then a small amount of glycerin is added to give the paint flexibility, adhesion, and a slight gloss finish, you end up with watercolor paint. This paint mixture is then taken and placed into metal tubes, or the mixture is dried into a solid form and cut into pans. In the 1400s, artists ground their pigments, mixed them with resin, and made their own watercolor paints. In the 1700s, manufacturers learned how to dry the paint mixture and cast it into large, premixed slabs. The artist would then buy a chunk of the slab, take it home with him, and ground it into powder. Then by adding water, the watercolor paint was ready to use.
In the 1800s, not only were the artists using tube watercolors but more people, even children, began to paint with them. Manufactures soon learned how to reformulate the solid pan paint and came up with metal tubes that contained the paint inside. Today, watercolor paints are a lot easier to obtain and come in many vibrant colors both in pan and tube form. So, are the pan paints better than the tube paints, or is there no difference? Let us explain this further.
Watercolor Paint in Tubes vs. Watercolor Paint Pans
Watercolor paints are supplied in tubes or pans, so you may ask what the difference is? The main thing to understand is that the quality of the paint in both the watercolors supplied in tubes as well as the watercolors sold in pans is the same. The only difference between the two is that during manufacture, the watercolors in pans go through an additional process of drying, while the watercolors in tubes are poured straight into the tubes and are ready to use.
For the painter, the choice of which type is best is solely a matter of preference. You can also use both at the same time.
Watercolor Paint Tubes
Watercolor paints in tubes are similar to small toothpaste tubes, and the consistency is the same. They come in three sizes including 5 ml, and 15 ml, which are the more common sizes used. There is also the 20 ml paint tube. The watercolor paint in the tubes contains more glycerin than that found in the watercolor paint pan. This assists with making the paint consistency softer and creamier, which makes it easier to mix with the water.
Artists make use of watercolor paint tubes if they are painting large areas, or filling in large sections, which help the painter to keep the intensity of the paint the same without any variations. The paint from the tube is also highly saturated with pigment that helps the artist, who is dependent on intensified color, to achieve this goal. The tube paint is also more flexible and is easier on your brush as you do not have to rub it with your brush to pick up the color you want to use. The watercolor tube paint is more economical and can also be used to refill empty pans.
When you use watercolor paint tubes, you need a palette to place the paint on. You can then add your water and mix your paints. This may cause a slight problem if one of the colors gets contaminated by another color on the palette, you can then land up wasting some paint. If you find you have squeezed out more paint than you need onto your palette, just leave it, and the next time you use it, just add some water to the dry paint and you can still paint with it.
When using watercolor paint from the tube, you must make sure to clean the thread of the tube before replacing the cap, otherwise, the paint on the thread can harden and it will be difficult to open it the next time you want to use it. However, if this does happen, then you can hold the cap under some hot water for a couple of seconds, which will expand the cap and also soften the paint allowing you to open it easily. You should always place the cap back on the tube the moment you are finished. Make sure to replace it correctly, otherwise, the paint will harden and dry out in the tube.
If this does happen, and the paint is not too old, you can cut the tube in its length and use the open tube as a temporary pan.
PROS
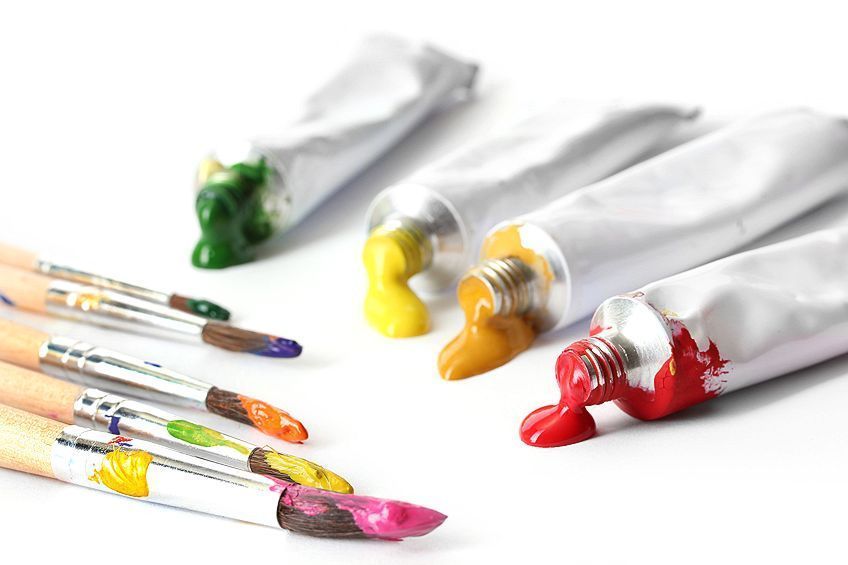
- The paint in the tubes has concentrated pigment colors, which will always give you vibrant colors
- Tubes contain a lot of paint, so you need not worry about being left with too little paint
- The hues in the tubes are extremely saturated
- Paint that comes in tubes is great for painting large areas
- Paint tubes can be used straight from the tube, just add water
CONS
- You may end up with dried paint on your palette
- If the cap is not screwed on properly, the paint may dry out in the tube
- It is difficult to work out how much paint you need, which could result in paint being wasted
- Contaminated paint on the palette can also result in wasted paint
Watercolor Paint in Pans
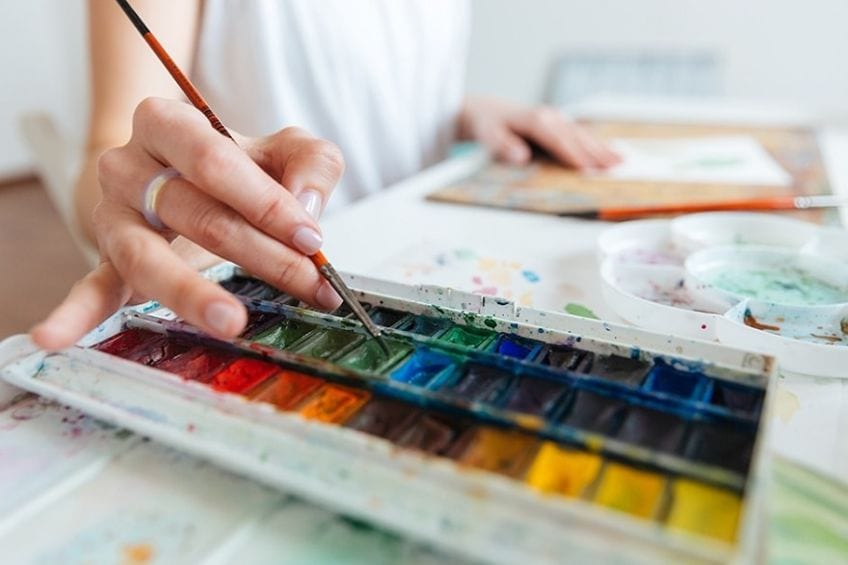
Watercolor paints in pans are small circular or rectangular cakes that are extruded under pressure and then compressed into cakes that are dry to the touch. When water is added to the pans, the paints are activated and ready to use. These cakes are then fitted into plastic or metal boxes with hinges that keep the paints in place, and when the lid is opened, it can serve as a palette to mix your paints.
The pan sets come with certain selected colors, where a complete set will include all the primary colors as well as neutral colors. However, you can also change the colors or customize them and create your own particular color palette. You can also purchase empty pan paint sets and fill them with your own paint colors. You can even buy individual pans and glue them onto your paint pan set. The watercolor paint in pans is a lot easier to use than the tubes, as you do not have to first put down your brush, open the tube and then squeeze out the paint. The paint is ready to use immediately.
Because the paint pans are compact and easy to transport, it is preferred by many painters who want to paint while traveling. The paint pans are not as expensive as the tubes, but they are designed more for small paintings and small brushes. When you want to start painting, it is a good idea to first put a drop of water on the colors you want to use and let it stand for a minute or two. This will soften the paint, making it easier to use. To start painting, just wet your brush and pick up the paint color you want to use. Then place it on the palette, and then you can add more water if required or mix it with any other color you choose.
If you want, you can work directly from the paint pan, but you need to take care that you do not contaminate any of the other colors in the process. To avoid this from happening, you can always make sure you wash your brush before you pick up new colors from the pan. When you are painting and you contaminate other colors, just wait until you are finished, then clean them off with a damp cloth. Then allow everything to dry for a few hours and then the lid can be closed.
You need to also ensure that you clean the lid and allow it to dry to ensure that the lid does not stick to the paints, making it difficult to open the box again.
PROS
- Fewer supplies are needed
- Compact and easy to transport
- You waste a lot less paint
- Easy to start by only adding water
- Lasts a long time, for up to 10 years or more
- No problems with the paint drying out as with the tubes
CONS
- Not suitable for larger areas, as it does not keep consistent color
- Brushes can be damaged due to the continual rubbing to lift the paint off the pan
- If the lid is left uncovered, it can attract dust that can stain your painting
How to Use Watercolor Paint in Tubes
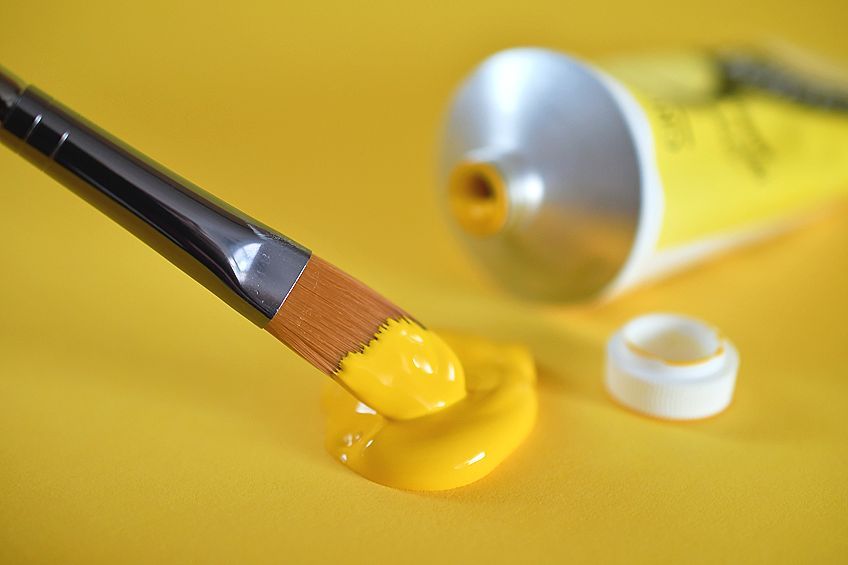
The best way to use paint in tubes is to remove the paint and use it directly from the tube. This way the paint is still moist and ready to use; there is no need to first add water to activate the paint pigments. Another advantage for using straight from the tube is that there is a very high concentration of pigment, making the colors vibrant and alive. It also guarantees that the paint you are going to use is pure, fresh, and clean without any mixing of pigment from other paints.
Watercolor Paint Materials
You can purchase watercolor paints in a large selection of colors, which include all of the primary colors, which makes them ideal for use in any form of art project. Watercolor paints are available in student, academic as well as artist-grade paints. You should always scan the product labels to confirm you are buying the paint that suits your project. Watercolor paints are supplied in two formulations: “staining” and “non-staining”. Non-staining watercolor paints remain on the surface of your paper, and you can easily remove them by using different “lift-off” techniques.
Staining watercolor paints are drawn into the paper and create a permanent color base.
Preparing the Mixing Surface
Once you have secured your watercolor paints, the next step is to ensure you have a non-absorbent or solid surface for mixing the paint. Many artists use a butcher’s tray or the lid of an empty watercolor pan. You can also use an ordinary dinner plate, just ensure it is white as this will help you to see the color mixture. We strongly suggest that you make use of a proper mixing palette as it has two separate sections, paint wells and a mixing section.

The paint wells consist of small depressions that are found on the side of the palette where you can squeeze out your paint from the tube. The mixing section is used solely for mixing your paints. The use of a mixing palette reduces the possibility of color contamination. Whatever surface you use, make sure that the surface is solid and non-absorbent, otherwise, the paint will more than likely stick to the surface.
Opening Your Paint Tubes
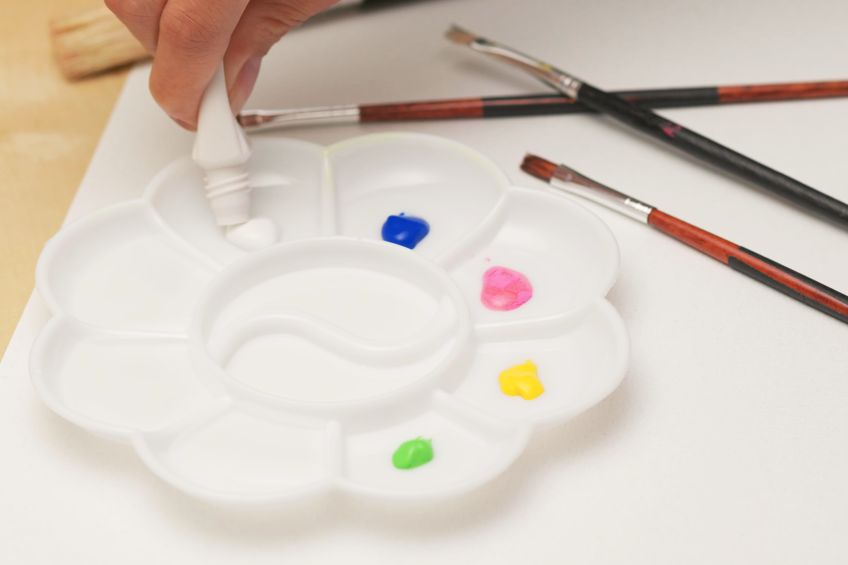
You may feel that this step is very obvious but be careful when you remove the cap from the tube. You may not be aware of this, but when you open the tube, you apply a little pressure, and this may cause the paint to gush out as you remove the lid. Make sure you remove the cap over your mixing surface so that if any paint does come gushing out, it will fall onto your mixing surface.
If you are using an old watercolor paint tube, you may experience some dried paint, which can make it fairly difficult to remove the cap.
To solve this problem, hold the tube upside down in some warm water and the dried paint will soften enough so you can remove the cap. If you find this problem recurring often, you can dip the cap in some honey or glycerin before you put it back on the tube, as glycerin is used in the formulation of paint to soften it. When you remove the cap, make sure you do not do it over your palette or your paper as the dried paint flakes can land on your palette or paper, and it can cause contamination of your colors.
Squeezing the Watercolor onto Your Palette
Now you need to squeeze some paint onto your mixing surface, making sure it is only a small dot of paint. Make sure the dots of paint are far away from each other to avoid any paint contamination if you are using a flat mixing surface like a plate or butcher’s tray. It is a lot easier to use a proper mixing palette as it has individual paint wells that are separated, and there is no possibility of paint contamination.
Before you start to paint, you can add a drop of water to each paint well which allows you to see the colors easier than when the paint has dried. We suggest that when you arrange your paint palette, you group the paint into its color family. This will help you later when you are painting, so you can locate the different colors a lot easier. Make sure you prepare your palette with all of the colors you are going to use in your project, as you do not want to look around for other colors while you are busy painting.
Preparing Your Mixing Area
Ensure that the mixing area is completely separated from the small dots of paint so that your watercolor paints remain pure. Now load your paintbrush with some water and drop it off in a separate space on your mixing surface.
This will be your mixing area where you will be mixing your watercolor paints.
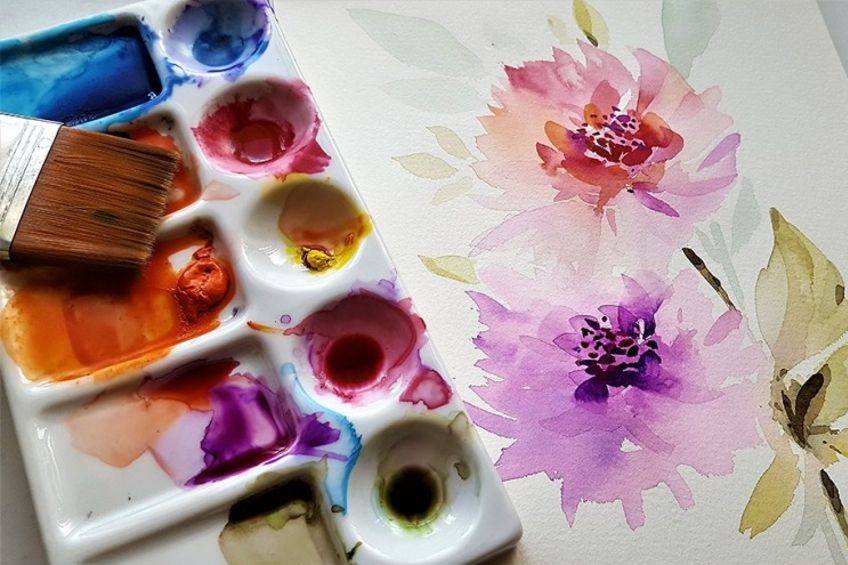
Mixing Your Watercolor Paints
Prepare two containers with clean water, which you will be using during your painting to wash your brushes in. Moisten your brush with some water and tap off the excess water, then you can gently lift the dot of paint from your paint well. You only want a small amount of paint on your brush as it is easier for you to add more at a later stage.
After you have picked up your paint on the brush, mix it in the small puddle of water you dropped onto your mixing surface. Try not to splash any of the paint into the other paint wells. If you want to add another color, wash your brush first, or use a new brush to keep your pigment color pure and vibrant. When working with watercolors, it is always better to add your paint to the water and not the other way around.
You may find washing your brush after each paint color a bit tedious, but if you do not, you run the risk of contaminating your paint colors. So, you need to make sure your brush is clean after each color change. Now that you are satisfied with the shade of color you want, you can start applying it to your paper. When you want to paint a broad area, you can just press down on your brush more or use another brush that is a different size.
You can also use two or more paint colors and mix them, creating new color blends. Take a small amount of another color and mix it in a pool of water until you are satisfied with the color. Always use a separate pool for mixing other colors to avoid color contamination.
Storing and Maintaining Your Watercolor Paint Tubes
Ensure that you wipe all the excess paint off the tube after you squeezed the paint out to ensure that no paint is left on the tube. Any leftover paint will cause difficulty when trying the remove the cap when you use the paint tube again. You can use a paper towel or clean cloth to do the job, and for extra cleaning, you can wipe the tube with some mineral spirits.
Try to keep all of your paint tubes together in one place, which makes it a lot easier to locate them when you want to paint again.
Make sure you store your watercolor in tubes in a dry cool place, as too much heat can crack the tubes and cause them to burst open. The ideal situation is to store them in an airtight container or lock them in a draw or a closet if you do not have an airtight container.
Making Your Own Watercolor Pan
To make your own watercolor pan, you can use watercolor tubes, or you can buy separate watercolor paint that is already in a pan. Then you need an empty palette box that comes in half pans or full pans and some extra empty pans. Now you need to decide what color palette you want so you can personalize the palette box. Then you must decide how the colors are to be laid out. This makes it simpler when you are busy painting as you know exactly where each color is situated. Making your own watercolor pan is also more cost-effective as you can just top up the colors when they are depleted.
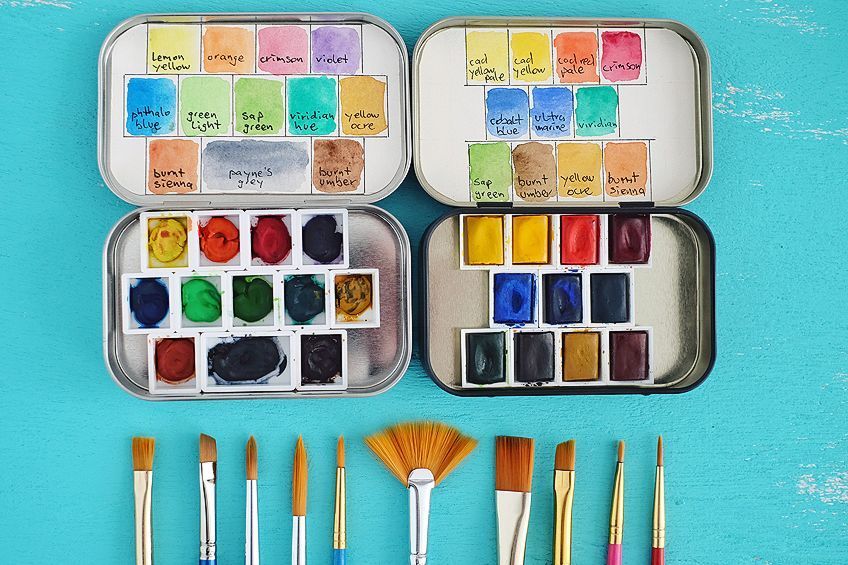
It is a good idea to label the color with a color name, a pigment number, and a brand. This should be helpful the next time you want to refill your palette. Squeeze some of the paint from the tube into the corner of your pan and then fill the pan halfway. Then stir the paint with a toothpick or paper clip to remove any air bubbles that can cause the paint to dry out. Leave the pans you filled to dry and do not cover them but dry them in a place that is well ventilated. As soon as the paint is dry, fill the pan, but not right to the top so you have space to add some water. Also, you need space so that the paint does not stick to the lid. This process of filling the pans in two stages is to avoid the paint from cracking and evaporating.
Whether you are a professional artist or you just love painting, watercolor in tubes makes the job a lot easier. All you need to do is put a small dot of paint on your plate or palette, take a wet brush and pull your colors onto the paper, and begin painting. It is that simple.
Frequently Asked Questions
How Many Colors Are Needed to Begin Watercolor Painting?
You cannot go wrong with the three primary colors. When mixing them, you can create whatever color you want. However, if you are just starting, then one color is all you need, just take one tube of paint and by adding water, you can make the color lighter, or by layering the colors, you can also darken the color.
Can You Use Pan and Tube Watercolors Together?
Yes, you can use watercolor paints from a pan and a tube, and these can be used together in the same painting. You can also mix the watercolor paint from the tube with those from the pan on your plate or your palette.
Is a Paint Tube or Pan Better When Mixing Watercolor Paint?
When mixing watercolor paint, it is best to use watercolor paint directly from the tube rather than from a pan, as the paint is always fresh and moist. Using a paint tune is also easier when mixing large amounts of paint for a big surface area.
How Long Do Watercolor Paints Last?
There is no shelf life for watercolor paints. Some artists have taken their watercolor paints that are 15 years old, and by just adding some water, the paints were as good as new. As long as you keep the paints in a dry dark place where there is no direct sunlight, it should preserve the pigment colors.

Matthew Matthysen is a multidisciplinary artist. He completed his fine art degree, majoring in History of Art and Contemporary Drawing Practice at the University of Witwatersrand, South Africa. Before joining acrylgiessen In 2020, Matthew worked part-time as an art teacher at Reddford Blue Hills High school. Matthew creates drawing and painting tutorials for acrylgiessen and captures them not only photographically and in written form. He also records the creation of his works in his own creative studio as in video format, from which later with a voiceover and a video editor also drawing tutorials for the Youtube channel of acrylgiessen are created.
Learn more about Matthew Matthysen and about acrylgiessen.