Pyrography – A Beginners Guide to Wood Burning Art
This post may contain affiliate links. We may earn a small commission from purchases made through them, at no additional cost to you.
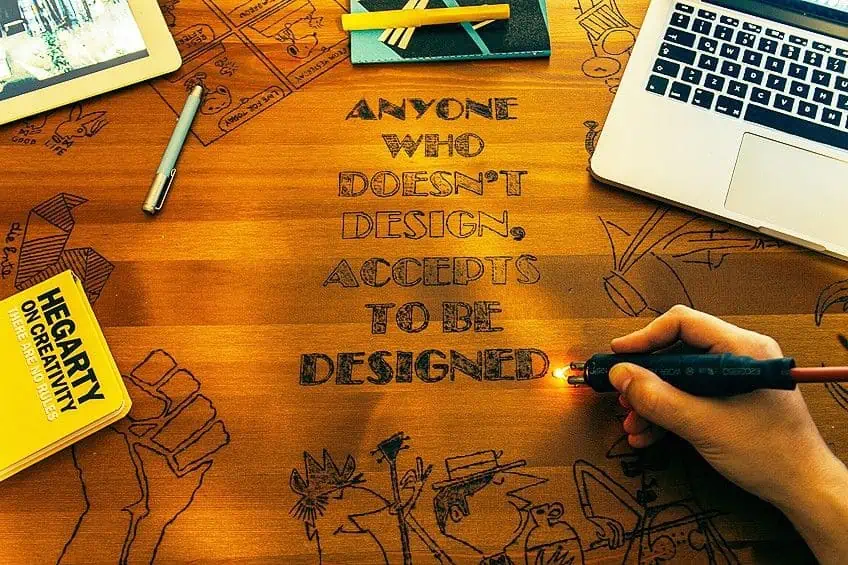
Ever since we started painting on the walls of caves, the need to express our experiences, desires, and ideas has increased exponentially. We have come a long way since depicting the best way to hunt a woolly mammoth though, in fact, eras like the renaissance have shown that there are no limits to the lengths we’ll go to or mediums we’ll use to make beautiful artwork. One medium that is often overlooked is pyrography, so let’s have a look at what exactly pyrography is, what makes it unique, and what some of the most notable artists behind this often-underrated medium are.
What Is Pyrography?
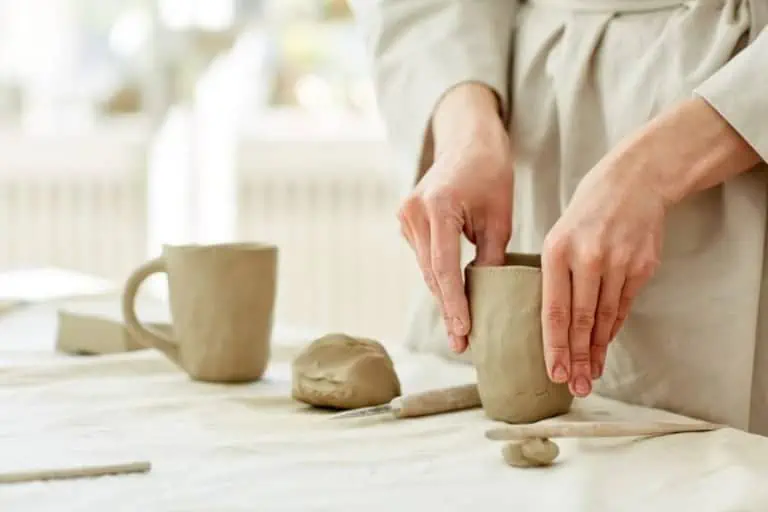
At its core, pyrography is a wood-burning art. It involves the burning and/or scoring of material to create patterns or forms on a given workpiece. Pyrography can be used on a number of different materials including wood, metals, leather, felt, and if you don’t mind the fumes, even plastic surfaces. Like painting and sketching, pyrography is a free-hand art form that involves using a poker, pins, metal rods, brands, or even open flames to emboss a material. This in combination with varying amounts so pressure and temperatures allow the artist to get a shocking variety of tones and textures for the artwork.
As you’ve probably gathered by now, perfecting this technique (or even reaching a level where you aren’t setting random things on fire) takes quite a bit of practice and experimentation, and where this might be true for other disciplines like portrait painting or sketching, it’s marginally more challenging with a wood-burning art like pyrography. While pyrography as an art form has been around for countless years in the form of tribes practicing things like ash drawings and scarification, the official art of pyrography was only fully recognized around the 17th century and continued to grow in popularity and complexity until the end of the 1800s
How Far Does the Practice of Pyrography Date Back?
While historians have tried their best to pinpoint exactly when the first man discovered the use of wood-burning as an art form, it seems like the further we dig into the history of pyrography art the further back it seems to stem. The art of wood-burning can’t even be tied down to a specific geographical location, examples have been found all over the African continent from Egypt to the African coast and even as far away as feudal China. If we jump ahead to the Victorian-era pyrography was mass-produced through the advent of the Industrial Revolution and became one of the most popular means of affordable (yet tasteful) decoration for loads of people.
As years went on and the proficiency of working with wood and heat developed, it was discovered that paint could be added to scorched wood to increase the range of colors and shades which could be achieved using this medium.
Then, with the advent of readily available electricity, it was discovered that we no longer needed coal ovens or open flames in order to get our pokers and/or pins hot enough to score or burn our workpieces. We now had the option of simply heating up metal using electricity, which was far more efficient and meant that metals lasted longer than they would when compared to using conventional heating mechanisms. In the modern-day, the art of wood-burning is still practiced as a form of traditional art in loads of European countries and is passed down from generation to generation to preserve not only their culture but create a sense of continuity in individual communities between generations.
If you’re wondering what type of wood is ideal for practicing the art of wood burning, the simple answer is softwoods. This makes sense considering that these woods tend to burn up easier compared to traditional hardwood. Some wood species that fall into this category are pine, maple, and oak, which are all readily available and relatively cheap if you’re considering trying your hand at the art of wood-burning.
Is There a Difference Between Wood Burning and Pyrography?
Sometimes it can be challenging for us to distinguish between things, but understanding the difference between two objects or concepts helps us differentiate and therefore deepen our understanding of things like niche art forms. This is best illustrated in the difference between pyrography and wood burning, as you’ll learn in a moment. Pyrography could be thought of as more of a broad-based artform, which is characterized as scoring or burning characters, impressions, or forms into any material, typically with the use of a poker, pin, or similar instrument.
Pyrography can be done on loads of surfaces like leather, plastic, nuts, tree bark, and even rare materials like ivory.
Wood burning on the other hand is more of a specialized version of pyrography, and although the core concept remains the same, wood burning is done exclusively on woods and bark as the name would suggest. Those who practice wood-burning typically use specific types of wood to get the best results, mostly due to their malleability and natural ability to preserve designs. Common wood types used for wood-burning art are birchwood, oak wood, and ash wood.

Although this distinction might be small, it’s important to know the difference between these art forms, as people devote quite a bit of time and energy into perfecting these art forms, and the last thing you’d want is to accidentally offend someone. If you’d like to know a bit more about pyrography and those who have brought the art form into the forefront of the art world, we’ll have a look at a few well-known pyrographers next.
Are There Any Famous Pyrographers?
While most of the world might see pyrography as a sort of hobby, there are artists that have taken the practice of pyrography to impressive heights. This being said, let’s have a look at some of the most well-known and talented pyrography artists out there and how they’ve managed to make their mark on the world.
Dumitru Muradian (1953 – Present)
Every genre and art form has its protégé, and in the art of pyrography, one of the most notable names is undoubtedly Dumitru Muradian. This gentleman is a Romanian national who currently resides in the US and is the big name in high-end pyrography pieces. His claim to fame is a piece commissioned by the Romanian Orthodox church, detailing a depiction of one of the most famous scenes in Christian history known as the last supper.
The better-known variation of this painting was completed in the year 1498 by another world-renowned artist Leonardo Davinci.
Like Davinci, Muradian was mainly interested in the natural world and religious scenes, which is perfectly illustrated in his huge catalog of pyrography works featuring things like landscapes, animals, portrait work, flowers, famous actors, and musicians, and still life illustrations. This is especially interesting to note this artist’s evolution and growth over the course of his life and how certain techniques have been developed and implemented to suit various applications.
Robert McGehee (1978 – Present)
While Muradian is very much a purist in his pursuit of perfecting his pyrography artwork, pyrography artist Robert McGehee is a jack of all trades by comparison. This artist has dabbled in a number of disciplines including but not limited to photography, beadwork, sketch work, painting, and pyrography of course. While you might think that a jack of all trades wouldn’t be able to hold a candle to a specialist, McGehee’s work is widely respected not only in pyrography circles but by professionals and newcomers to the art form in general.
While other artists have pursued conventional depictions by adapting painted works and scenery into pyrography works, McGehee seems to have used the medium as an opportunity to alter the fundamental nature of his approach.
What do his words depict? Well, McGehee is an American artist who has been heavily influenced by Native American and African cultures, and by extension their artworks. While other pyrographers typically create basic forms and scenery, McGehee’s work is far more detailed in comparison, featuring perfectly symmetrical depictions of people and places, not to mention intricate geometric forms.
Ken Li (1958 – Present)
For most artists, art is a reflection of their environment and their state of mind at the time their work is created. This comes as no surprise considering that everything from sound, smell, color, taste, hunger, paint, and even sleepiness can affect the way that we feel as people and even our general perception of the world around us. What happens when this sensory is turned way beyond typical levels though?
As human beings, it can be difficult to adapt to change, and we often need an outlet for it. Ken Li lived through the Chinese cultural revolution, and the changes in the social, cultural, and political environment influenced the subject of his artwork.
Li’s pyrography served as an outlet and framing mechanism for the events unfolding in front of him and is ultimately what put him on the map as a pyrographer. The subject matter of his work had a lot to do with the socio-cultural changes in China at the time, as well as the impressive diversity of ethnicities, present there at the time. Some of his most famous works are a series of depictions of women in traditional garb from a variety of ethnic groups, a subject that very few artists were willing to engage with at the time due to social ramifications.
Are There Different Types of Wood Burning Kits?
While it’s good to know what a good wood burner kit looks like, not all wood-burning kits are suitable for you depending on your skill level. Manufacturers realize this and have created wood-burning kits for everyone depending on their ability. Typically, there are three types of wood-burning kits, one for kids, ordinary ones, and ones for those with an advanced skill level, or professionals if you prefer. Here are a few things you can expect from each of these types of wood-burning kits respectively.
Kids’ Wood Burning/Pyrography Kits
Like most products aimed towards kids, these wood-burning kits often put an emphasis on safety. After all, we don’t want any kids burning their precious little fingers in the pursuit of having some creative fun. Besides loads of heat shielding, there are loads of instructional materials included in these kits, which usually details how to use the wood burner tool, what not to use it on, how to prepare your wood for the etching process, how to transfer your designs onto the wooden surface, and even how to use your stencils effectively.
These might also include additional information on things to make from the wood provided, like little installation art pieces, tables, or simply stands for your workpiece.
While these workpieces are useful for all manner of beginner pyrographers, it might be a bit frustrating for older crafters to use some of the smaller instruments. Plus considering that the learning curve might not be as steep as it would for kids, things might get boring pretty quickly. They are great kits though and are the perfect jumping-off point for kids who are interested in pyrography.
Intermediary Wood Burning/Pyrography Kits
You could think of these as beginner wood-burning kits for adults. They are some of the most widely sold and are an easy access point for people with crafting experience that want to cut their teeth in the wood-burning discipline. These kits are best characterized by offering loads of variety to the user, with loads of stencils and wood-burning tips for you to choose from. The overall purpose of these wood-burning kits is to introduce you to the art of wood-burning and allow you to develop your technique by utilizing different designs and shapes on your workpiece.

The pyrography pens included in them could or could not have variable heat settings depending on the manufacturer and the price range of the kit, but the pens themselves are usually decent to work with. While these kits do allow you to create your own designs, they lean more toward you perfecting the designs they have provided, using woods that are easy to work with (but kits that include materials usually cost a bit more). These kits are also focused on the user’s experience to try and sell you on the craft, which means their pens are usually ergonomically friendly and require little to no maintenance.
Professional Wood Burning/Pyrography Kits
While there are loads of wood-burning kits out there, these are typically the crème of the crop. They usually don’t have as much variety as some of the ones we mentioned previously, focussing less on stencils and instructional materials. Typically, they focus more on the quality of wood-burning tips, the overall feel of the pyrography pen, and the degree to which the heat can be adjusted. While pens for beginners typically heat up slowly, these heat up to operating temperature in just a few seconds and have fewer safety precautions than ones aimed at kids and beginner adults.
These kits also contain less decorative elements too, which means they’re usually sold without things like coloring pencils, paints, and/or stickers.
While a beginner could start out with one of these kits, in theory, they would not have the same experience that they would while using a starter kit. Remember, these kits don’t want to sell you on the idea of wood burning as a craft, which means they won’t have any designs or instructions you could use to develop your skills. This can be disheartening for many beginners, not to mention overkill considering the grade of materials and professional tips usually sold with these wood burning kits.
A Guide to Pyrography for Beginners
Even having the right wood-burning pen won’t do you any good if you don’t know what you’re doing. Having a good wood-burning pen does help though, but we’re going to give a short breakdown of how to go about wood burning correctly, whether it’s your first time or not.
This being said, let’s have a look at a few things you’ll need and a few basic steps that will ensure that you get the most out of your first-time wood burning. Here’s what you’ll need:
- A pyrography pen
- A clean cloth
- Sanding paper or power sander
- Stencils
- Graphite paper
- Wood burning tips
Prepare Your Workspace and Tools
When working with pyrography it’s important to remember that you’re working with a lot of heat, for this reason, you should ensure that your workspace is free of any flammable substances and that it is well ventilated, at least while you’re working with the wood-burning tool itself. Once your workspace has been prepared it’s time to ensure that you have all of the right tools for the job. This includes your stencils, your wood burner tool, your workpiece, a pair of gloves, and some cloths to clean up any stray wood particles that might be laying around.
In addition to the burning tools, you will need some sanding paper, some tape, graphite paper, and at least a printed design of what you’ll be putting on your workpiece.
Prepare Your Workpiece
Preparing your wood probably has the biggest impact on your end result. This being said, you should go about preparing your workpiece to the absolute best of your ability to ensure that when you get to actually implanting your design things go off without a hitch. How do you prepare your workpiece for wood burning you ask?
Preparing your workpiece for wood burning primarily involves sanding it down as smooth as possible, but before you get into that you should ensure that your workpiece is as clean as possible too. You can clean your wooden workpiece by simply applying some soap and water to remove any dust or grime on the workpiece, and then waiting for it to dry completely before moving on to the next step in the process.

Once your workpiece has been cleaned and dried, it’s time for you to get to sanding. When sanding wood for wood burning, you’re going to want to get it really smooth, the trick is to start off with medium-grit sandpaper and then progressively increase the grit all the way up to 180 to get the best results. Once you’re happy with the smoothness of your workpiece, ensure that you’ve removed any stray wood particles using a clean cloth before moving to the next step in the process.
If you have some money to spend and don’t want to spend your valuable time sanding down your workpiece, you could always purchase some prepared wood either online or from your local store. This does save you some time, but they might not have the type of wood you’re looking to use for your project.
Prepare Your Design
There are tons of wood-burning ideas out there, and some of the best ones are not only readily available but are often free! Choosing your design can be really tough since there are so many options available, so make sure you take your time. If this is your first-time wood burning, we recommend using a design that has as few details as possible, this should make the learning curve a bit less steep and make the process much more fun.
If you’re really good at doing things by hand you can skip choosing a design and use some of your own wood-burning ideas to get started. Either way, you’ll use some graphite paper to transfer your design onto your workpiece. Remember that this doesn’t have to be 100% perfect. It only serves as a guide for your hands and eyes, the final design will be up to you and how closely you want to follow the stencil you’ve implemented. If your design is big, use some tape to adhere the graphite paper to your workpiece while you transfer it.
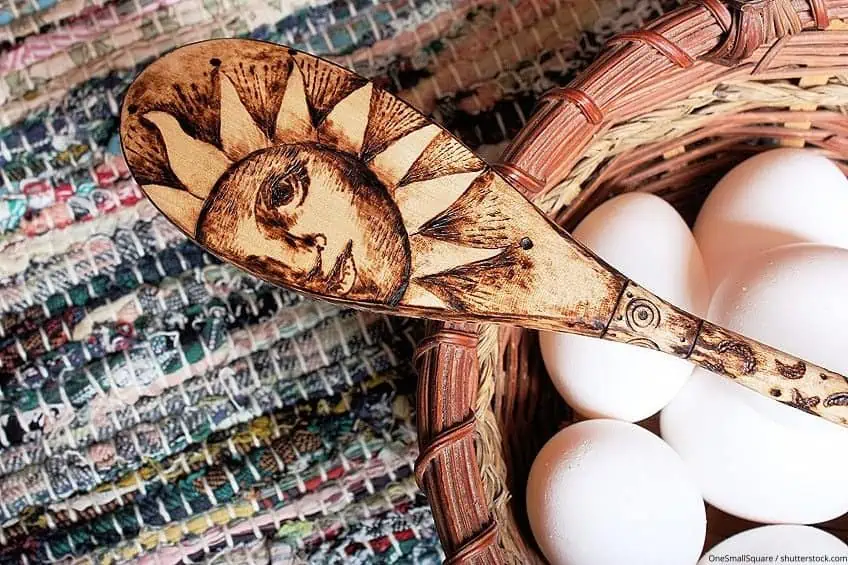
Burn Your Design into the Workpiece
Now that you have prepared your workpiece and have transferred your design onto it, it’s time to get to the moment you’ve been waiting for. Wood burning has a lot to do with your attention to detail as well as pressure. It’s actually a lot like etching and requires a similar level of control to execute correctly. It also really depends on the type of wood that you’re using as a workpiece. Certain types of wood are far easier to burn compared to others, this is due to the softness and the density of the wood’s grain. If a wood has a denser grain, you will likely have to use a higher temperature to even make an indent in the wood.
This being said, be sure to research the type of wood you’re using, and which temperatures are most effective before you get started.
If you have never used a wood-burning tool before it’s best to make all of your mistakes right out of the gate on a spare piece of wood before moving on to your actual workpiece. This will allow you to get a feel for your wrist movement and the pressure needed to score the wood effectively. Once you get the hang of things, secure your workpiece with a clamp or vice before you start burning. Now that you have the hang of things it’s time for you to get going on your workpiece. The first step here is to use your pyrography pen to create an outline of the form you transferred onto your workpiece. Don’t worry about any of the smaller details, simply focus on getting the general outline of your workpiece down so that you have a good starting point.

You might notice that the longer that you leave the pen on a certain spot the darker and deeper the indent becomes. Find the sweet spot with a combination of pressure and movement, just ensure that you don’t move too quickly and focus on your technique and attention to detail as much as you possibly can, this being your first time around. Once you have your outline traced out, it’s time for you to get started on the inner details of the design. Remember that you have a variety of tools and tips at your disposal when finishing off the finer details, these will allow you to burn at cool angles and create even more patterns in and around your design. Try not to focus too much on shading as this might result in gouging, shading is an advanced skill that needs to be cultivated over time. Once you’re happy with the job you’ve done simply give your workpiece a one over with a clean cloth, and don’t forget to turn off the heat on your pyrography pen.
Now that you know what pyrography is, where it comes from, who some noticeable artists in the medium are, what you’ll need to get started with wood burning, and how to get the most out of your first-time wood burning, it’s time for you to get out there and put some of your newfound skills to the test. Remember to always work in a well-ventilated area and to wear gloves when working with pyrography pens, as well as to always turn them off once you’re done working with them.
Frequently Asked Questions
How Difficult Is Pyrography?
While it might be a fairly obscure art form, pyrography is still just that, an art form. Because of this, the concept of challenging and easy doesn’t really apply, as your proficiency will improve the more you practice. The learning curve isn’t quite as steep as some would have you believe though.
What Is the Difference Between Wood Burning and Pyrography?
When it comes down to it, wood-burning and pyrography are essentially the same things. There is an important distinction between the two though, while pyrography covers a wide range of surfaces being modified by means of directed heat, wood-burning refers specifically to the practice of scoring and burning wood.
Do You Have to Be able to Draw to Do Pyrography?
Technically speaking, one has never needed to be able to draw to practice pyrography as an art. Although the medium has become more intricate over time, pyrography has always primarily been about basic forms to communicate its message. Additionally, you don’t have to be good at drawing because there are a wide range of resources and stencils available for you to choose from.
Is It Hard to Learn Pyrography?
Although the concept of wood-burning and/or pyrography can seem a bit overwhelming, it is actually pretty straightforward. The primary challenge with pyrography is developing your skills over time, as the learning curve is different for everyone.
Is Pyrography Bad for Your Lungs?
While there are potential risks involved with practicing pyrography, they aren’t any different compared to common hazards you could encounter in any facet of woodworking. There is the possibility of inhaling smoke or sawdust, getting these things into your eyes or orifices, or burning your extremities accidentally. All of these can be avoided with diligence, and by wearing the appropriate personal protective gear.

In 2005, Charlene completed her wellness degrees in therapeutic aromatherapy and reflexology at the International School of Reflexology and Meridian Therapy. She worked for a company offering corporate wellness programs for several years before opening her own therapy practice. In 2015, she was asked by a digital marketer friend to join her company as a content creator, and it was here that she discovered her enthusiasm for writing. Since entering the world of content creation, she has gained a lot of experience over the years writing about various topics such as beauty, health, wellness, travel, crafting, and much more. Due to various circumstances, she had to give up her therapy practice and now works as a freelance writer. Since she is a very creative person and as a balance to writing likes to be active in various areas of art and crafts, the activity at acrylgiessen.com is perfect for her to contribute their knowledge and experience in various creative topics.
Learn more about Charlene Lewis and about us.