Watercolor Skin Tones – Create Your Own Watercolor Skin Tone Chart
This post may contain affiliate links. We may earn a small commission from purchases made through them, at no additional cost to you.
Watercolor painting is a soft medium to use when creating beautiful art pieces. It has light tones and brushstrokes compared to oil painting or acrylic paint. This is perfect for achieving gentle color mixes and imagery. Most painters and artists will agree that painting skin tones can be extremely challenging, as you have to mix your colors to get the correct tones. Our tutorial will explore how to make skin color with watercolor paint. We will look at the importance of creating your watercolor skin tones color chart and allow you to experience the process of mixing the correct colors to make the tone you wish to use in your painting. This process will assist you in growing your watercolor skin tones chart as well as your skills with this beautiful medium.
Learning the Steps for Painting Watercolor Skin Tones
In today’s watercolor mixing tutorial, we will be learning how to create a skin tone chart by mixing the three primary colors to create watercolor flesh tones. As you may already know, the primary colors are red, blue, and yellow, which are used as base tones that you will mix specifically to get the desired skin tone you need. Lastly, we will touch on how to use opacity to make lighter or darker watercolor flesh tones.
Once we have learned the steps in mixing the correct watercolor flesh tones, we will move on to learning how to add extra pigmentation to make a thicker consistency, how to add layers to darker skin tones, as well as how to use a wash technique for lighter skin tones. In this tutorial, we will look at how to make skin color with watercolors and play around with color combinations and build your skin chart. Now we have covered the introduction, it’s time to get started!
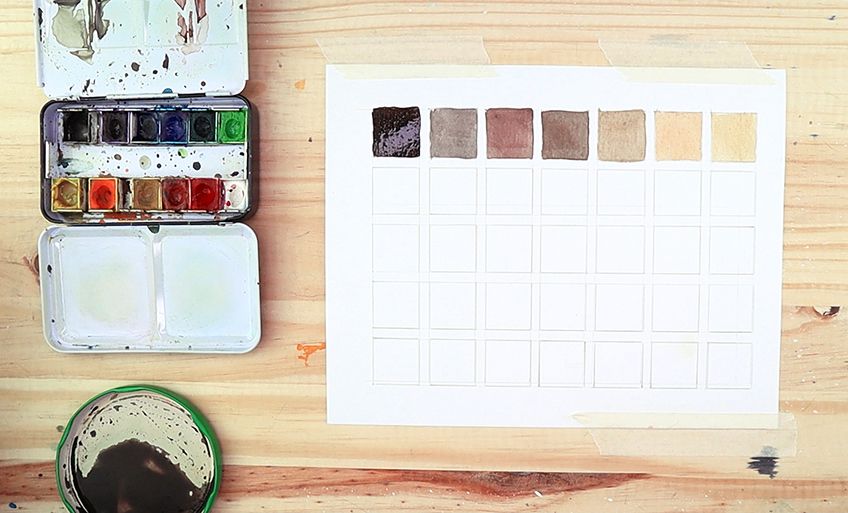
How to Begin Making a Watercolor Skin Tone Chart
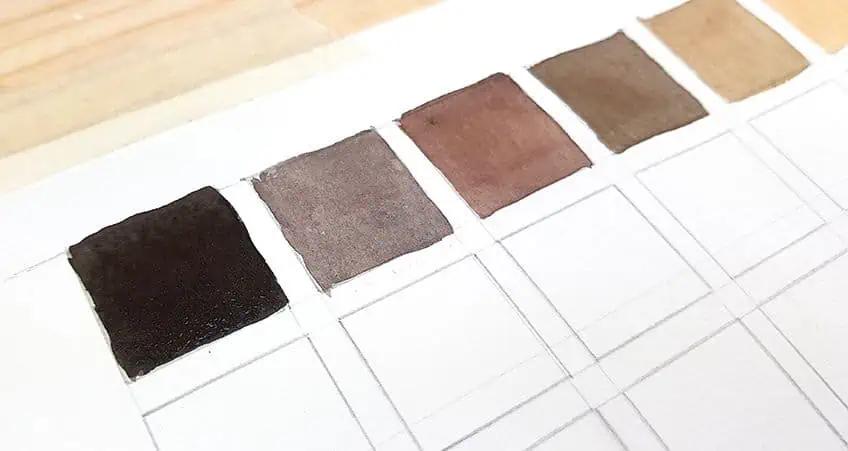
Start the process of building your watercolor skin tone chart, you will need to take your paper notebook or painting page. Draw five to seven rows. Use a ruler to be precise. Then make those rows into five blocks going down. See the image below for the idea.

Playing With Primary Colors
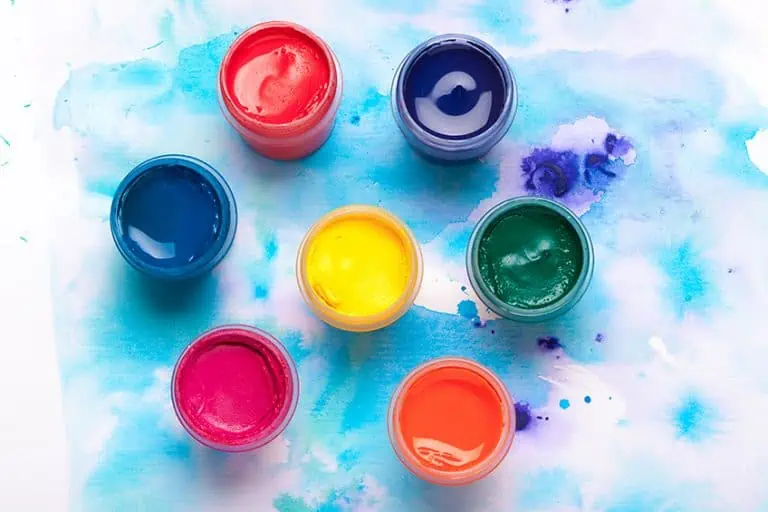
As we all learned in kindergarten, the three primary colors are red, blue, and yellow. All colors in the world are derived from these three base tones. Today, you will play around with these colors and learn how to make the ultimate ratio to mix the correct skin tone you want. Ideally, we will mix the paints by adding a little or less of one color to make the desired skin color. To begin the first block, you will need to dilute the red paint and then add a touch of yellow to this already watered-down red mix. You want to keep the mixes very diluted for lighter skin tones. Then add more yellow to create a gentle brown tone.

Next, we want to make the mix a little peachier in color tone. Gently add a tiny bit of red to the mix as subtly as you can, and just add a touch of paint to your brush before adding it to the mix. We will also look at how to make the opacity of the watercolors and how this will create transparency in the color. Once you have made the mix, you can add it to your next block.
By now, you will see that we are mixing from light to dark. To make a darker skin tone, you will need to add hints of blue to your already diluted red and yellow mixture. The idea is to continually add to the mix as you move through the watercolor skin tone chart, creating notable shading changes.
Your color chart should be taking shape now. You can gently begin putting a tiny amount of red, blue, or yellow into your mix – this will make your skin tone mix darken. As your paintbrush glides over the paper, it should resemble a different look compared to the paint mix.
While building your watercolor skin tone chart, you may notice that the more blues or reds you mix, the darker the mix will become, and naturally look more purple than skin color. To change this, you can mix tiny blobs of yellow.
This will not only darken the mix from purple to brown but will also give a peachy hint to the darker skin tone.
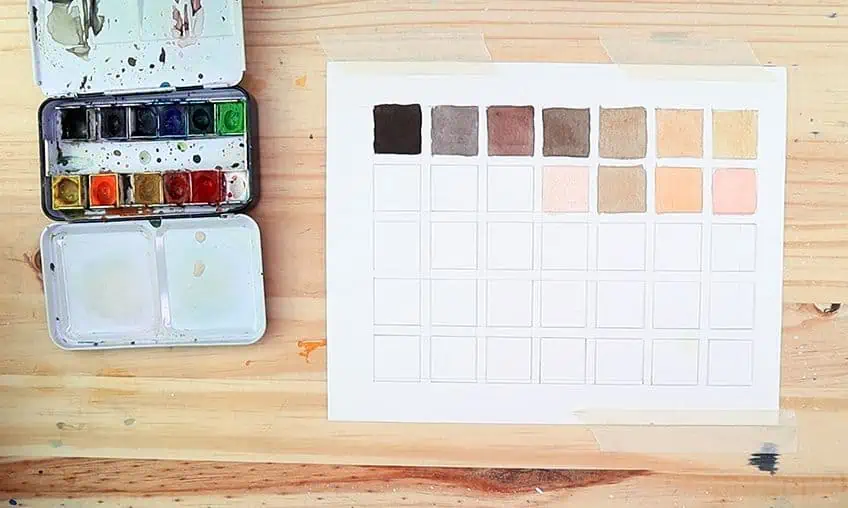
Experimenting With Different Primary Color Mixes
By this stage, you should have a full row of watercolor skin tone shades. Now, you must clean and prepare your paintbrushes, mix the palette, and change the water jar. Restart the whole shading process as you did in the beginning, but this time, we will focus on a lighter skin tone shading row. We will focus on the two ideas of creating lighter skin tones. One idea is the color ratio and the next is the opacity or how diluted the watercolor paint is. To begin, add a touch of red paint in a puddle of water on your mixing palette and take that to your first square on the second row.
Now have fun and play around with the watercolor paint ratios between yellow, blue, and red. Create even skin tones that seem darker and have a low opacity by diluting the color mixes. The darker skin tone can also be mixed but may seem transparent because of the diluted paint mix. Considering that this exercise is purely experimentation, we suggest that you play around with independent mixes of the primary colors and work out how to lighten or darken the different watercolor flesh tones for yourself.
Play around with little mixes at a time and see what works for you.
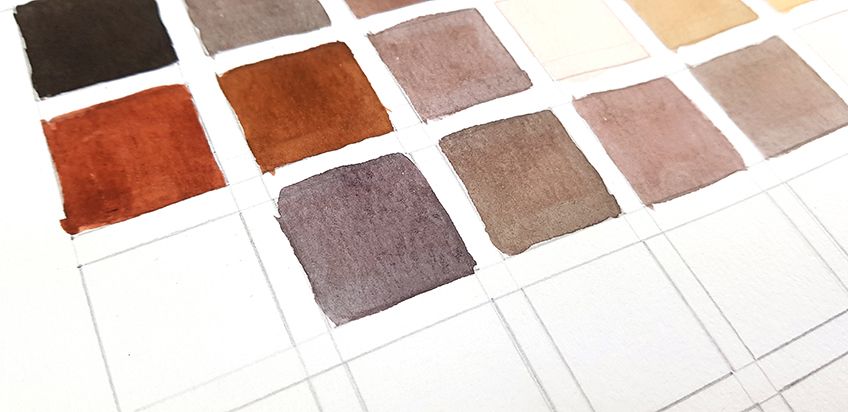
Using Orange, Purple, and Green Paint to Create Watercolor Skin Tones
Phase one is now complete, so well done for grasping the basic primary color mixes to create diverse skin tones. In this next phase, we will experiment with more colors to make our skin tones warmer or colder. Make sure your paintbrushes are completely clean and change your water when creating new mixes. Because we are using water to dilute mixes, it is recommended to have it clean as possible.
When you are working on a darker skin tone, you may use more blue paint with a medium ratio of red paint and a small blob of added yellow paint. Gently mix this. You may need to add a tiny touch of purple paint, but if this gets too strong in color, just add more yellow to counterbalance it.
As you experiment in the previous phase with the color ratio and opacity, you will do that again by using more colors mixed into your primary color mix. When you want to mix light color skin tones, you will use a very diluted red mix that will resemble a peach color.
Then, to oppose that mix, you will add and mix blues and purples.
Using Yellow and Red to Lighten Skin Tones Mixes
It is a good idea to learn how to make lighter or darker skin tones by exercising the idea that red and yellow paint can mix and make them resemble a skin tone. With light flesh tones, the body can blush with a rush of red blood under the skin. So, use that idea when painting skin tones. This is a good concept to use when mixing the paint colors to create the natural peachy tones of the light skin.

The yellow shade of paint from the primary color range is the most versatile tone to use. It is the medium to make a color mix lighter or darker and you can achieve a more realistic shade by slowly adding yellow paint to your watercolor skin tone chart. In lighter tones, we will mainly use reds and yellows. By adding little touches of color to a paint mix, you will see different shades and tones.
Add red paint for a brighter and warmer tone or yellow paint for a lighter tone.
Using Blue and Red to Darken Skin Tones Mixes
We have focused on how to use red paint and yellow paint to create lighter skin tones. Now, we will take a look at how to add blue paint to your mix. By making a darker color tone, we could easily cheat and use black or brown, but that would defeat the point. Take your color mix and gently add blue to the mix, and if it becomes purple, then just add a touch of red paint. This should make the brownish tone for your chart.

By now, you should have a fairly good grasp on how to use the specific primary colors red, yellow, and blue to mix the lighter skin shades and the darker skin shades. To darken a skin tone, we would use a touch of blue paint, and to make a skin tone a touch warmer, you would need to add red paint to get that natural skin look. In other words, to make skin darker, we use blue paint and to get it looking warmer, you add red paint.
If you are finding the color mix ratios you have created are not very diluted, then you can slowly add touches of blue paint and red paint. By this stage, if it is getting too dark, simply add a blob of yellow paint, then try adding complementary colors to create more options. Don’t be afraid to get creative. Be sure to remember your paint ratios so you can recreate that mix at a later stage.

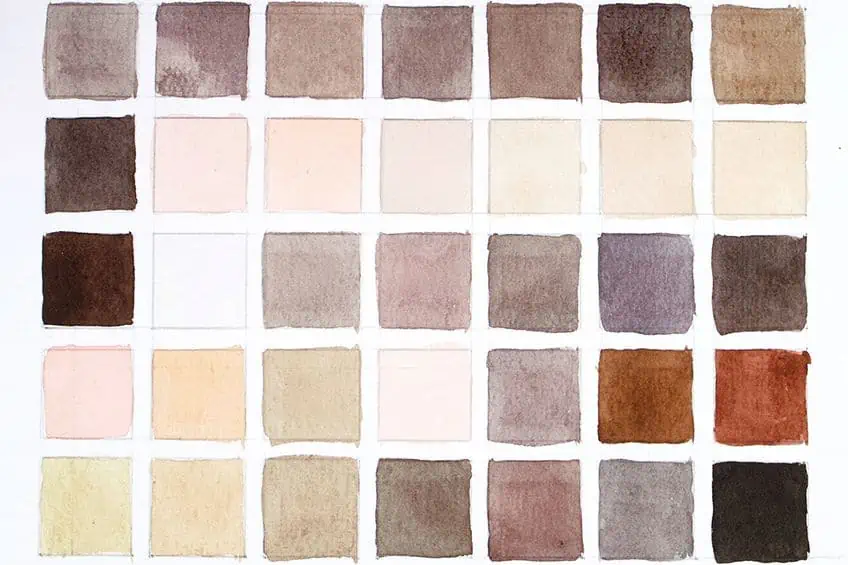
Creating a watercolor skin tone chart to show the different and unique skin tones of the world is simple if you can master the concept of color ratios and opacities of paint mixing. Some skin tones are different shades of pink tones and some are more purple. The shadows and lights on the skin tones can be developed with your watercolor paint mixing abilities.
The only way to learn is to do it. Be creative and push the boundaries and rules.
Things to Remember When Mixing Watercolors
Mixing watercolor paints can be challenging, but if you get the basics under your belt, then it won’t be so hard. Watercolors are unique compared to other paint mediums. Try our tips the next time you have a paintbrush in your hand.
- Keep your water jar clean at all times. Usually, a water jar is used only for cleaning, but with watercolor painting, you will need to dip your brush to help create the dilution process of your paints. Using a second water jar can be beneficial to your painting experience.
- There are many different skin tone variations. Some are peachier and the darker tones are more purple. This is controlled by the mixes of paint you use.

- Choose a good mixing palette. Anything porcelain or plastic will do, which you should be able to find your kitchen cupboards.
- Have fun. This tutorial is all about experimenting with color shades – there are no mistakes in art.
- Keep in mind the concept of light source and opacity when mixing your watercolor skin tone mixes.
In this tutorial on how to make skin color with watercolor, we looked at the basics of paint mixing. We delved into the concept and understanding of how the three primary colors of red, yellow, and blue are used as a base for watercolor skin tone mixing. Using watercolor paints may have different methods of mixing because they are water-soluble. So, when you want to mix darker or lighter colors, you will need to do this through different methods. Either you add more pigment to your painting mixture or you can manage the mix by the opacity of the paint. This tutorial is a wonderful introduction to watercolor skin tone mixing and building a watercolor skin tone chart.
Frequently Asked Questions
Is It Possible to Paint Darker Skin Tones With Watercolor Paint?
There are multiple ways to create watercolor skin tones in darker shades. Making a skin chart is an especially helpful tool as it can provide a better understanding of how to mix and create different tones suitable for skin by using various methods. A well-used method is to add more paint pigment into your mix. This will enable you to gradually build up darker watercolor skin tones. Remember, however, that you need to pay close attention to the ratios of blue and red that you use. Just a slight change can affect the result of the watercolor flesh tone you are creating. Blue is a good choice to make the skin darker and red is the ideal choice to enrich the tone and bring warmth into it. Feel free to experiment.
Can I Paint Realistic Skin With Watercolor?
Painting a realistic skin tone with watercolors is easier than you think. In this how-to-make-skin-color-with-watercolor tutorial, we will look at the concept of light in painting and how to create realistic skin tones. Any painting or drawing uses shadows and light to determine depth and dimensions; this is important when painting skin tones of the human body. This can be done when mixing the opacity of the paint. An added key idea in skin tone color mixing is the use of red paint to neutralize a mix, making it a warmer or lighter skin tone. The same goes for the use of blue paint for darker skin tones and yellow paint to add light to browns or purple mixes. The use of red paint, opacity and yellow for light are the three most important ideas to take away from this lesson when it comes to mixing realistic watercolor skin tones.
Can I Make My Watercolor Pigmented?
The best way to make your watercolor pigments is to experiment with different color mixes. You can do this by adding more paint to thicken the consistency of your color mix or by adding layers to your painting. In this tutorial, we will go through the different ways to mix watercolor pigments, however, you will need to focus on the way different skin tones react to light and shadows on the body. Use the opacity of the paint to create different shades of paint consistency for a thicker or thinner effect.

Matthew Matthysen is a multidisciplinary artist. He completed his fine art degree, majoring in History of Art and Contemporary Drawing Practice at the University of Witwatersrand, South Africa. Before joining acrylgiessen In 2020, Matthew worked part-time as an art teacher at Reddford Blue Hills High school. Matthew creates drawing and painting tutorials for acrylgiessen and captures them not only photographically and in written form. He also records the creation of his works in his own creative studio as in video format, from which later with a voiceover and a video editor also drawing tutorials for the Youtube channel of acrylgiessen are created.
Learn more about Matthew Matthysen and about acrylgiessen.